My husband received his first Acer laptop from his old company. It ran flawlessly for nearly two years, until one day it stopped working out of nowhere.
If you’ve ever had a work laptop die on you, you’ll appreciate the initial anxiety he felt. On top of it all, he had a presentation coming up that same day!
With IT services offering very little helpful information, we decided to do our own research. After following a few user tested troubleshooting steps, we were able to get it powered back up in no time.
In most cases, your Acer laptop won’t turn on due to internal static buildup. To discharge the buildup, simply turn off and unplug your laptop and remove the battery. Then, hold down the power button for up to 60 seconds. Finally, reassemble and reboot the laptop.
About 80% of users will find this quick fix will solve the problem. If you happen to be in the remaining 20% crowd, don’t worry. I’ve compiled everything I learned here in a comprehensive troubleshooting guide.
As it turns out there are a total of 7 fundamental fixes you should try before having your device looked at by a professional. Let’s run through them all now!
Notably, regardless of your specific Acer laptop, the same basic procedure outlined here will apply for all models.
Step 1: Perform A Power Drain
Acer laptop models that have an external battery enable you to unclip the battery without removing the laptop case.
Once the device is turned off, unplugged and the battery is removed, go ahead and long-press the power button for up to 60 seconds. Then just reinsert the battery, plug it in and turn it on! It’s that simple.
On the other hand, if your model has an internal battery, there are a few additional steps required.
Remove Laptop Bottom Base
The first thing you need to do is remove the outer case. Start off by properly grounding yourself and then turn off and unplug the device.
On the back side of the laptop you will notice a bunch of screws. Grab an appropriately sized screw driver and remove them all. I struggled with this process initially only to later discover that one of the screws was hiding beneath a sticker!
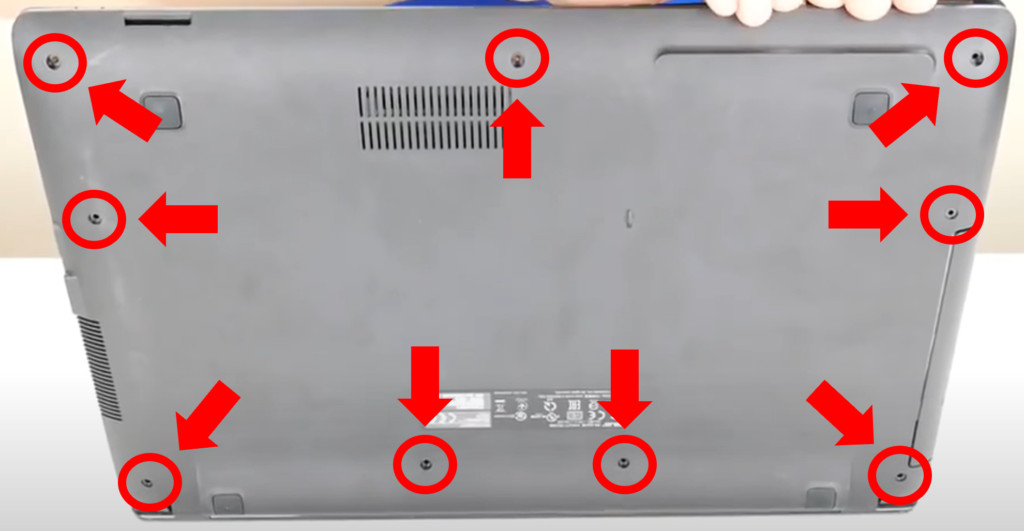
With the screws removed, you can now start to slowly remove the case.
If you are having trouble getting leverage, try sliding a credit card along all four sides of the top and bottom sections.
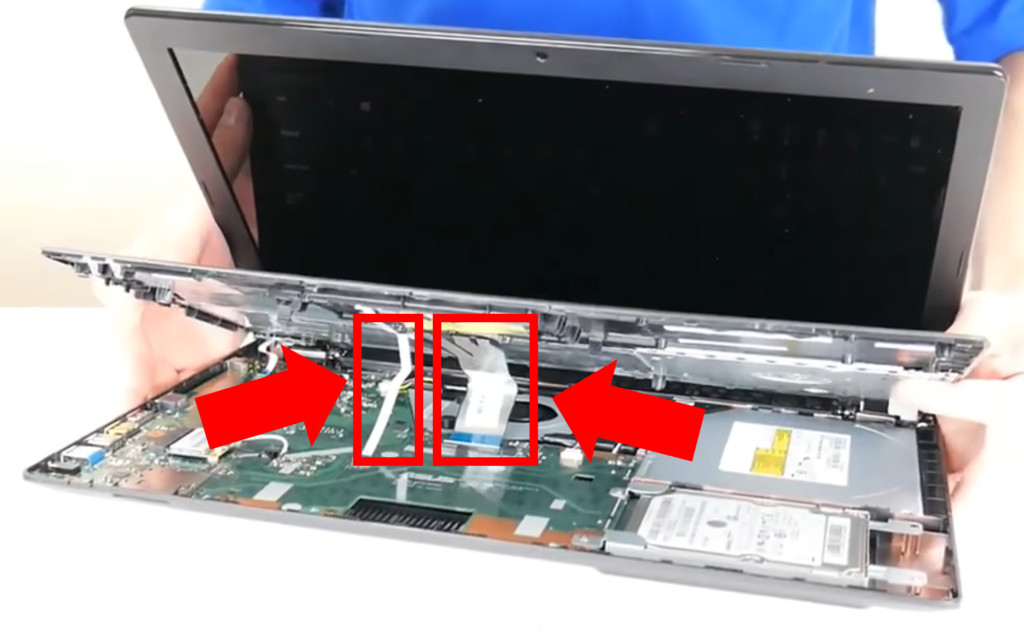
Some Acer models will have little connectors called ribbon cables that attach the palmrest to the motherboard. For this reason, it is critical that you do not aggressively pull apart the case.
If you do see ribbon cables, carefully unclip them before advancing.
Remove Laptop Battery
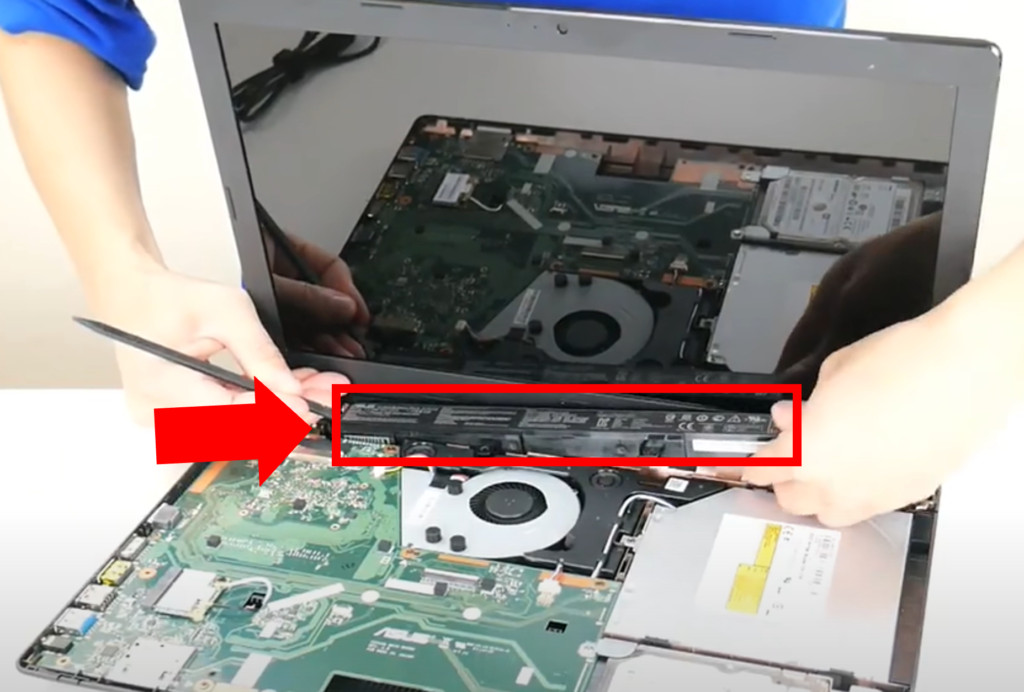
With the case removed, it’s time to pull out the battery.
For most models, the battery simply rests on the motherboard port without any screws or clips anchoring it down.
So, start by attempting to simply lift the battery up.
This isn’t always the case however and a screw or wire may be anchoring the battery to the motherboard.
Be sure to unscrew the battery and detach any wires before attempting to pull out the battery.
Discharge Excess Power
With the battery disconnected and removed and the laptop still unplugged and off, flip the laptop over and open up the screen.
Now long-press the power button for up to 60 seconds.
It’s important to note that if your palmrest disconnected while opening up the case, you will likely need to first reattach the power button before attempting this step.
While you are holding down the power button, you will not notice anything happening. That is expected! Even though you cannot see or hear it, any static build up or remaining power is being discharged from the laptop.
Reassemble And Reboot
Finally, all that’s left to do is reassemble the laptop, plug it back in and power it up! It should turn back on without any issues.
Some users will continuously run into this same problem, requiring them to perform a power drain over and over again.
If this is the case, your power adapter, battery or surge protector is most likely causing internal static build up.
One or all three of these components may therefore need to be replaced.
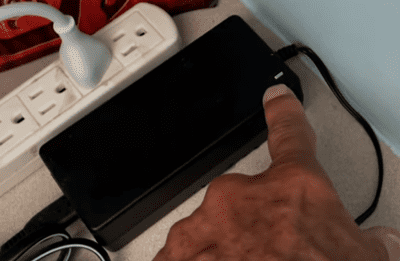
Step 2: Troubleshoot The Charger
In the event a power drain does not solve the problem, you likely have a faulty charger and/or battery.
To confirm if the charger is the issue, start off by once again performing a power drain as detailed above. Once complete, reinsert the battery but this time DO NOT plug the power cord back in.
Attempt to turn the laptop on. If it successfully boots, that confirms that both the laptop and battery are working as expected!
This also confirms that the charger is no longer in proper working condition and needs to be replaced immediately.
Step 3: Troubleshoot The Battery
So, what if your laptop still doesn’t show any signs of life? It’s possible your battery is acting up.
Time to test the theory! Perform yet another power drain and this time DO NOT reinsert the battery and plug the charger back in.
Attempt to boot the laptop up.
If it works, you can be confident that your battery is faulty. Once you replace it, the laptop will function properly again.
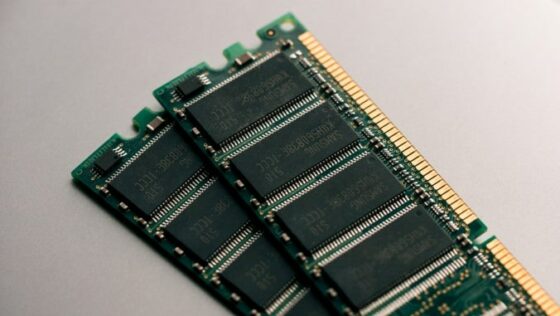
Step 4: Inspect RAM Sticks
You are likely well aware that your laptop’s memory is stored in what are known as Random-access Memory (RAM) sticks.
What you may not be aware of is faulty RAM sticks can prevent the motherboard from communicating properly with the RAM. When this happens, your laptop can fail to execute even the most basic function of turning on.
Leading causes of RAM failure:
- High heat levels
- Faulty connection
- Extreme voltage levels (high or low)
- Physical damage
Remove, Reorder and Reinsert RAM Sticks
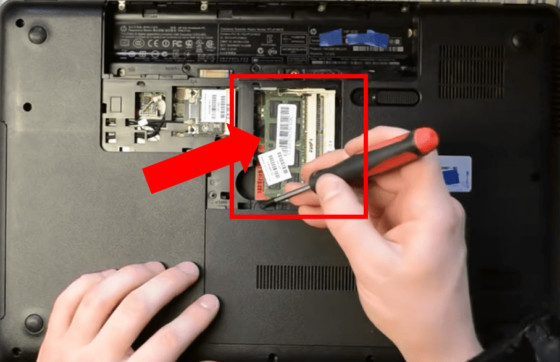
It’s fairly common for the RAM sticks to become loose over time, resulting in an unstable connection. To see if this is the case, you’ll need to gain access to them for closer inspection.
Some Acer models will have an easily accessible RAM compartment that only require the removal of a few screws. Others may require you to first remove the battery to gain access.
Once you are in, fully remove the stick(s) and then firmly re-seat them to ensure a stable connection is made.
If you have multiple RAM sticks, you should reinsert them in a different order then you found them. You should also attempt to restart the laptop after reinserting one stick at a time.
Run Memory Diagnostic Test
Even if your laptop powers up and appears to be fixed, its a good idea to run the Windows Memory Diagnostic Tool to determine the health of your RAM.
Type Windows Memory Diagnostic Tool into the Windows search bar and select it from the list. Then, click Restart now and check for problems.
Following the restart, a RAM diagnostic report will automatically pop up. If the report flags any errors, you may need to consider purchasing new RAM sticks.
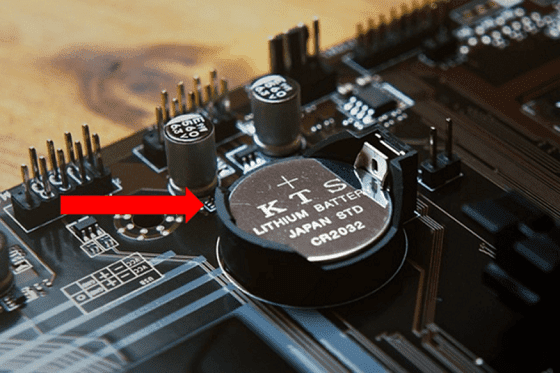
Step 5: Reinsert CMOS Battery
A full system board failure is another possible reason that your Acer laptop is not turning on.
While this sounds dramatic, often all you need to do to fix it is to remove and reinsert the CMOS battery. This will effectively reset the motherboard back to its baseline configurations, solving all sorts of issues.
First, disassemble your laptop case and then locate and remove the CMOS battery from the motherboard. Then, long-press the power button for up to one minute to drain all excess remaining power.
Now, leave the laptop alone for at least 30 minutes before reinserting the CMOS battery back into your laptop.
Finally, turn on your laptop and check to see if your problem has been resolved.
Accessing your CMOS battery on some models can prove challenging. You can use the Acer laptop manual lookup to find exactly where your CMOS battery is located.
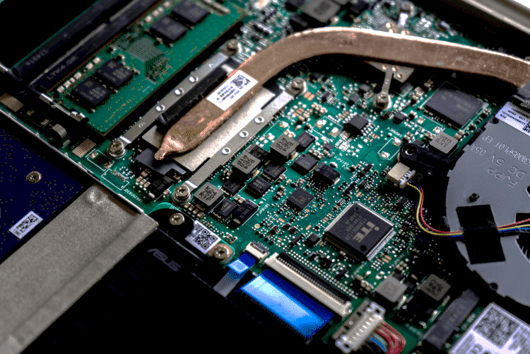
Step 6: Clean Cooling Fan
If it seems like your laptop fan is constantly running and making noises, it is likely that your cooling fan is malfunctioning. As a result, your device may be experiencing higher than expected temperatures.
Often times it is the Central Processing Unit (CPU) or Graphics Processing Unit (GPU) that will overheat the most, leading to critical errors.
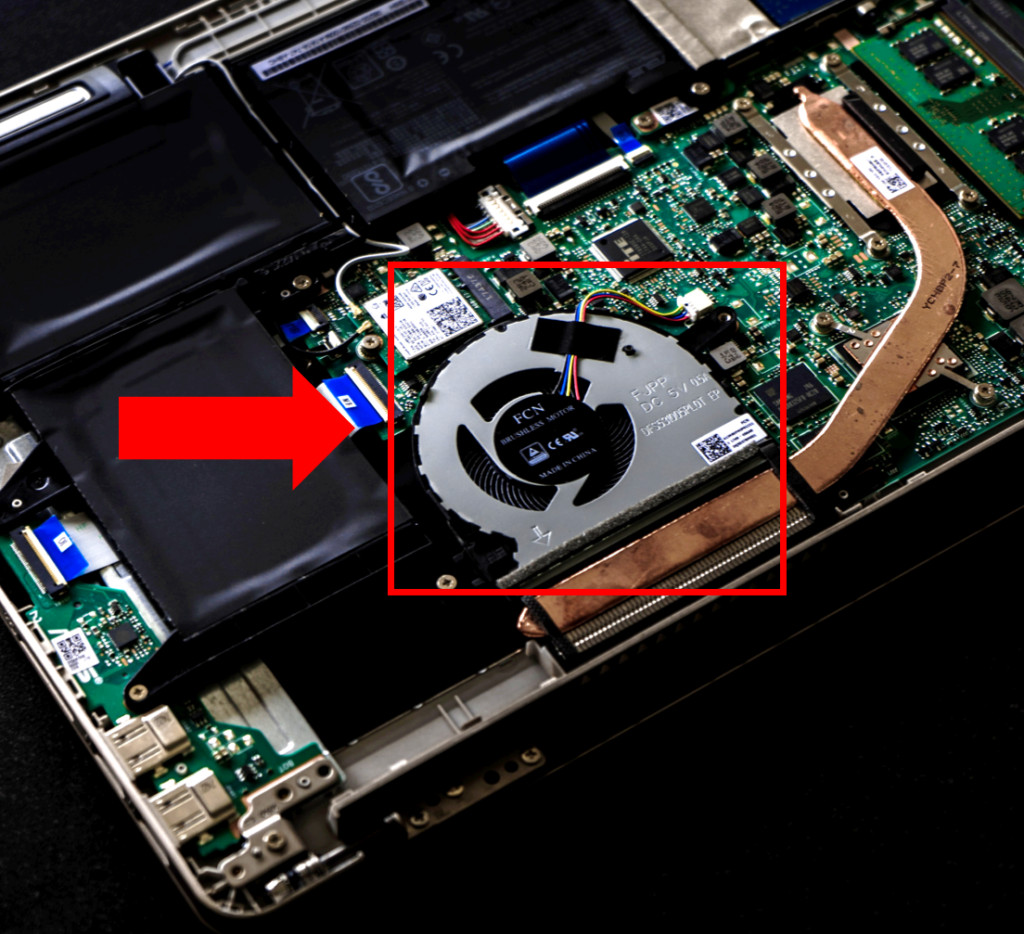
Overtime, quite a bit of debris can accumulate on the cooling fan, causing it to underperform. That’s why it is so important to periodically clean it!
A clean cotton swab and some isopropyl alcohol will usually do the trick. Pour a small amount of alcohol onto the swab and gently clean the cooling mechanism. DO NOT pour the alcohol directly onto the fan or anywhere near the motherboard.
Take the time to also clean the exhaust port on the case that allows air to flow in and out of the laptop.
After about 30 minutes and only when the isopropyl alcohol has fully dried, you can reassemble the laptop and attempt to turn it on.
If the issue persists, the cooling fan may need to be replaced. Alternatively, you try purchasing an external cooling unit for your laptop.
Step 7: Perform BIOS Recovery
Lastly, if all else fails, a BIOS chip or BIOS firmware corruption issue could be to blame.
A random beeping sound or certain keys lighting up unexpectedly are both clues that the BIOS is corrupt.
During startup, your computer attempts to boot the BIOS before doing anything else. But if there is an BIOS issue during this crucial first step with either the firmware or the chip itself, your device will fail to complete the start up process.
Interruptions during a BIO update, common PC viruses and flash memory failures can all result in firmware corruption. On the hardware side, the BIOS chip itself can fail if it gets too hot, experiencing high voltage or encounters random cosmic rays.
Fortunately, there are two reliable ways to fix Acer BIOS issues.
Built-in BIOS Recovery Key Combination
Most Acer laptops have a built-in key combination function to easily perform a BIOS recovery.
Start by turning the device off by holding the power button for about 10 seconds.
BIOS recovery key combinations vary quite a bit. In total, we are going to try four different recovery keys:
- “F2”
- “Delete”
- “Insert”
- “F10”
It is important to HOLD DOWN each of these keys BEFORE and DURING your attempts to turn ON your laptop. Also, between each key attempt, be sure to power down your laptop PRIOR to trying a new combination.
BIOS Recovery With USB
If the recovery key combinations don’t work, you will need to perform a recovery using a USB with a different computer.
Insert a thumb drive into a working computer and reformat it to “FAT32”.
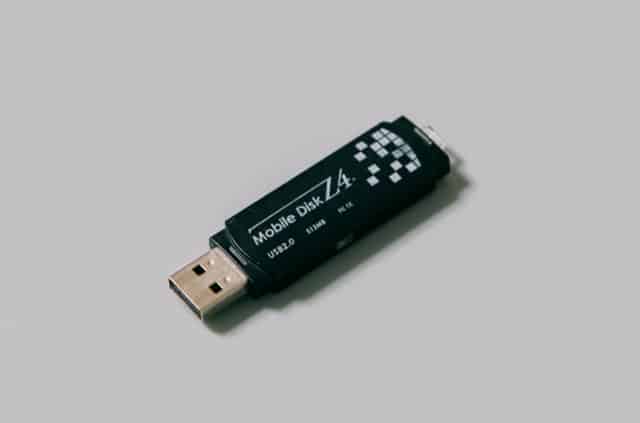
It is important to note that when you reformat your USB, you will lose all of the information and files contained on it!
To update to FAT32, open up your Folders file, right click on USB Drive (D:) and select Format.
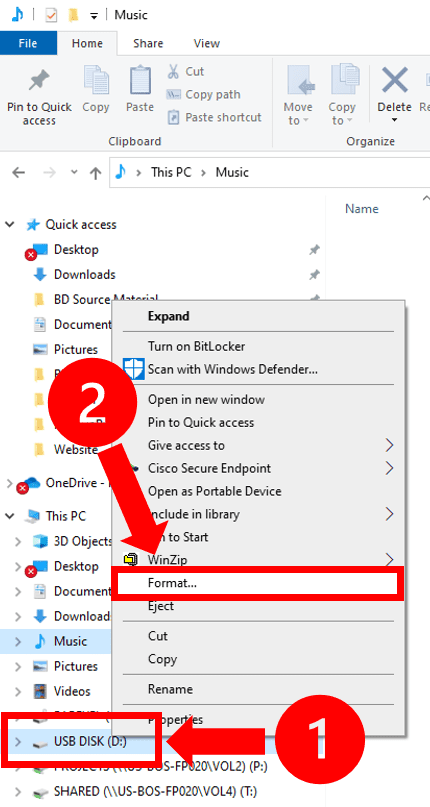
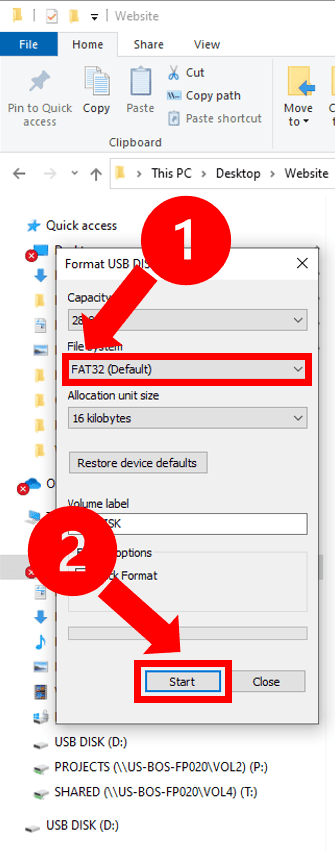
Within the File system section, click FAT32 from the drop down menu. Then, select Start, OK and Yes to finalize the formatting process.
With the flash drive successfully reformatted, head over to the Acer Drivers and Manuals page, enter your laptop model/ serial number and click Submit.
For some models, the model/ serial number may be located in the empty space behind the battery. Remove your battery to check if you are having trouble locating it.
Now, scroll down and click the plus (‘+‘) icon next to BIOS/Firmware. Now, located the most recent BIOS update available and click Download.
Once the file is downloaded, go to the downloads folder and open it. The file will ask you to make changes to your device. Select Yes. Then follow the steps by continuing to select Next and accepting the licensee agreement terms when prompted.
At the Acer BIOS Update and Recovery window select Create Recovery USB flash drive and select Next.
On the next screen your newly formatted USB drive should pop up. Select it from the options and click Next. The BIOS recovery files you need will now be copied onto your USB drive.
When it is done loading the files, select Finish and then Cancel.
You can check to make sure the process worked by going back to your Files folder and checking the USB Drive (D:). You should see the newly downloaded files on there.
Now go ahead and eject the USB drive.
Turn OFF the Acer laptop you are attempting to fix and insert the flash drive.
While attempting each of the recovery key combinations detailed in the above section, turn the computer back on. Continue holding the recovery key combinations during startup for at least 10 seconds.
The Acer BIOS Update window will appear and the BIOS recovery will be initiated.
Once BIOS has been recovered, your laptop will restart. DO NOT INTERRUPT THE LAPTOP AT THIS TIME.
A screen will appear that states “A System BIOS Recovery has occurred. Press Enter to continue.” Go ahead and hit Enter.
That’s it! Your laptop should be fixed!
Conclusion
If you encounter your Acer laptop not turning on, perform the following 7 troubleshooting steps:
- Perform a power drain
- Troubleshoot the charger
- Troubleshoot the battery
- Inspect RAM sticks
- Reinsert CMOS battery
- Clean cooling fan
- Perform BIOS recovery
Your laptop should be up and running again in no time! If these fixes didn’t solve the problem, give me a shout in the comments section and let me know what worked for you.
If you suspect the laptop it unrepairable, it is always worth contacting Acer customer support at 1 (866) 695-2237 and checking your Acer warranty before purchasing a new one.

Chelsea Ashbrook is a Senior Manager of Corporate Digital Experience at Genentech. Chelsea received her B.A. from the University of Connecticut and has spent the last 11 years working in the technology field.
