AOC is consistency among the top 10 best-selling PC monitors globally! But, they do come with a few challenges. One such challenge reported by many users working from home is encountering the ‘no signal’ message.
AOC Monitor No Signal
To fix the AOC monitor no signal error, turn off and unplug the monitor and your computer. Wait up to 30 seconds. Then turn on the monitor first, followed by your computer. Finally, ensure the correct input and resolution settings are selected and all cables are secure and undamaged.
That’s it! These quick and easy steps will remove this error message for the vast majority of users. But if not, don’t panic. There are a total of 7 common troubleshooting steps you can try.
These include fixes directly to the display, as well as steps troubleshooting the PC.
It’s best to follow the below detailed steps in sequential order.
Step 1: Power Cycle Devices
If you’ve spent anytime troubleshooting electronics in the past, you know the first thing you should attempt is power cycling your devices.
When my products are not working, I hate being told to try turning it off and back on again. But guess what? This fix works far more often than you’d think.
The best way to approach this is by first turning off and unplugging the monitor. Then, power down and unplug the PC. After about 30 seconds you can plug everything back in and power up your monitor, followed by your PC.
The order of events here actually matters, so don’t over look this detail!
While this seemingly overly simplistic fix does work for many users, it won’t work for everyone. If you are still encountering the error, no worries. Proceed on to the next step!
Step 2: Match Monitor Input To Display Cable
The four most common display cables are HDMI, DisplayPort (DP), DVI and VGA. As it turns out, AOC monitors typically support 2 or 3 of these depending on the model.
All to often, users accidently set their monitor to an input that does not match the display cable in use.
First and foremost, you’ll need to have a basic understanding of what each of these cables look like. You can use the graphic below for assistance.

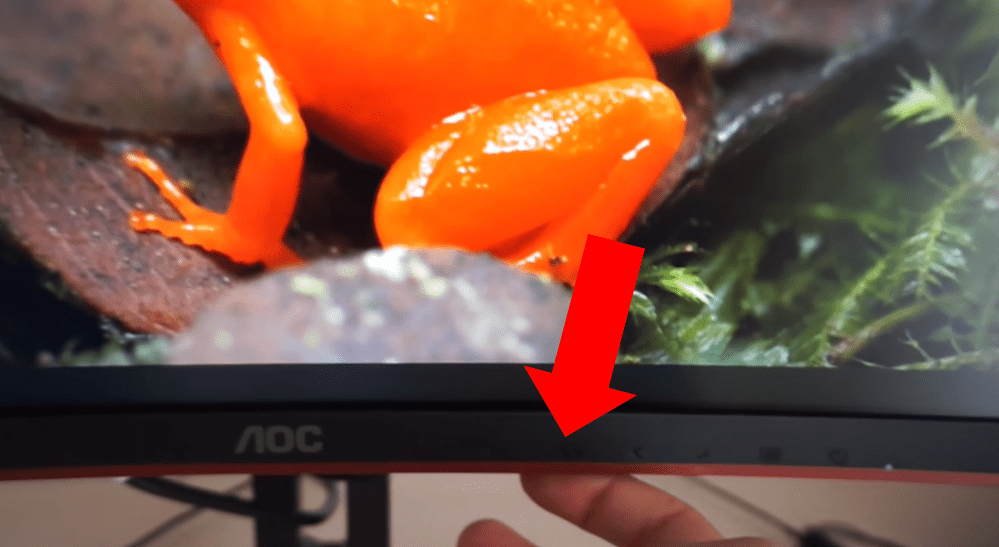
Once you feel confident that you know the exact cable you are currently using, identify the Source or Input button.
The Source/ Input button will be located on the right-hand side of your monitor. It will either be on the backside of the display or towards the bottom.

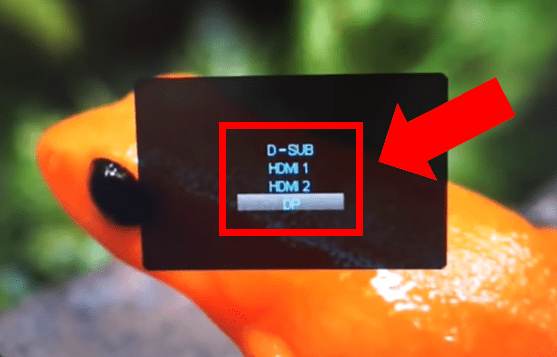
Once pressed, the following input box will appear on your screen. Use the corresponding directional keys to toggle the input options until you identify the input that matches your input cable!

Step 3: Ensure Display Cable Is Secure And Undamaged
A display cable that is not properly secured can cause a surprising number of issues, from screen flickering, no signal errors, and more.
For this reason it is vital to check your display cable connections and make sure that the connection is firm on both ends.
I always recommend you unplug the cable and plug it back in so that you can firmly push the cable head into the port. Many times, users will only visually inspect the connection and assume everything is ok. But a visual inspection alone is not enough!
Case in point – the tiny separation below between the laptop and HDMI cable head is not obvious upon visual inspection. Any yet, it was enough separation to cause a break in the connection.

Having said that, there is also value in performing a close visual inspection of the cable itself to check for check for any damage areas.
If you have done all of this without any results, try using a different display cable.
For example, if I was using an HDMI cable, I would try replacing the HDMI with a DisplayPort. Don’t forget that this means you also need to go back and change the input settings again.
In the event that using a different cable solves the problem, your original cable is probably junk. Either buy a new one, or stick with the replacement cable.
Step 4: Test Different Resolution Ranges
Depending on the specific model you have, AOC monitors have a range of possible display resolutions that it can relay back to your PC.
If your computer’s graphic card falls out of this resolution range, a ‘no signal’ message can arise. In fact, it’s even possible that your monitor won’t turn on at all. To fix this, you need to reboot your computer using Safe Mode.
Once in Safe Mode, your PC automatically uses a lower display resolution! This gives you a window of time to navigate to your computer’s resolution settings and select a lower standard display resolution.
I personally find it easiest to do a little bit of resolution setting testing. Starting at the lowest possible resolution, increase the settings higher and higher until the error returns. Be sure to wait 15 to 30 seconds between tests so that the change can take hold. Then just select the setting one level below.
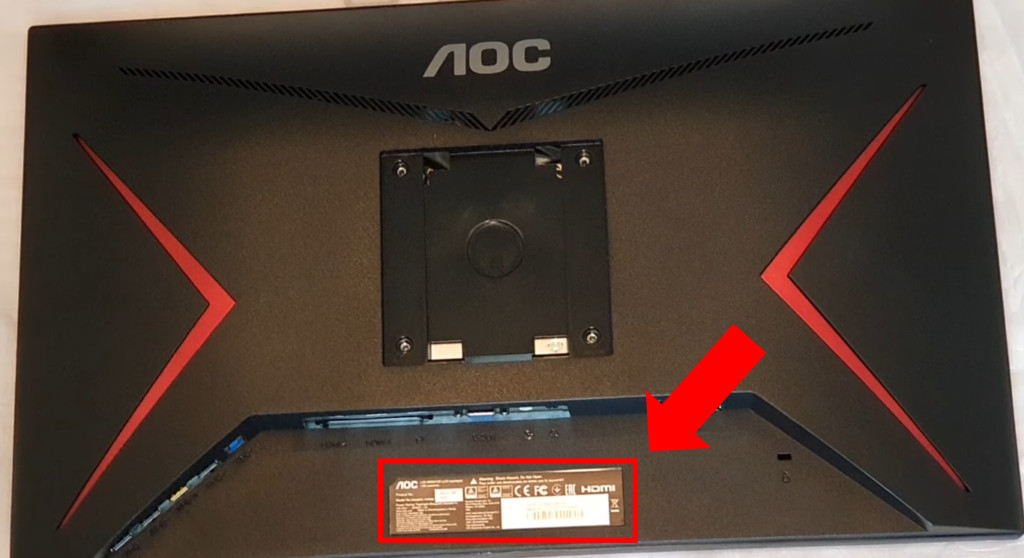
Alternatively, you identify the exact maximum resolution by searching your model number (found on the back of the device) in the AOC user manual lookup.

Before we move on to PC related fixes, try using your monitor with another device.
This can be another desktop computer, MacBook, game console, etc. If your monitor display works, then you know your monitor is working properly and your computer is the cause.
It is worth noting that some of these upcoming steps require you to open and manipulate your laptop or desktop computer. Many folks are not comfortable with this and that is ok! If you are one of these people, you can always bring your monitor to a nearby repair shop.
On the other hand, if you do plan to proceed, ensure you know how to properly ground yourself to avoid destroying your computer with electrostatic charge.
Step 5: Ensure Display Cable Is Plugged Into Graphic Card
Just about all desktop PC’s have an on-board graphics unit with direct connections on the back face of your computer.
If you are using a desktop PC, be sure that your monitor cable is NOT connected to the motherboard. Instead it should be connected directly to the graphics unit.
This is an easy mistake to make because the ports are the same, so it is always a good idea to double check.
Step 6: Remove and Reorder RAM
Improper Random Access Memory (RAM) stick connections could also be to blame.
With your computer off and all cables unplugged, ground yourself and open up your PC unit.
Remove all of the RAM sticks. Assuming there is no visible damage, light blow off any dust or debris and reseat them.
It is always best practice to seat the sticks in a different order in which you found them.

Step 7: Remove and Reinsert CMOS Battery
The CMOS battery in your laptop or computer powers the BIOS firmware.
In case you are wondering, CMOS stands for Complementary Metal Oxide Semiconductor. BIOS stands for “Basic Input/Output System” and it manages the essential functions of your computer.
Resetting the BIOS sets it back to its previous configurations which can often fix a lot of different issues.
Once again, with your computer off and all cables unplugged, ground yourself and open up your PC unit.
Locate the CMOS battery on the motherboard and pop it out. Then drain all excess remaining power by holding down the power button for 10 seconds.
After about a minute, reinsert the CMOS battery back into your PC.
Finally, restart your computer and check to see if your display is working.

Conclusion
These 7 troubleshooting steps are proven to fix the AOC monitor no signal problem:
- Power cycle devices
- Match monitor input to display cable
- Ensure display cable is secure and undamaged
- Test different resolution ranges
- Ensure display cable is plugged into graphic card
- Remove and reorder RAM
- Reset and reinsert CMOS battery
If you’ve given each of these fixes a go, and you’re still having issues you can also contact AOC Customer Service Call Center at 888-838-6388.
It is also worth noting that AOC Monitors have a generous three-year warranty.
Shoot me a comment below to let me know how you did!

Chelsea Ashbrook is a Senior Manager of Corporate Digital Experience at Genentech. Chelsea received her B.A. from the University of Connecticut and has spent the last 11 years working in the technology field.

