Dell has a great lineup of audio compatible monitors, however they can occasionally have some frustrating issues. One of the more common problems users report encountering is their Dell monitor speakers not working.
To fix the Dell monitor no sound problem, first confirm your Dell model supports audio. Then update audio source, adjust the monitor and PC volume settings, and enable loudness equalization. If the issue persists, check the audio cables, update the audio driver, and ensure BIOS audio onboard device is enabled.
Ultimately, there are 8 common troubleshooting steps you should try.
I strongly recommend you follow these steps in order.
We will start with the most common fixes and then work our way towards less common, more involved troubleshooting steps.
Step 1: Confirm Monitor Audio Output Compatibility
Ok – let’s get the obvious stuff out of the way first.
Not all Dell displays have built-in speakers and/or support audio output functionality.
While this may seem obvious, it is also the most common explanation for why your monitor has no sound.
So before you do anything else, double check whether or not your specific monitor model has built-in speakers and/or supports audio output functionality!
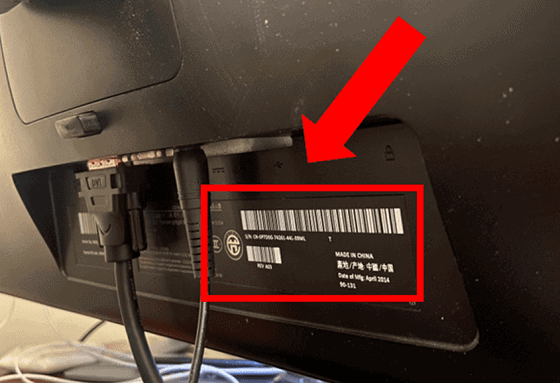
The easiest way to confirm this, is to first identify your model number. This is usually located on a sticker on the back or bottom of the monitor.
Next, enter the Dell model number into the user manual lookup.
Once the Owner’s Manual or User’s Guide Document has been downloaded, locate the product specifications section. Here, under Audio Output, Integrated Speakers, etc. determine if your specific monitor supports speakers.
It is important to note that a monitor that supports “audio output” is NOT the same thing as having built-in speak capabilities.
Supporting audio output simply indicates that you can plug headphones or external speakers into your monitor directly.
Ok – so now you’ve confirmed whether or not your monitor has built-in speakers or supports audio output. Maybe it does both? Continue on to step 2.
Step 2: Update Default Audio Source
It is also incredibly common to experience this issue due to having the incorrect audio source selected on your PC.
Therefore, it is critically important to set the audio output of your PC to the specific monitor or audio device you are using.
The specific settings will differ slightly depending on the operating system you are using.
For Windows 10, and the vast majority of Windows operating systems, first select select volume from the application tray in the bottom right corner of your screen.
This may appear as a standalone volume icon as shown below, or you may need to click the application up arrow icon and select it there.
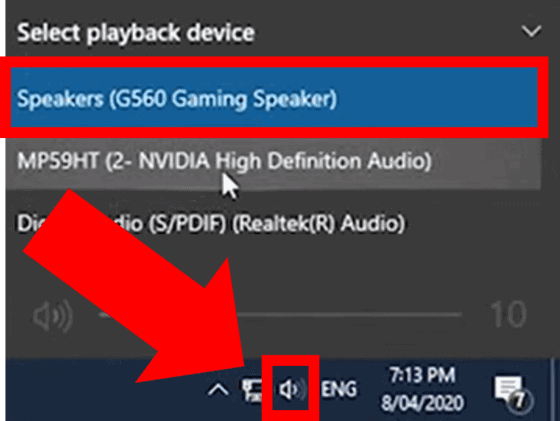
Here you will find each of the available audio sources. In my case, I have an external speaker attached to my monitor and so this is what I have selected.
For Dell monitors with built-in speakers, you can select the monitor itself as the playback device. Similarly if you are using external headphones, you will be able to select them here.
Step 3: Adjust Volume On Monitor
Another quick and simple troubleshooting step to cross off the list early is to check your volume levels.
It’s possible you are encountering the issue simply because the monitor has been set to mute or is set too low.
For the vast majority of Dell displays that support audio output, you can adjust the monitor volume level using the dedicated volume button on the bottom right side of the monitor.
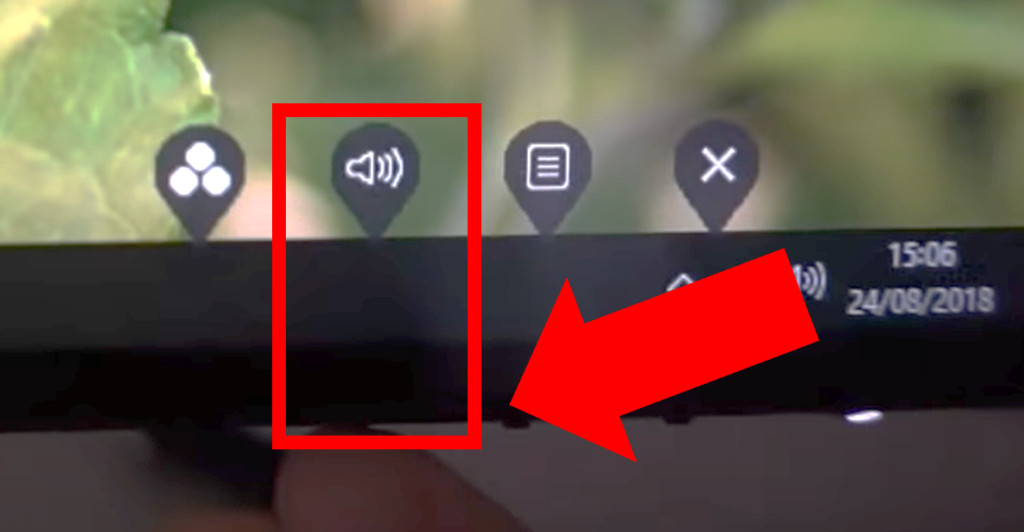
Make sure that the monitor volume is on and set high enough to hear.
If your monitor model does not have a dedicated volume button and you are having trouble locating the volume controls, use the Dell monitor user manual lookup for assistance.
Step 4: Inspect Volume Settings On PC
Similarly, you also need to make sure that you have the proper volume settings on your PC or primary operating device.
First, right click on the volume icon in the applications tray in the bottom right corner of your screen. Then select Open Sound Settings.
Under Sound Settings, make sure that the Master volume has not been accidentally set to Mute and is at a reasonable level.
Next, right click on the volume icon again and this time select Open volume mixer.
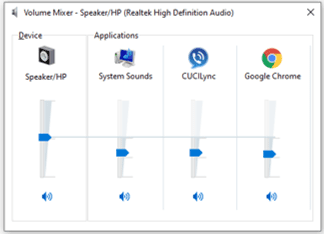
Once again, make sure that the application you are attempting to use is not on mute and instead is set to an audible volume level.
An extremely common mistake is not realizing that applications like Google Chrome for example, have their own distinct volume settings.
This steps applies regardless of whether you have a PC hooked up to your monitor or some other device.
Regardless of the device you are using, if it has its own volume settings, you need to ensure they are properly calibrated.
Step 5: Enable Loudness Equalization
I also recommend you enable Loudness Equalization.
With Loudness Equalization turned on, the volume of sounds that are being produces will become normalized and balanced.
This means that really loud sounds will be more quiet. But more importantly in this case, really quiet sounds will be boosted and become more amplified.
How To Enable Loudness Equalization
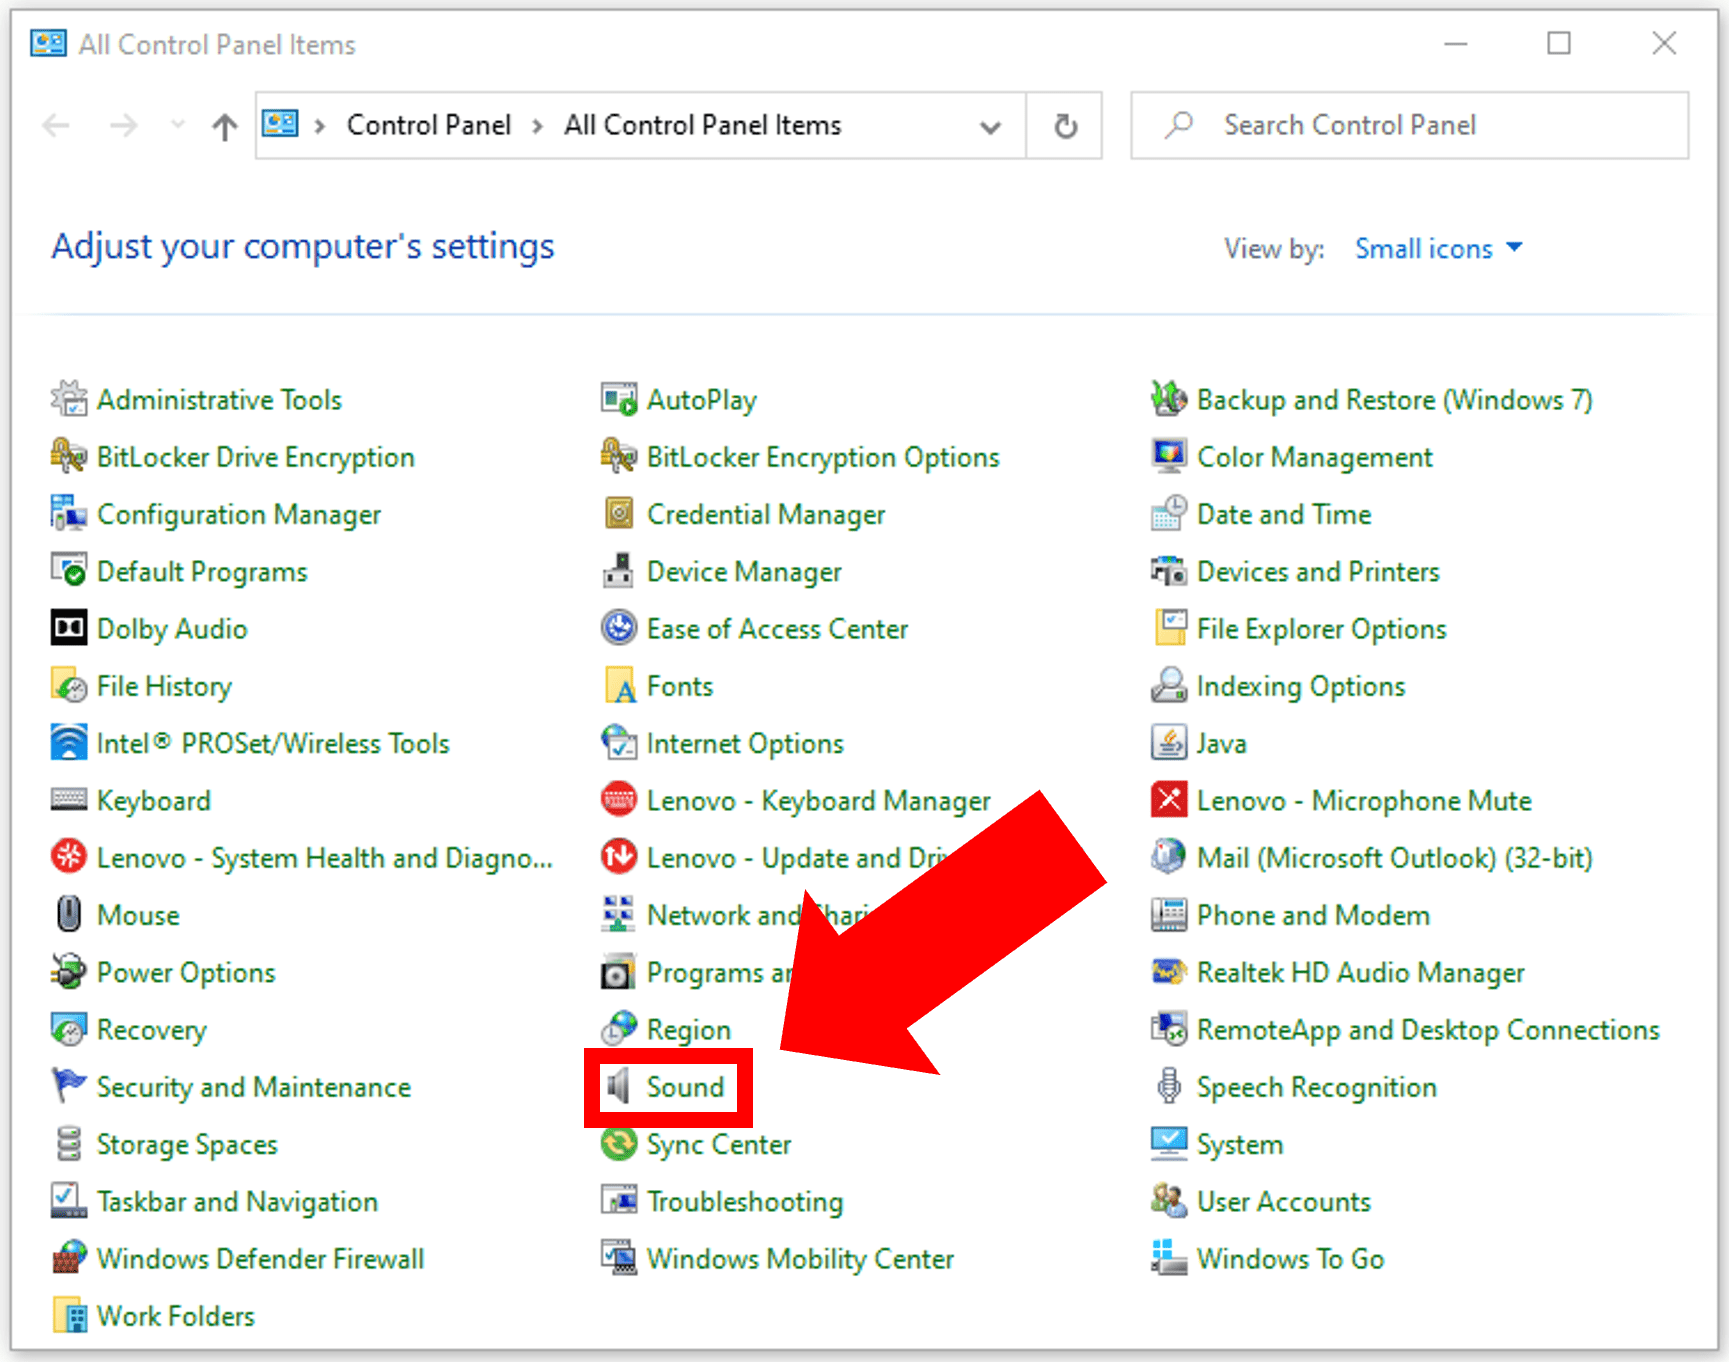
- First, type Control Panel into the Windows search field and select it from the pop up menu.
- Then, within the Control Panel locate and select Sound.
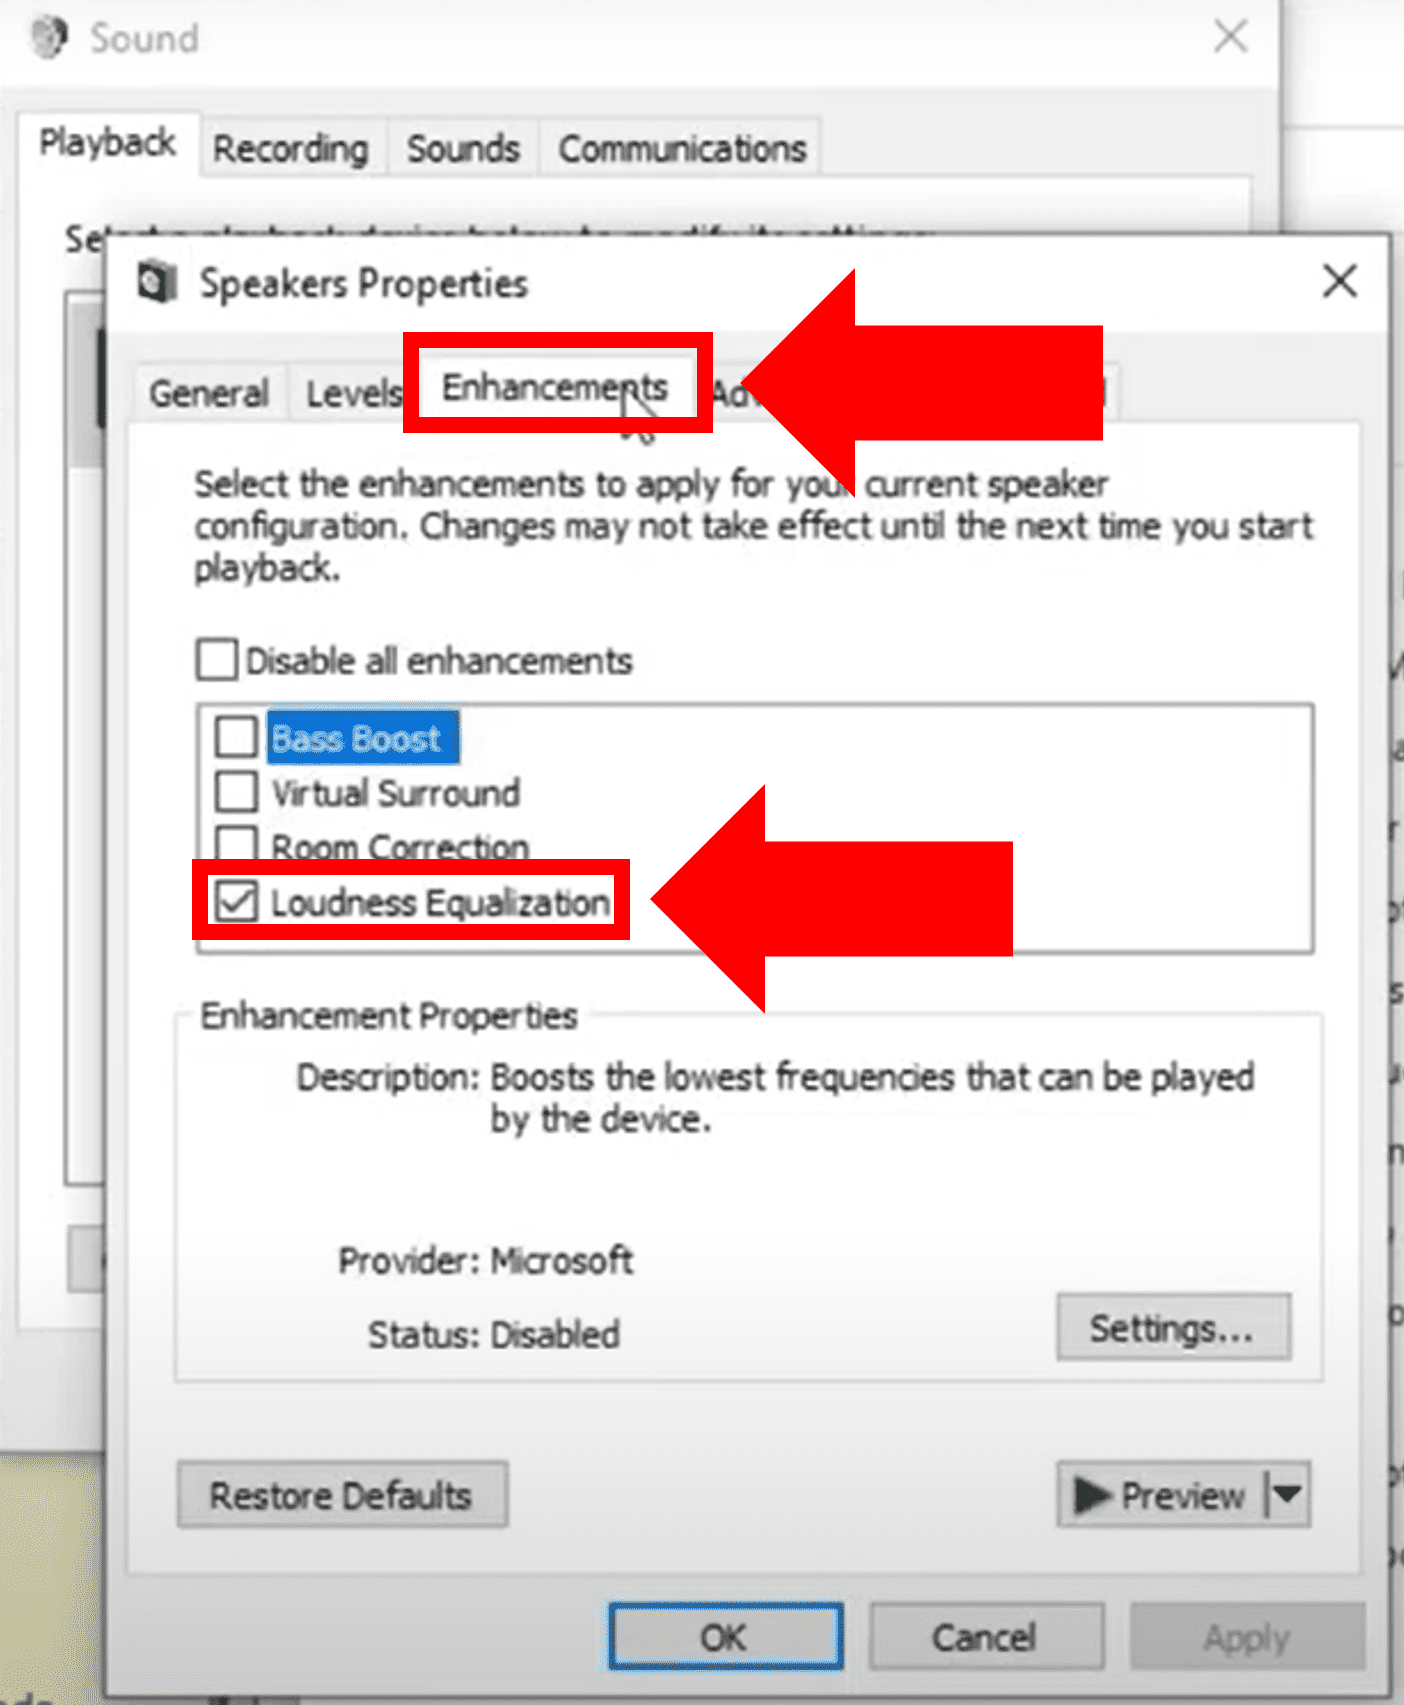
- Next, double click on the device through which you would like the audio to play through.
- Finally, under the Enhancements tab, enable Loudness Equalization and click OK.
Step 6: Check Audio Cables
You also need to carefully check all audio cable connections.
For Dell displays with with built-in speaker capabilities, the audio is most often carried through the DisplayPort (DP) or HDMI display cable directly.

In some cases, you may even have a VGA cable that has a connected but separate audio jack connection.
For monitors that do not have built-in speakers but do support audio output, there will be a separate audio jack cable for your device.
First and foremost, make sure the audio cable is plugged into the correct ports on your display and PC/device.
Also confirm that the connection with your specific cable is firm on both ends. Because these cables often carry both video and audio signals, even a slightly broken connection can result in sound issues, in addition to visual issues like screen flickering and no signal errors.
Next, make sure there are no issues or obstructions with the audio cable itself. Check for any signs of visible damage.
Finally, try using a different audio cable than you are currently using.
For example, if you are specifically encountering this issue while using an HDMI cable, try swapping out the HDMI for a DP, or VGA cable and vice versa.
If using a different audio cable solves the issue, a faulty audio cable was likely the culprit.
Step 7: Update Computer Applications And Audio Driver
If none of the above fixes have worked, your PC applications or audio driver may be out of date.
How To Update Your Computer Applications (Windows 10)
Many application publishers will provide periodic updates to their apps. Often times these updates include new features or provide fixes to various app issues.
You can use your Microsoft Store on Windows to automatically install app updates.
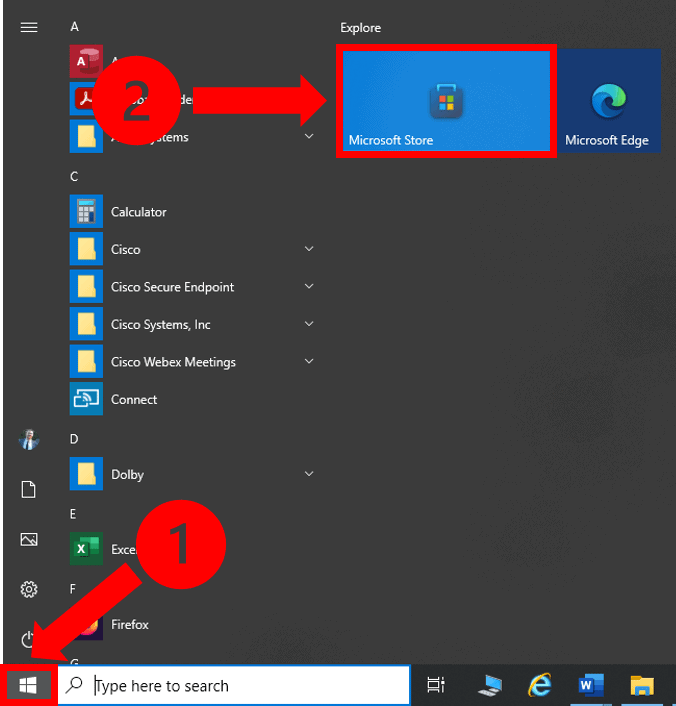
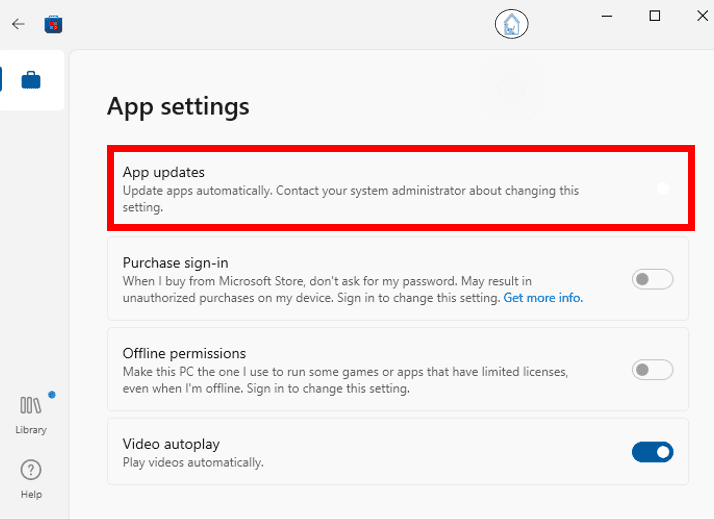
- First select Start, and click on the Microsoft Store.
- Once you are in the Microsoft Store, select the account menu and then select Settings.
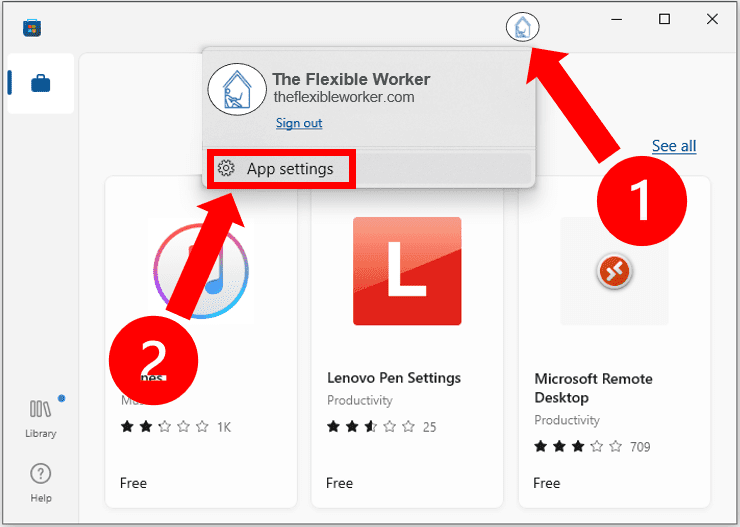
- Under App updates, set Update apps automatically to On. Here you can see my default settings are set to update apps automatically already. This may also be the case from some of you. For others, you will need to use the toggle button to turn this setting on.
Depending on your version of Windows, these steps may slightly vary. Check out the official Windows support page to learn how to update your apps across Windows versions.
How to Update And Reinstall Your Audio Driver (Windows 10 / 11)
Sometimes the audio driver is specifically to blame. To test this, first try to update the audio device driver directly.
Head over to the search box and this time enter Device Manager. Under Sound, video and game controllers right-click on the name of your audio device, and select Update driver.
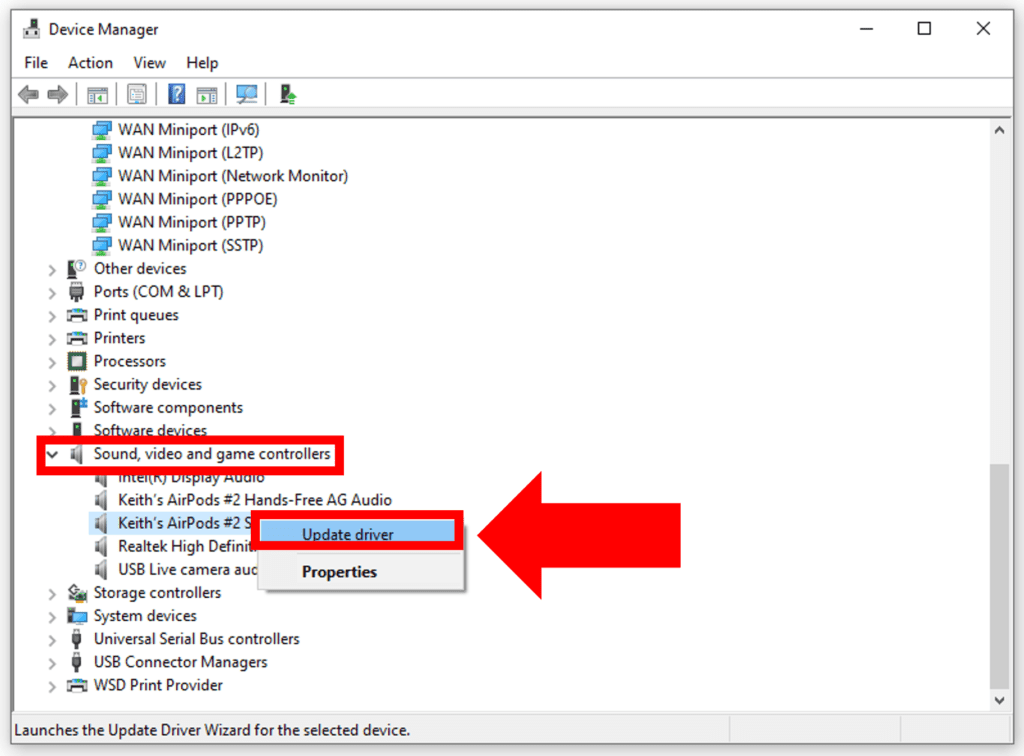
First, select Search automatically for updated driver software and wait for your audio driver to be updated. If this doesn’t work, select Search for update drivers on Windows Update instead.
If this does not fix your problem, try uninstalling the sound driver by right-clicking and selecting Uninstall.
Then simply Restart your computer – Windows will automatically attempt to reinstall the audio driver during startup.
If your driver does not automatically reinstall, or if you do not see your specific audio device driver within the device manager to start with, you will need to download it.
Simply head over to Google and type in your device name, model number, and “audio driver” to locate it.
Step 8: Ensure BIOS Audio Onboard Device Is Enabled
If all else fails, it is possible that your audio has been accidently disabled in the BIOS.
While uncommon, users who have purchased a used PC have sometimes reported their onboard audio settings being tampered with.
To check this, you will need to restart your PC and determine the relevant keyboard key during startup that will take you to the BIOS.
Most often the BIOS redirect key will be displayed on screen. However, if you are unsure, search for your PC name and model number and look it up in the corresponding user manual.
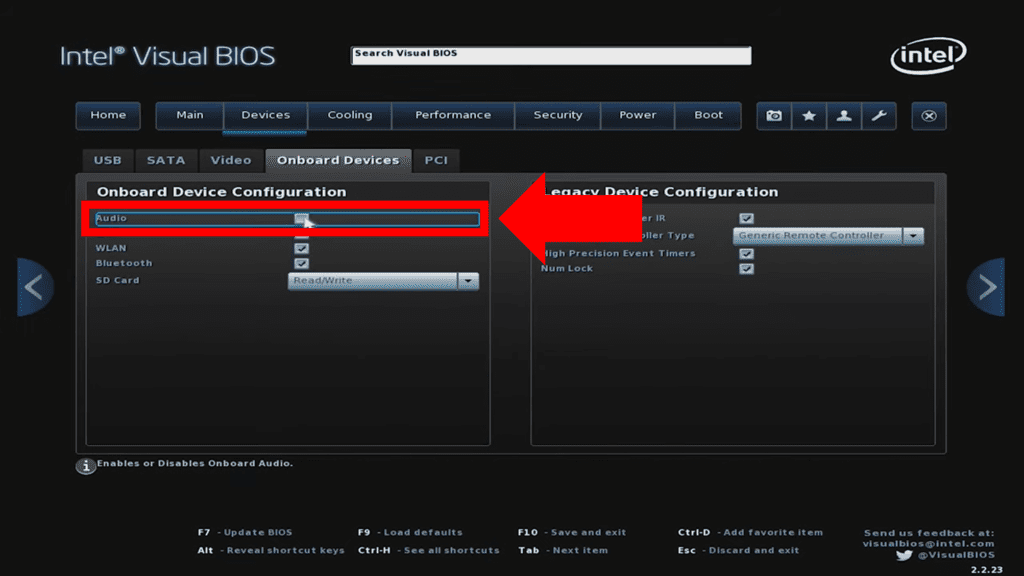
In the BIOS, locate Onboard Devices and make sure Audio is enabled.
Conclusion
Your Dell monitor sound not working can initially be alarming. No need to worry. Follow these 8 troubleshooting steps to get your audio functioning properly again!
- Confirm monitor audio output compatibility
- Update default audio source
- Adjust monitor volume
- Inspect PC volume settings
- Enable Loudness Equalization
- Check audio cables
- Update computer applications and audio driver
- Ensure BIOS audio onboard device is enabled
If none of these fixes helped, you can contact Dell consumer & member purchase sales support at 1-877-717-3355. Or you can contact Dell Technical Support online.
You can also check out your Dell warranty policy.
Were you able to get your sound turned back on? If so, let me know how in the comments section below!

Chelsea Ashbrook is a Senior Manager of Corporate Digital Experience at Genentech. Chelsea received her B.A. from the University of Connecticut and has spent the last 11 years working in the technology field.
