There is nothing more frustrating than being in a rush to print, only to discover the ink cartridges are empty. Fortunately, Epson has a great lineup of reliable printers, with a fairly straight forward ink cartridge setup.
To change the ink in an Epson Printer, first turn the printer on. Use the menu to navigate to ‘Setup’ > ‘Maintenance’ > ‘Replace cartridge’. Click the ‘Start’ button. The cartridge holder will now ready itself for replacement. Once the cartridge is replaced, close the lid and press ‘Start’ followed by ‘Home’.
The overall process to change Epson ink cartridges is mostly the same, regardless of model. Having said that there are some nuances with the WF-3720, WF-3730 & WF-3733 printers.
For this reason, a separate step by step process has been detailed below for these three specific models.
Notably, older Epson Printer models only use two cartridges, while newer Epson models use four cartridges. For the purposes of this article, we will focus on the newer models.
WF-2650, WF-2750, WF-2630 & Beyond
The process is exactly the same for the following models: WF 2650, WF 2750, WF 2630, WF 2760, WF 2530, WF 2520, WF 2540, WF 2660, XP 200, XP 300, XP 320, XP 400, XP 410, XP 420, and WF 310.
It is important to follow the steps below in exact order.
- First, turn the printer on.
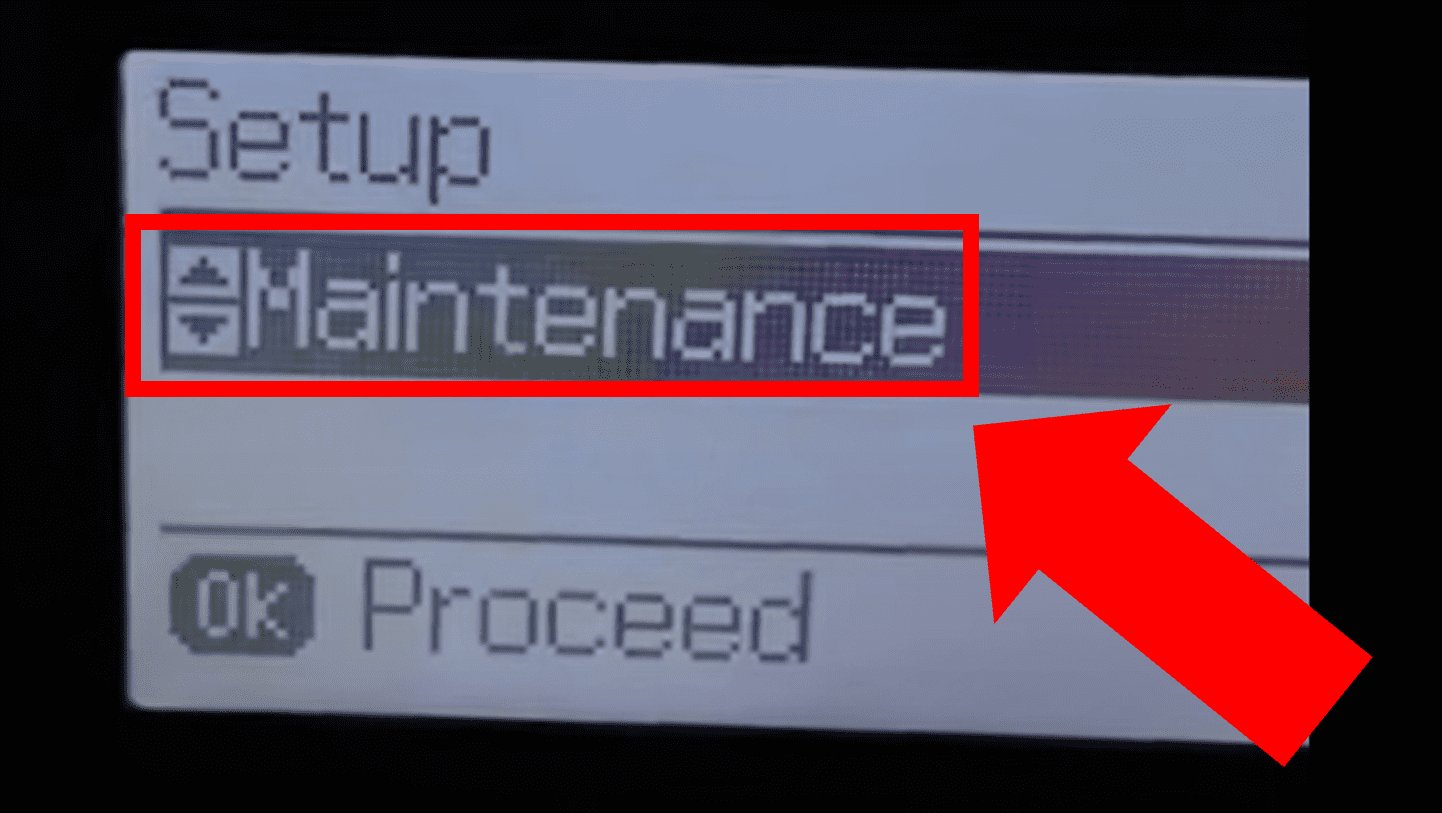
- Then, navigate to Setup on the display and press OK.

- Next, press the down arrow key until you locate Maintenance and then press OK.
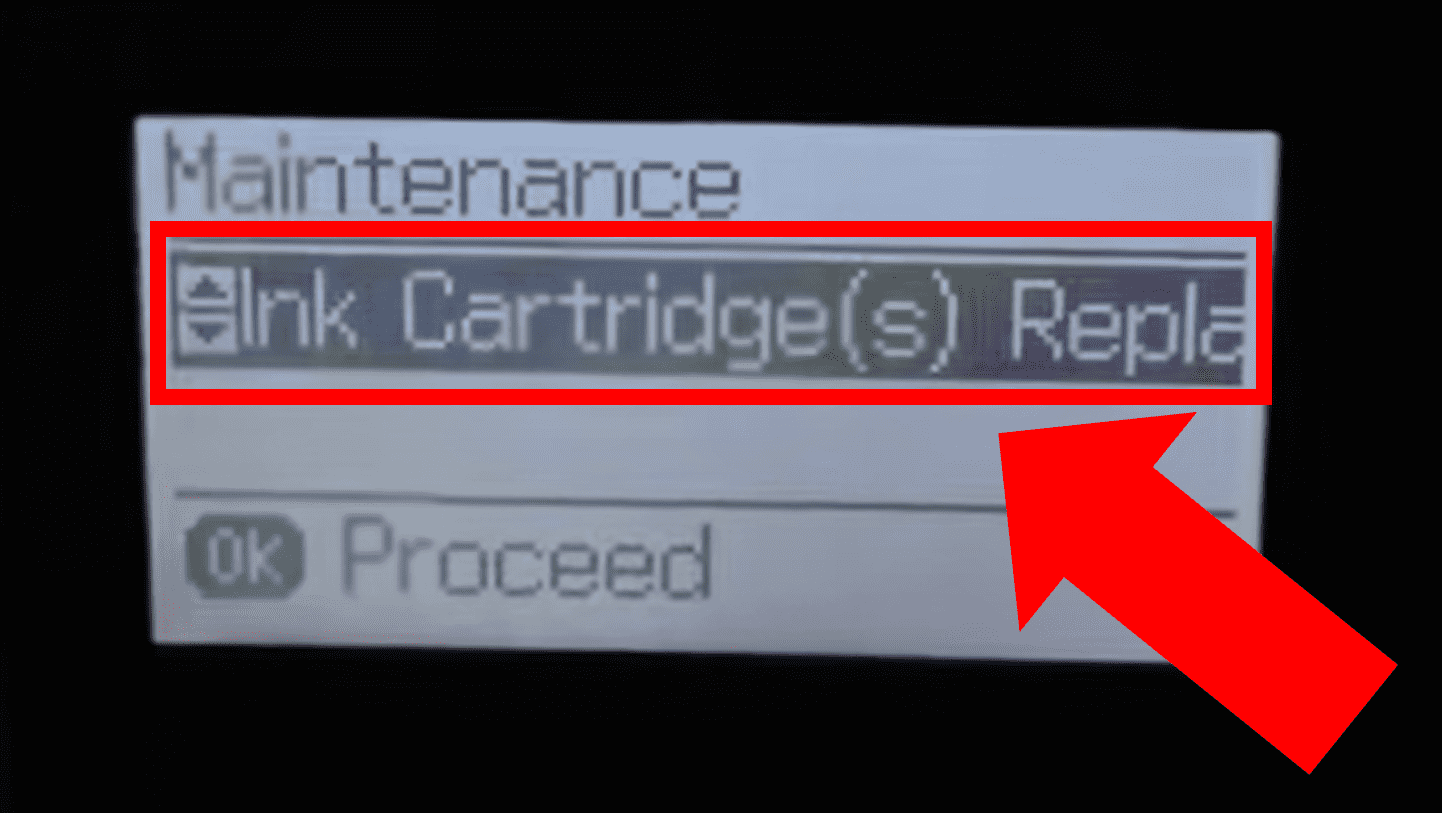
- Continue to press the down arrow key until you locate Ink Cartridge(s) Replacement and press OK.
- Now, locate the gray Start key on the right side of the printer and push the one that display B&W just above it.

- You will now hear the cartridge track moving inside the printer.
- Use the side opening to insert your finger and lift up to open the top of the printer to access the ink cartridge holder.
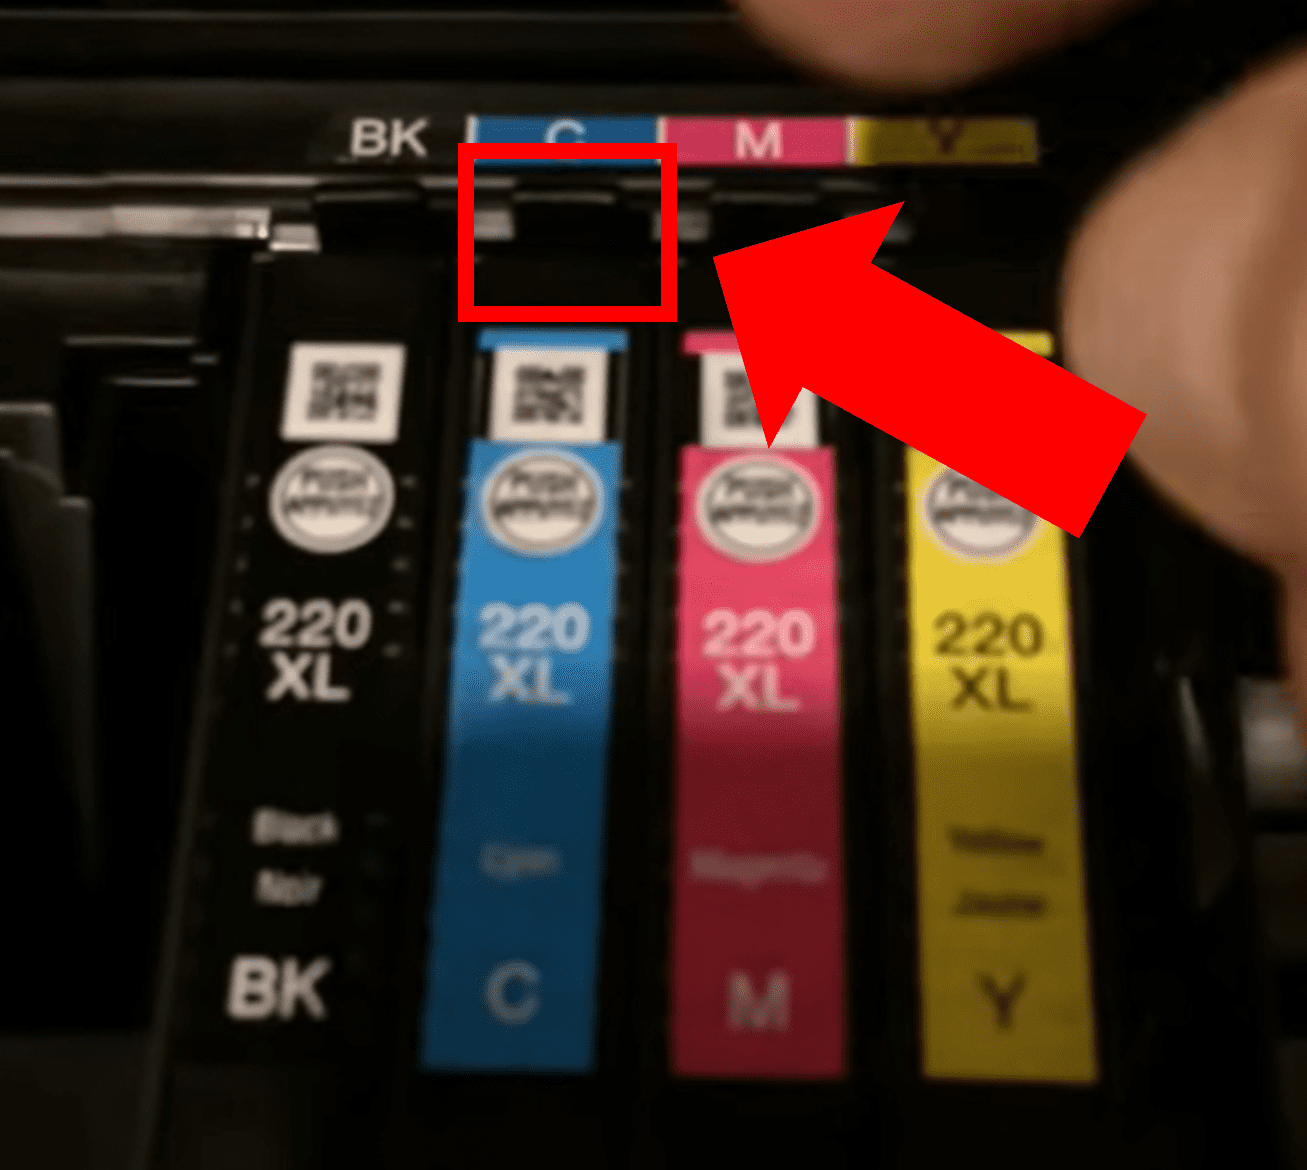
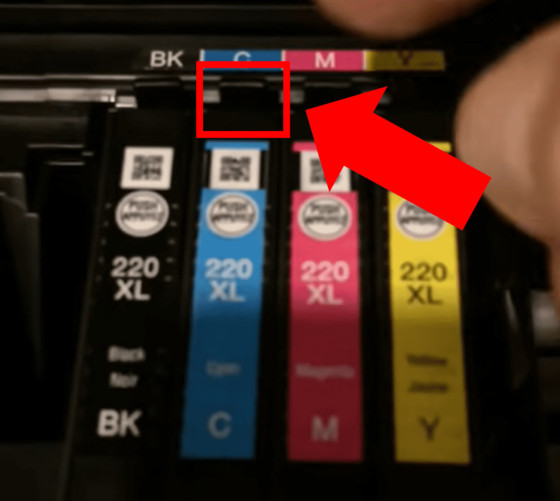
- Identify the specific ink cartridge you would like to replace (black, cyan, magenta or yellow), pull the cartridge lever towards you, and then pull and lift the ink cartridge up and out of the holder.
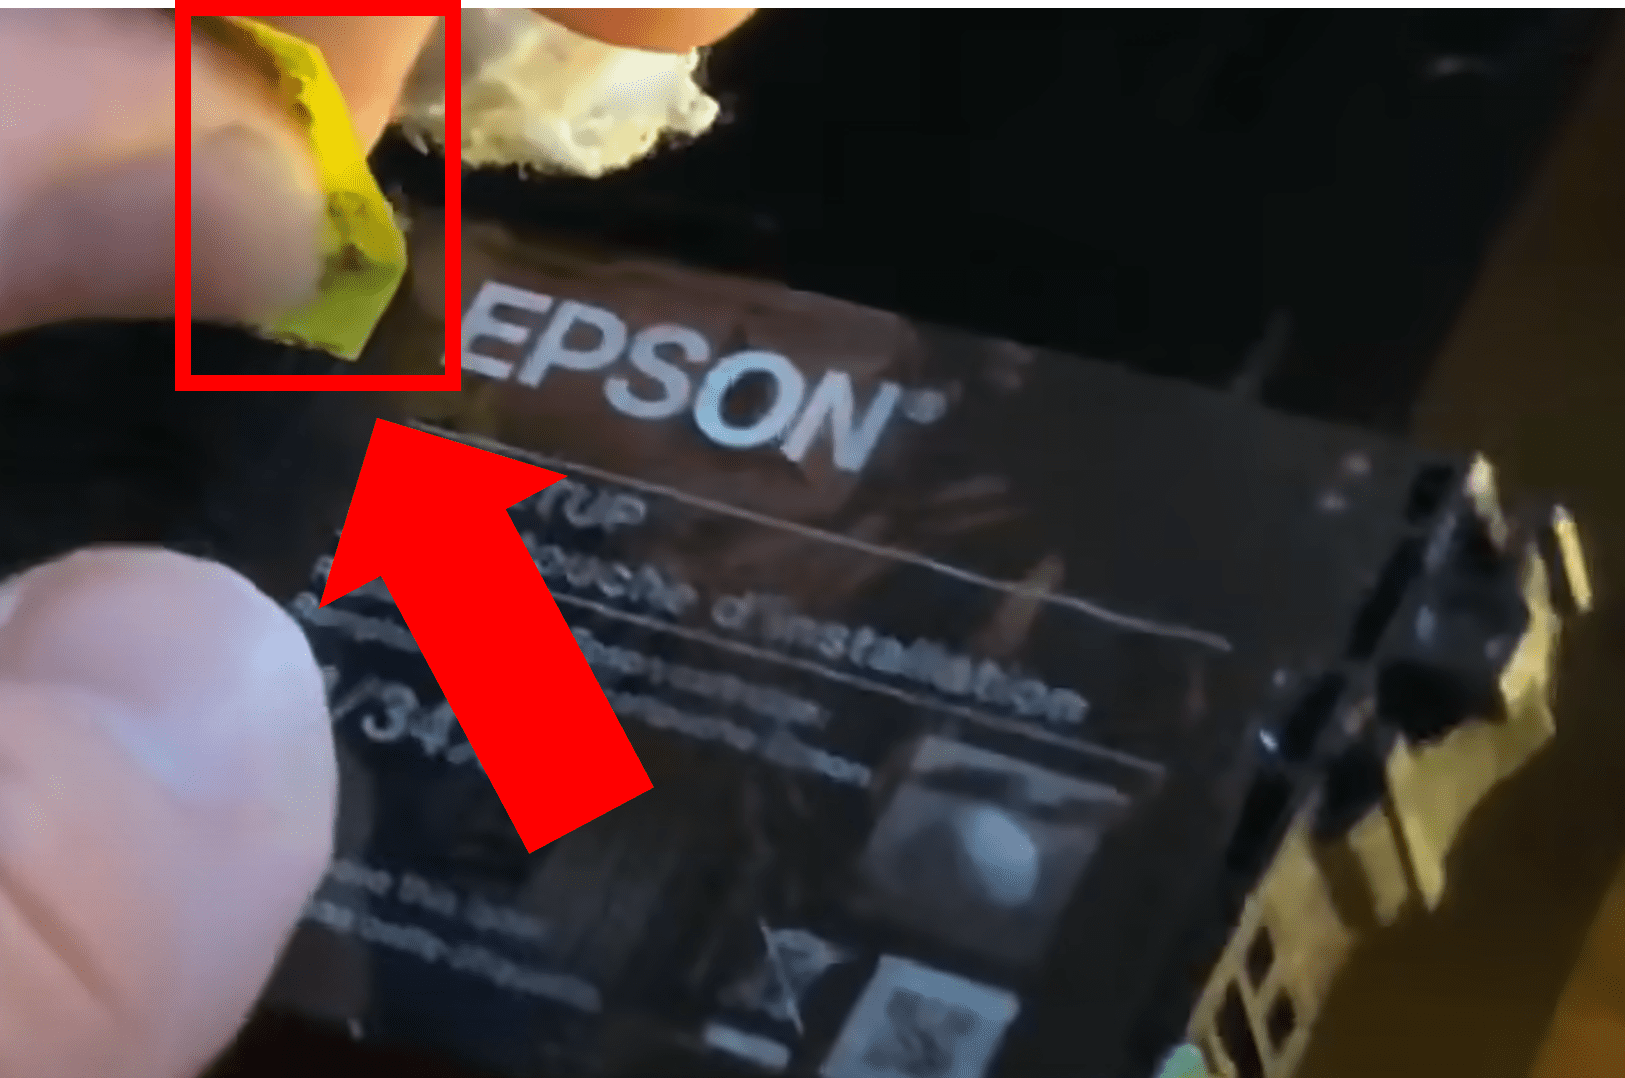
- It is now time to open up the new replacement ink cartridge and remove it from the packaging. Important Note: You need to remove the yellow tag (do NOT remove anything else) on the new ink cartridge before using it. Leaving this tag on will result in printing blank pages. Be sure to only handle the ink cartridge by gripping the plastic outer side casing. Do not directly touch the contact point or general ink dispensing area.
- Now, put the new ink cartridge into its respective holder by setting it in evenly and gently pushing it down until snug.
- Lastly, close the lid to the printer and press the gray Start B&W key again.
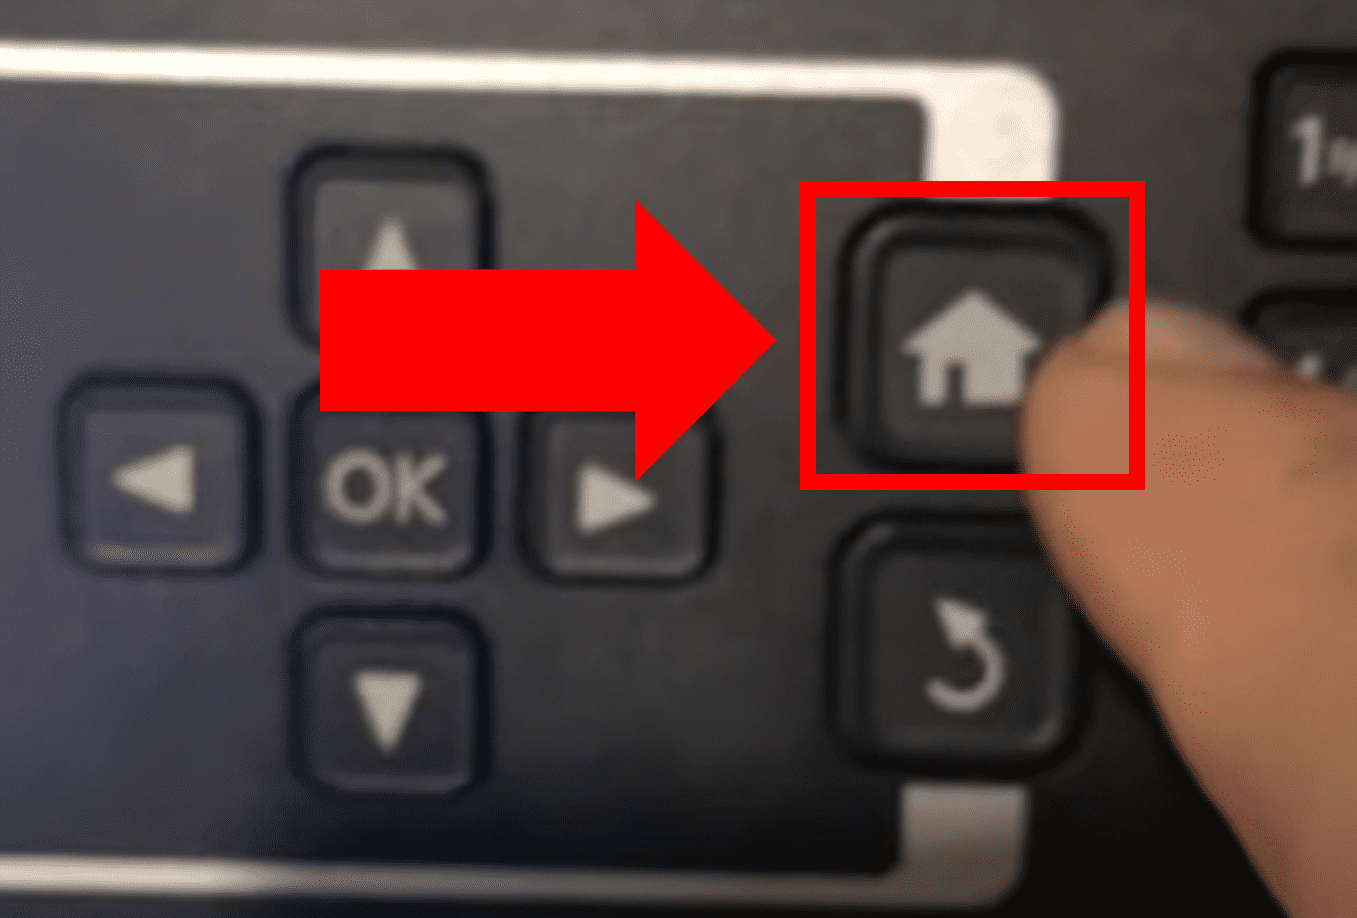
- The printer will now prepare the ink system and check all systems. When this process is complete, press the Home key.
That’s it! You are now ready to print.
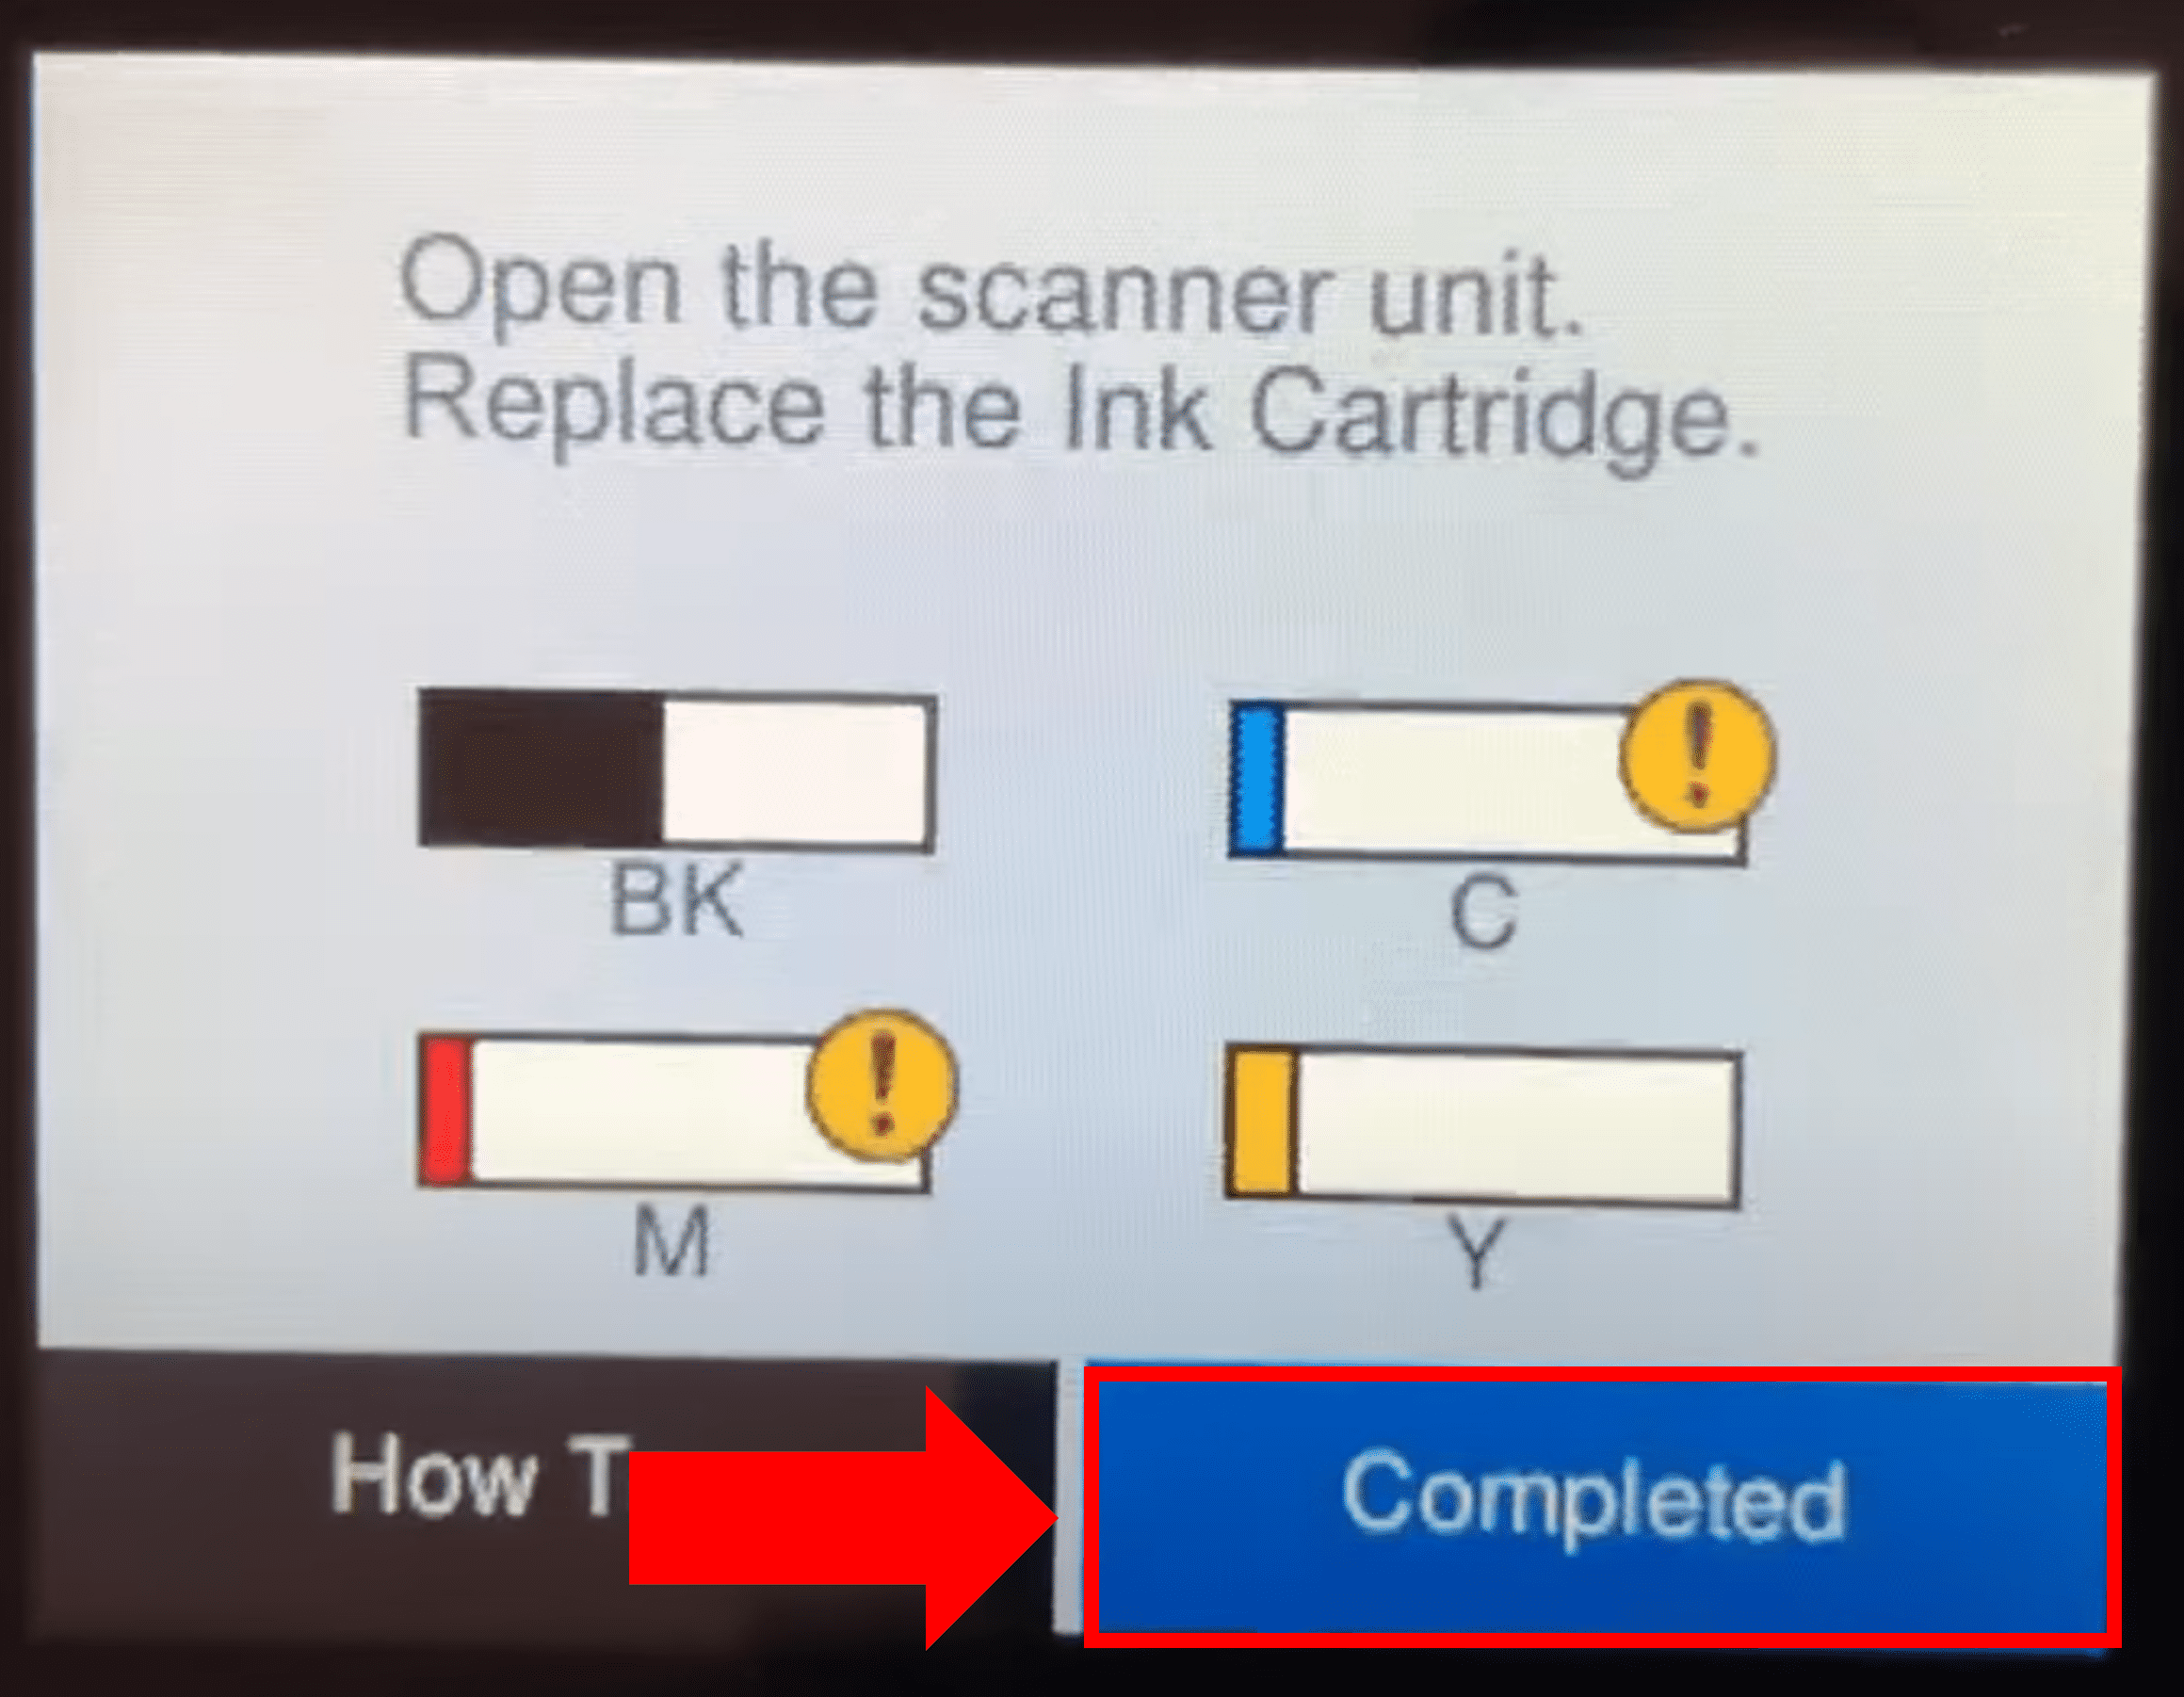
WF-3720, WF-3730 & WF-3733
The steps below apply to all three of these models. Follow them in exact order.
- First, turn the printer on.
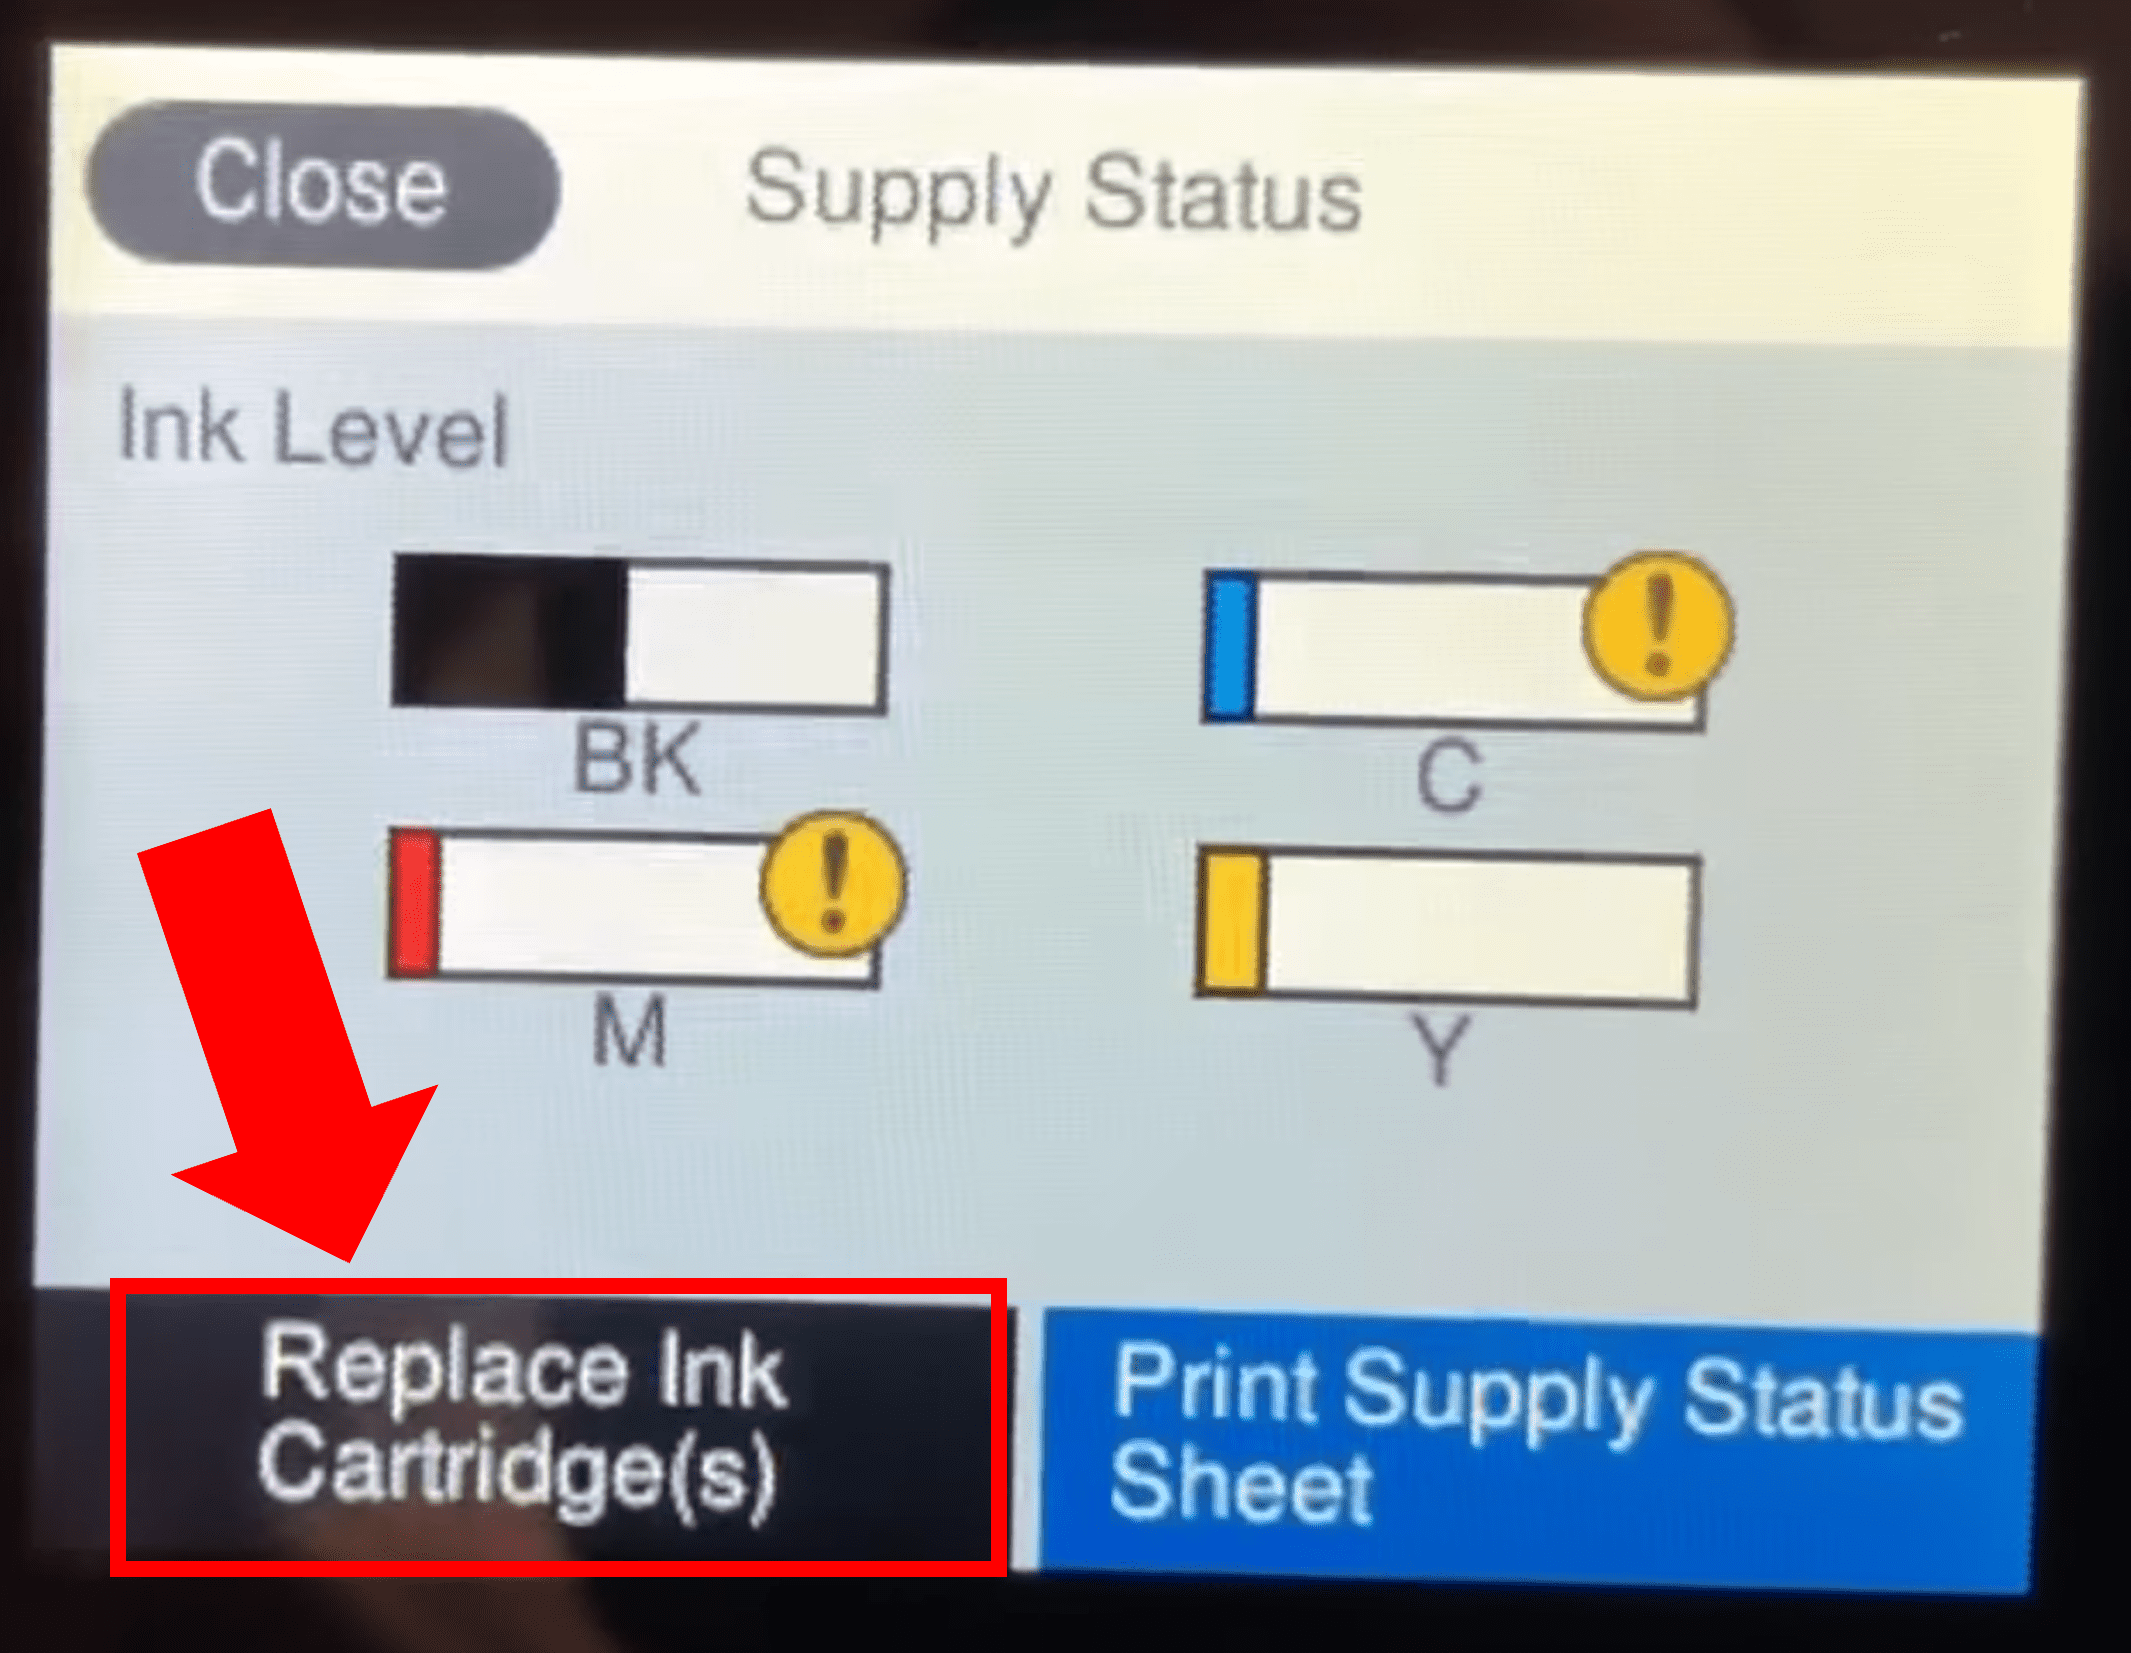
- Next, on the control panel display, touch the ink symbol in the top left corner.
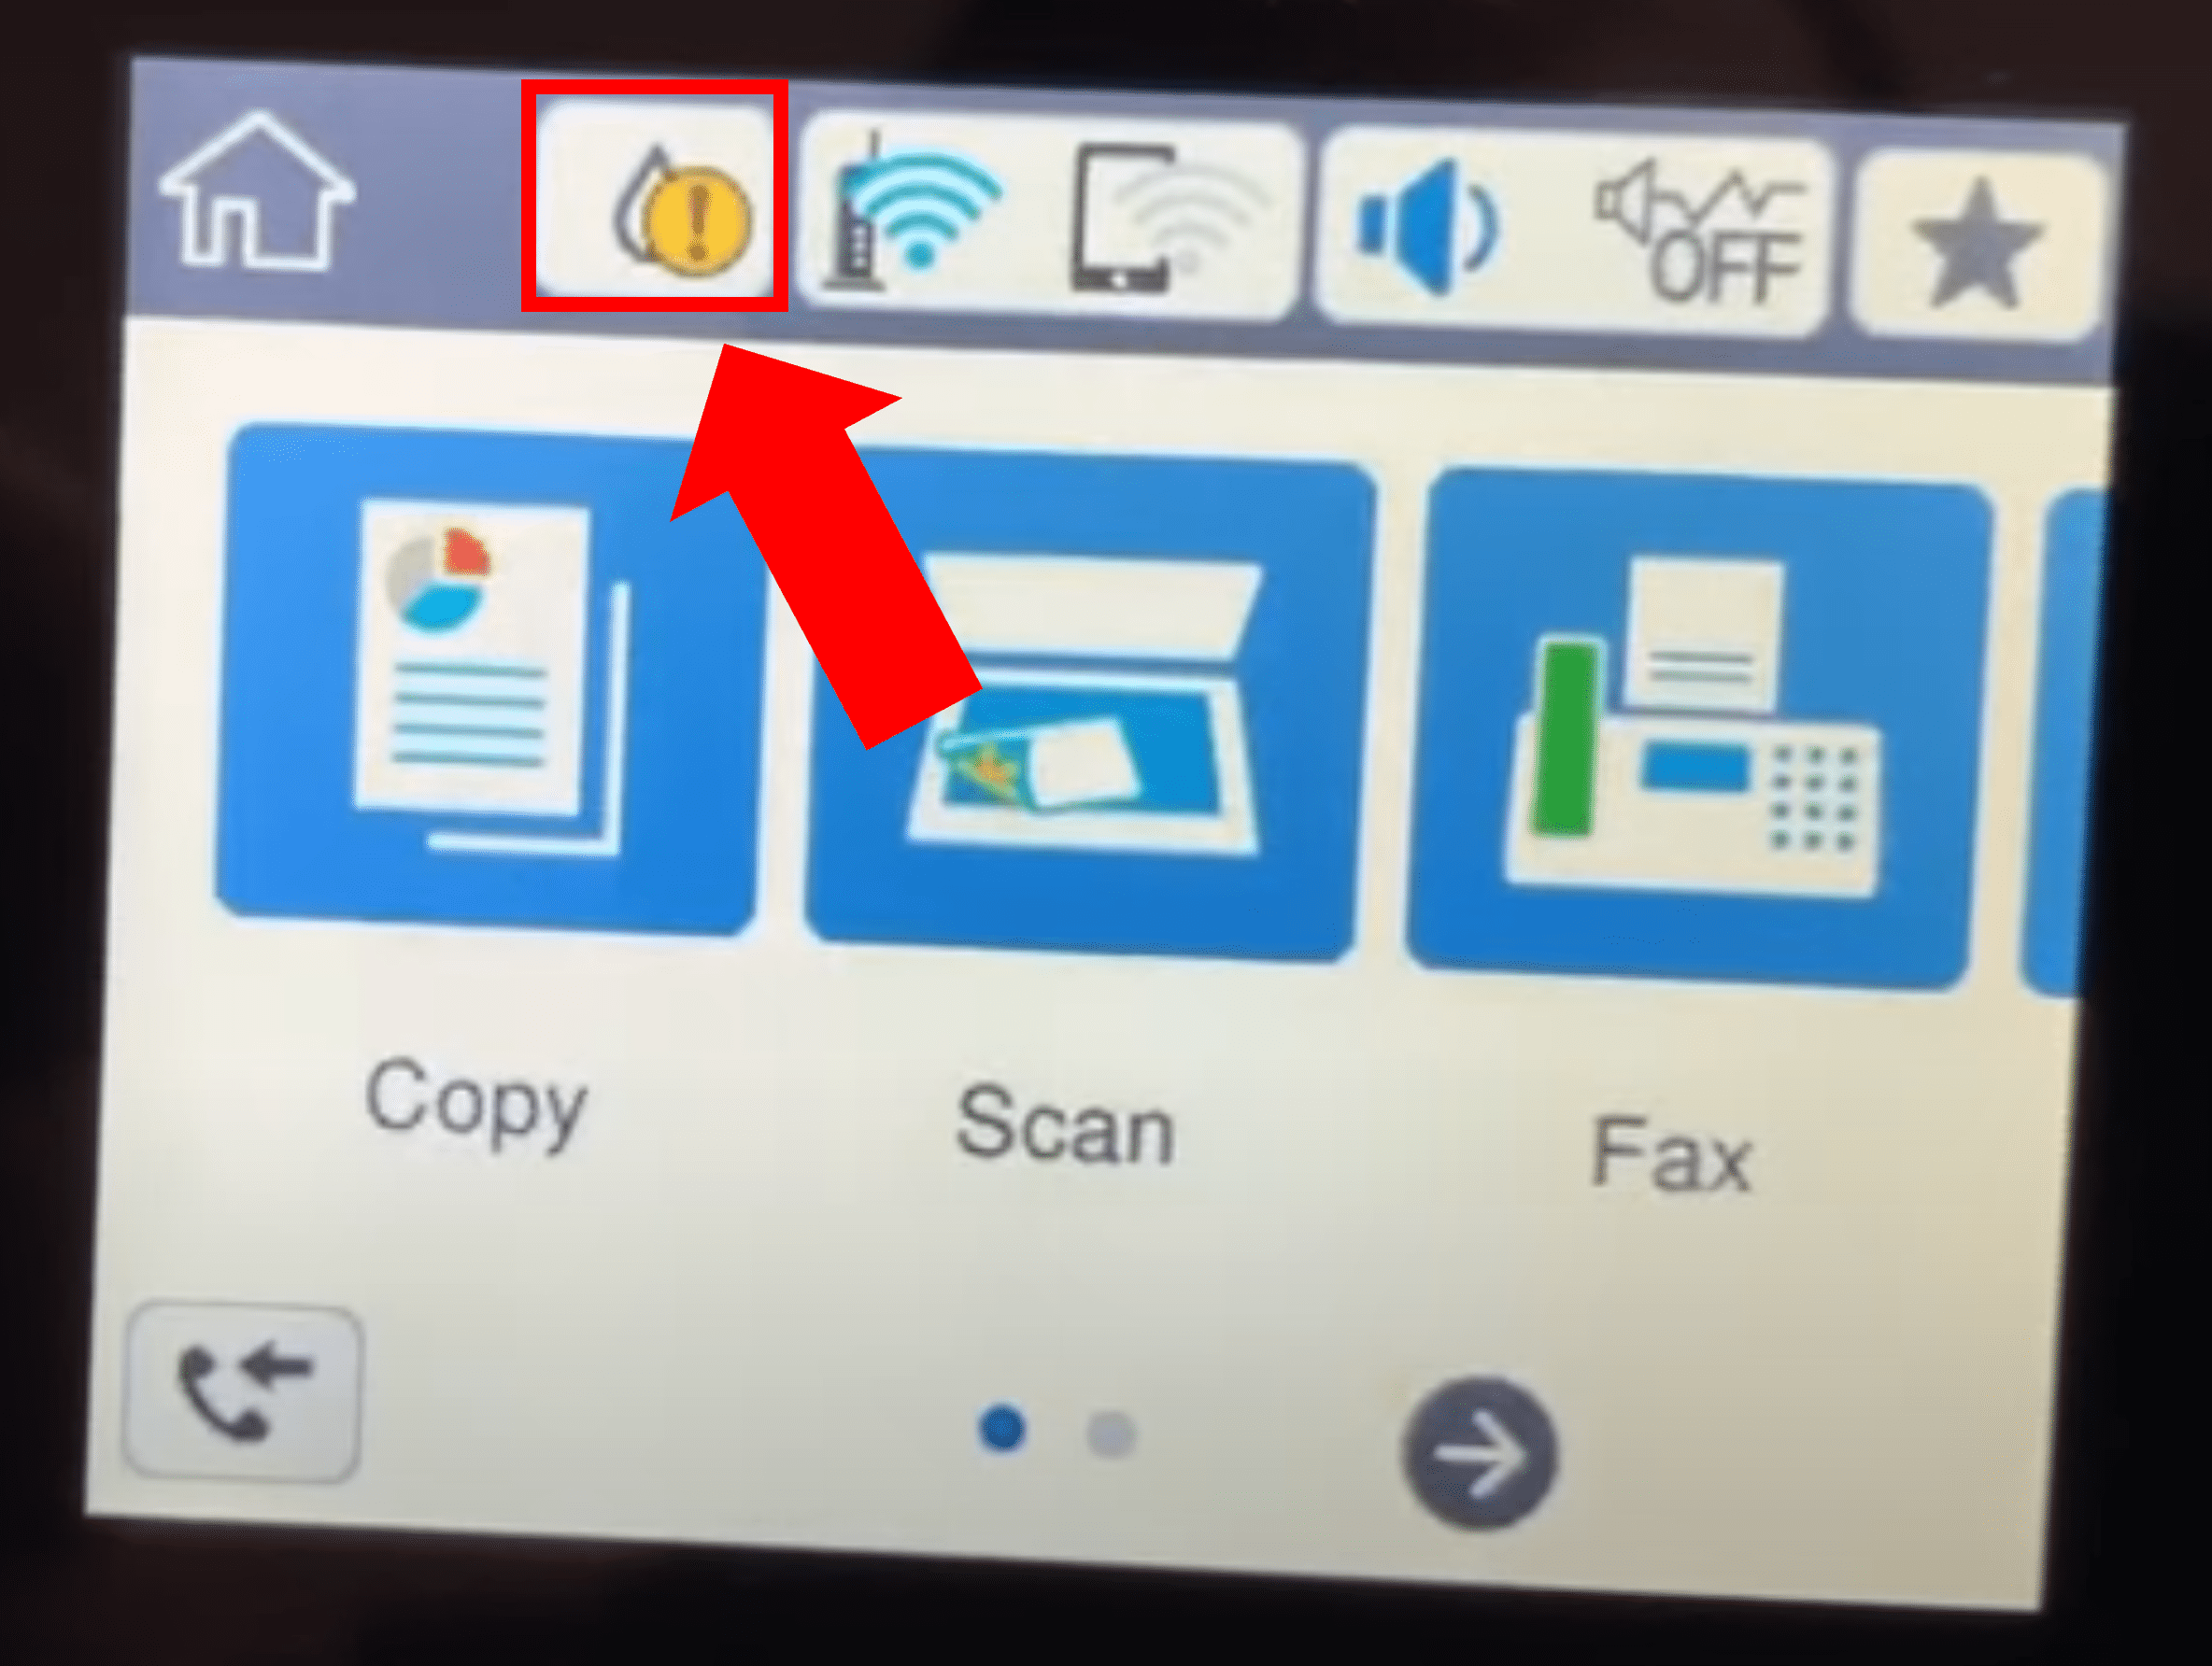
- Here you will be able to see the black, cyan, magenta and yellow ink levels, informing you which ink cartridge(s) is in need of replacement. Now, select Replace Ink Cartridge(s) from the bottom left corner and select Next and then Start.
- You will now hear the cartridge track moving inside the printer.
- Use the side opening to insert your finger and lift up to open the top of the printer to access the ink cartridge holder.
- Identify the specific ink cartridge you would like to replace (black, cyan, magenta or yellow), pull the cartridge lever towards you, and then pull and lift the ink cartridge up and out of the holder.
- It is now time to open up the new replacement ink cartridge and remove it from the packaging. Important Note: You need to remove the yellow tag (do NOT remove anything else) on the new ink cartridge before using it. Be sure to only handle the ink cartridge by gripping the plastic outer side casing. Do not directly touch the contact point or general ink dispensing area.
- Now, put the new ink cartridge into its respective holder by setting it in evenly and gently pushing it down until snug.
- Finally, to inform your printer that you have completed the replacement, select Completed from the bottom right corner.
- The printer will now enter the Maintenance phase for approximately 4 minutes to finalize the process.
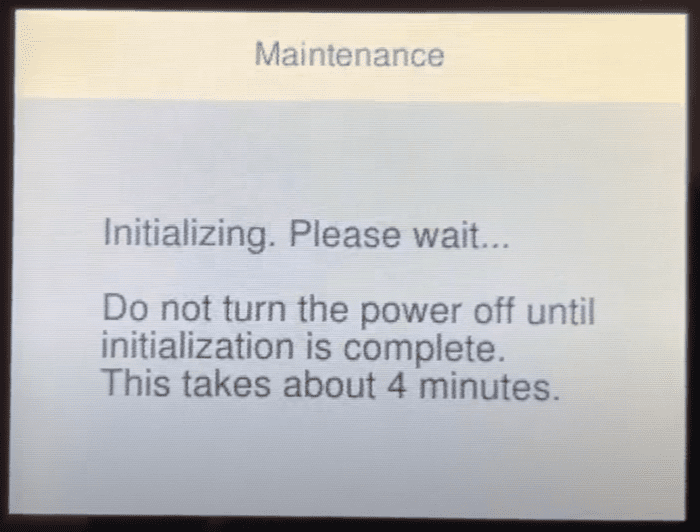
- Once complete, simply close the top of the printer.
You did it! The ink is now fully replaced and your Epson Printer is ready for normal use.
Notably, if print quality is poor following the ink cartridge change, you may need to clean the printhead.
Conclusion
Attempting to print, only to discover your Epson Printer is out of ink can be frustrating. Fortunately, replacing empty Epson ink cartridges is a relatively straight forward process:
- Turn the printer on.
- Navigate to ‘Setup’ > ‘Maintenance’ > ‘Replace cartridge’.
- Click ‘Start’.
- Wait until cartridge holder is positioned properly.
- Remove and replace empty ink cartridge.
- Close the lid and press ‘Start’ followed by ‘Home’.
If for any reason you are still having trouble changing your Epson Printer ink, you can try entering your model number into the official Epson Printer manual lookup for additional information. You can also call Epson Customer Service at 1 (800) 463-7766.

Chelsea Ashbrook is a Senior Manager of Corporate Digital Experience at Genentech. Chelsea received her B.A. from the University of Connecticut and has spent the last 11 years working in the technology field.
