When working from home, the ability to use wireless headphones can be a life saver. Fortunately, the pairing process between your AirPods and Toshiba laptop is straightforward.
To connect AirPods to Toshiba laptop, click ‘Start’ > ‘Settings’ > ‘Devices’. Switch the ‘Bluetooth’ toggle button to ‘On’, select ‘Add Bluetooth or other device’ and click ‘Bluetooth’. Open the AirPods case and hold the button on the back for several seconds. Select AirPods from device list to complete pairing.
Let’s review each of these steps in detail from start to finish. It is important to follow these instructions in the exact order outlined below.
Step 1: Check AirPods Charge Status
First, it’s important to make sure that your AirPods are sufficiently charged.
To check your AirPods’ current charge status, open the case lid and hold the case close to your device (iPhone, iPad, etc).

Step 2: Turn Laptop Bluetooth On
Next, you need to activate bluetooth on your Toshiba laptop.
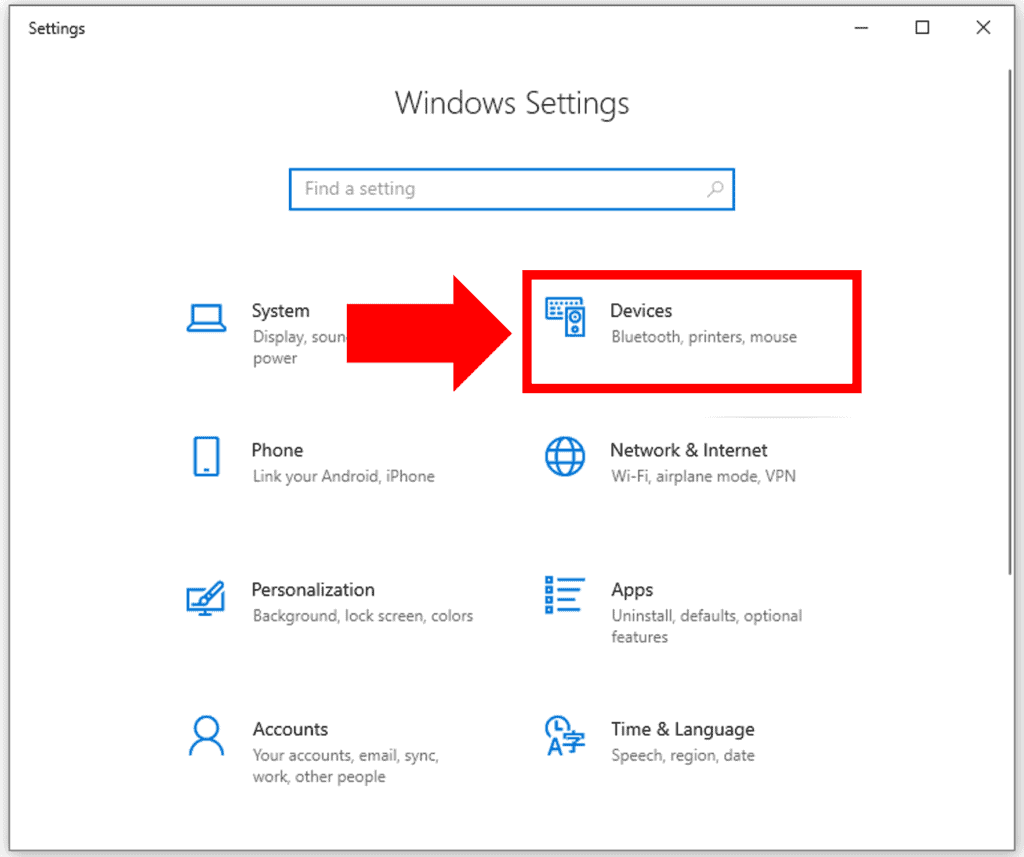
To do so, click Start, select Settings from the pop up menu, and then click Devices.
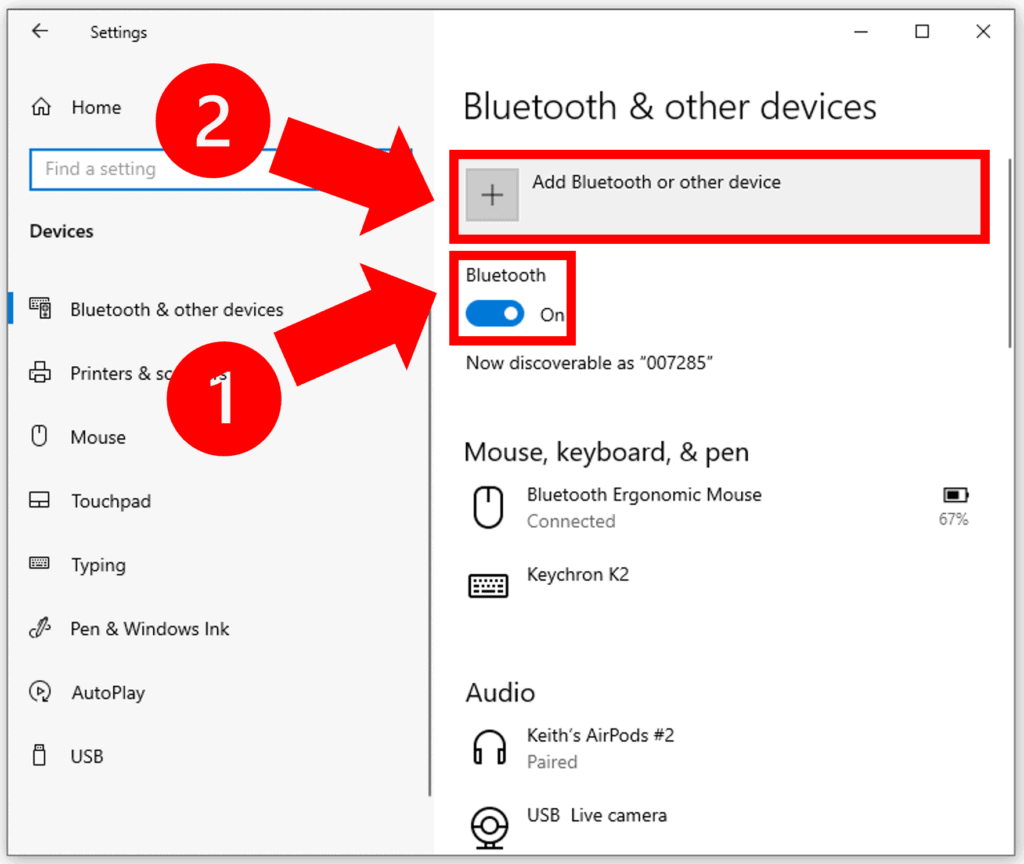
Within the Bluetooth & other devices section, switch the the Bluetooth toggle button to On. Then, click Add Bluetooth or other device.
Step 3: Add A New Bluetooth Device
Now it’s time to let your laptop know that you would like to add a new bluetooth device.
Within the Add a device window, click on Bluetooth.
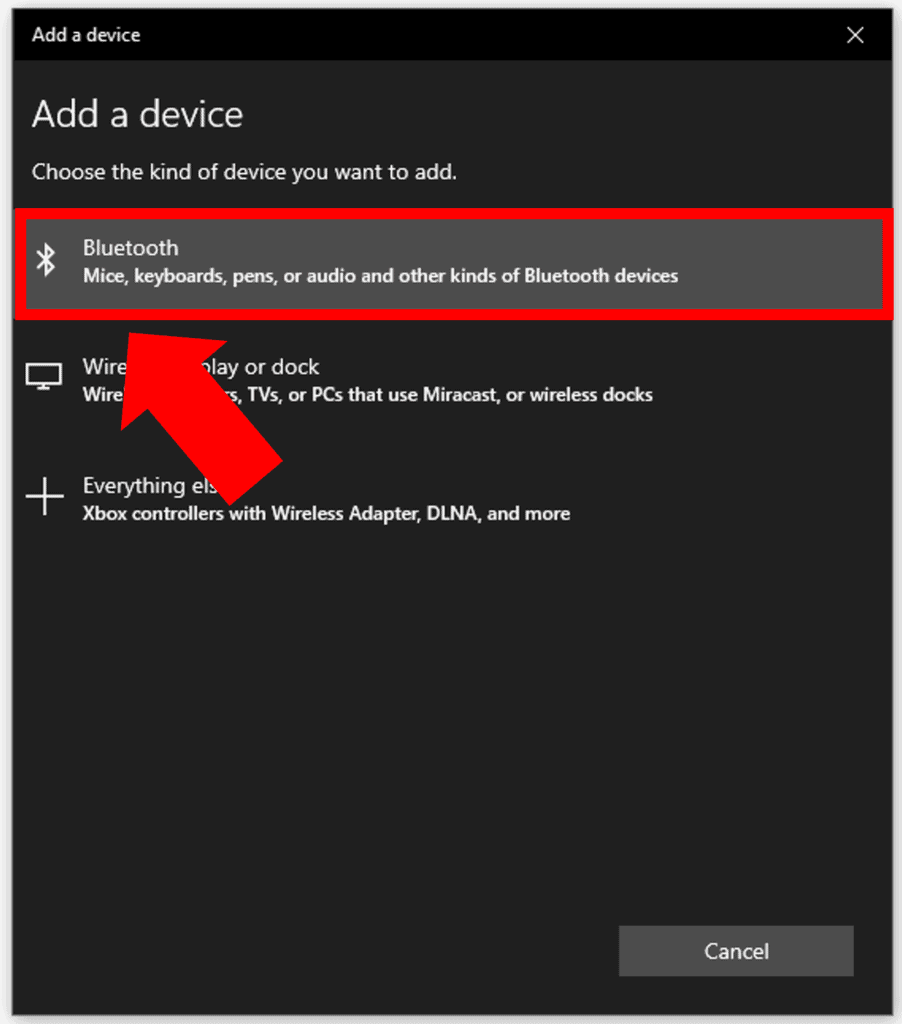
Your laptop’s Bluetooth signal will now start searching for any Bluetooth devices nearby.
Step 4: Pair Your AirPods With Your Laptop
To allow your Toshiba laptop to discover your AirPods, open the case and press and hold the small button on the back of the case for a few seconds.
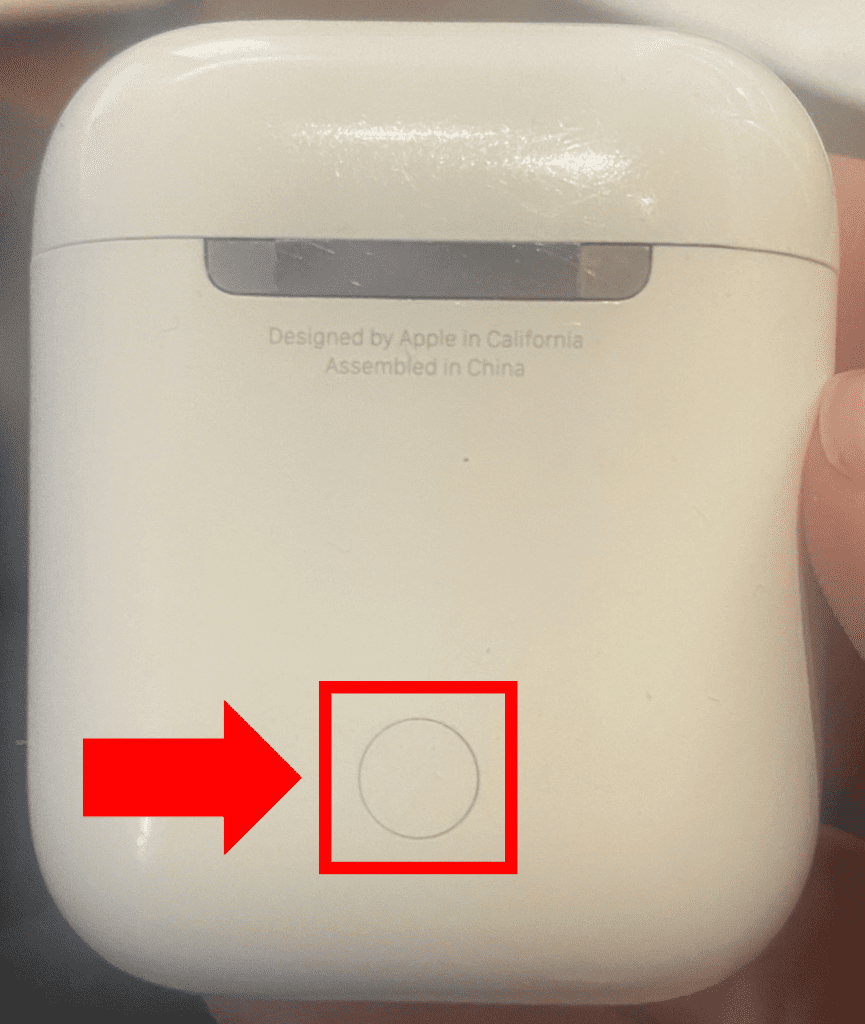
If you have AirPods generation 1, the light inside the case will start blinking white. On the other hand, if you have AirPods generation 2 or AirPods Pro, the light on the front of the case will start blinking white.
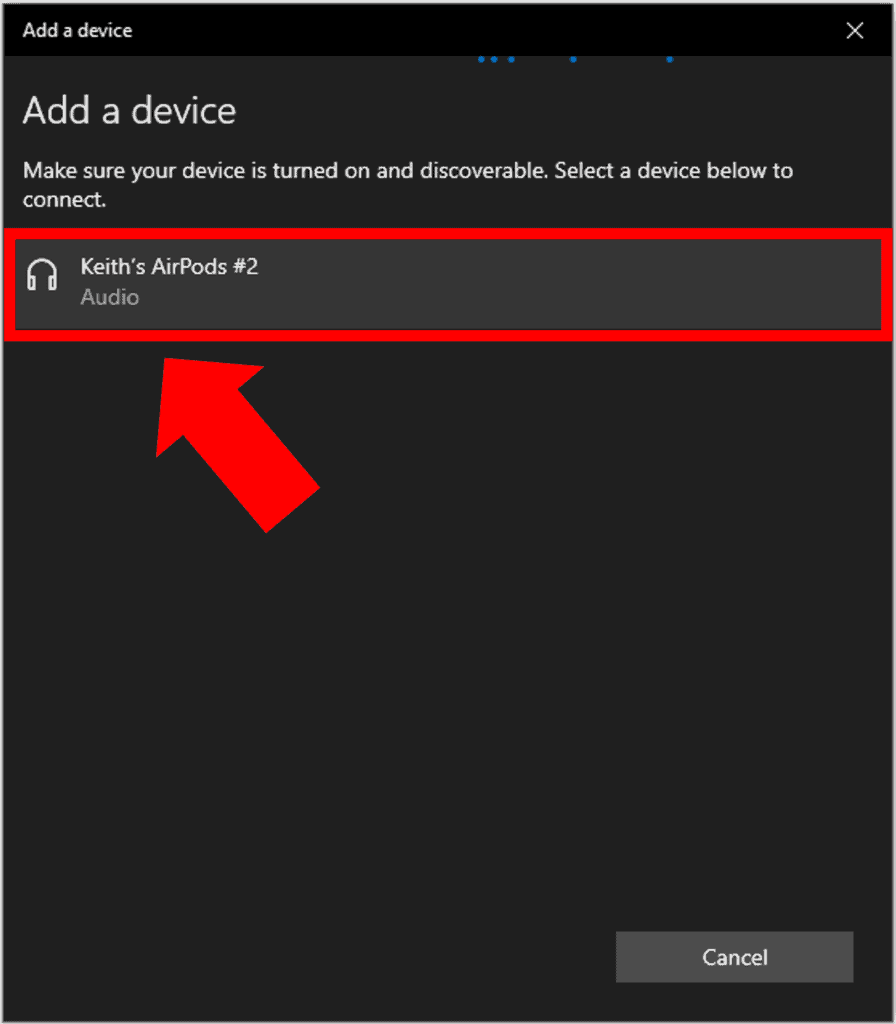
After about 10 seconds, you will see your AirPods appear in the device list. It is important to note that initially, your AirPods may appear under the name Headphones.
Usually, the name will then quickly change to the name of your AirPods as shown below. Click on your AirPods and select Connect.
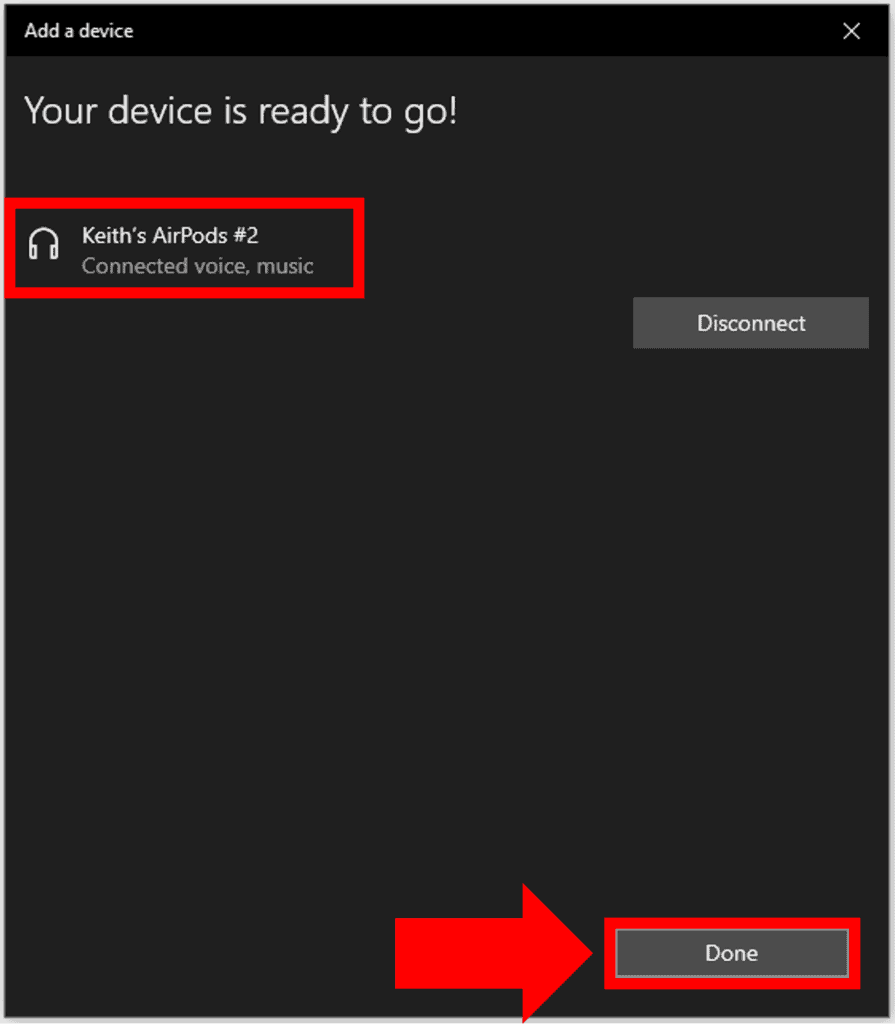
The window should now say Your device is ready to go! The AirPods should also say Connected voice, music. As a final step, simply click Done to connect the AirPods.
Congratulations – your AirPods are now connected to your Toshiba Laptop!
AirPods Not Connecting To Toshiba Laptop
Ok, so you’re now wondering how do I connect my AirPods to my Toshiba laptop if I have followed all of these steps and yet still I cannot get connected?
To fix AirPods not connecting to Toshiba laptop, first navigate to ‘Sound settings’ and under ‘Output’ change the device to ‘AirPods’. If the issue persists, run the Registry Editor as an administrator and add a new String Value file named ‘PnPCapabilities’ with Value data ‘24’ within the ‘HKEY_LOCAL_MACHINE’ folder ‘ControlSet001’.
In most cases, if you’ve performed the four steps above, and you find your Airpods not connecting to Toshiba laptop, simply updating your default sound output device usually does the trick.
If that does not solve the issue, there is a more involved process you can try that requires you to run the Registry Editor as an administrator.
Let’s review both of these steps in greater detail.
Step 1: Update Your Default Sound Settings
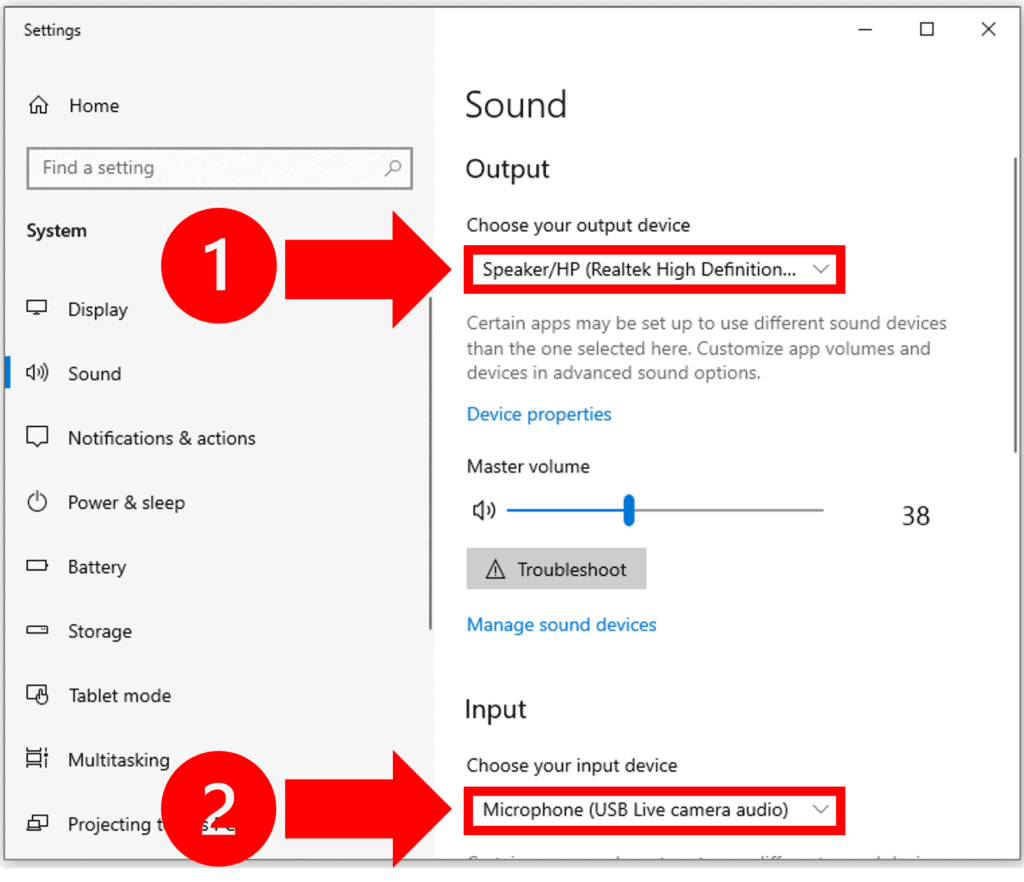
First, try is updating your default sound settings. To do so, type Sound settings into the search bar and select it from the pop up menu.
Under the Sound section, change the Output and Input device to AirPods.
Step 2: Run The Registry Editor As An Administrator
If updating the default output and input sound device does not solve the problem, you can also try a popular Registry Editor workaround that many Toshiba laptop users have reported worked for them.
First, type Registry Editor into the Windows search bar, right click on it in the pop up menu, and click Run as administrator and then Yes.
Then, from the file menu on the left hand side click HKEY_LOCAL_MACHINE > SYSTEM > ControlSet001 > Control > Class. Now, within the Class folder locate and right click on the folder that starts with e0cbf06c. Select New and then String Value.
Give this new String Value file the name PnPCapabilities. Then, double click on the file and enter 24 within the Value data field and select OK.
Finally, exit out of the Registry Editor and restart your Toshiba laptop.
That’s it! When your laptop reboots, try pairing your AirPods again. They should connect this time.
As this process is a bit more involved, you may wish to follow these same steps using the video below as an aid.
Conclusion
The ability to pair wireless headphones with your laptop in the work from home environment is a game changer. Here’s how to connect AirPods to Toshiba laptop:
- Click ‘Start’ > ‘Settings’ > ‘Devices’.
- Switch the ‘Bluetooth’ toggle button to ‘On’.
- Select ‘Add Bluetooth or other device’ and click ‘Bluetooth’.
- Open AirPods case, hold button on the back for several seconds and select AirPods from device list.
After following these steps, if your AirPods still won’t connect, double check your sound setting inputs and consider using the Registry Editor workaround. You can also visit Toshiba Consumer Laptop Support or call Toshiba Customer Service at 1 (800) 457-7777.
Still having issues? Try using the model number to lookup your specific Toshiba laptop manual for additional troubleshooting steps.
Additional Toshiba laptop troubleshooting support brought to you by The Flexible Worker Team:

Chelsea Ashbrook is a Senior Manager of Corporate Digital Experience at Genentech. Chelsea received her B.A. from the University of Connecticut and has spent the last 11 years working in the technology field.
