To fix the MSI monitor no signal problem, shut down and unplug the monitor and your PC. After 60 seconds, first turn on the monitor, followed by your PC. If the error message remains, ensure the input and display resolution settings are correct and all cables are undamaged and secure.
While these fixes will solve the problem for 80% or more of users, there are a few additional troubleshooting steps you can attempt.
By following these steps in order, you will be able to quickly isolate whether it is your monitor or your computer causing the error.
It is therefore best to attempt each fix in the order outlined below!
Reboot Monitor And PC
I get it, believe me. There are few things as annoying as someone asking if you tried power cycling your device when it doesn’t work.
It’s the equivalent of some asking you “where did you see it last?” when you announce that you lost something. Having said that, many users have indicated that after trying everything else, this straight forward fix worked for them.
So, we’re going to get this step out of the way early.
Start by turning off and unplugging the monitor first, followed by the PC. Then, after about a minute, plug them both back in and boot up the display first. Then, turn on your PC.
While it may sound trivial, the order of events matters. So once again, start by turning on the monitor FIRST, then the PC SECOND.
If you are still encountering the error message, proceed to the next step.
Select Correct Input
One of the leading causes for the ‘no input’ error messages is having the wrong input setting selected.
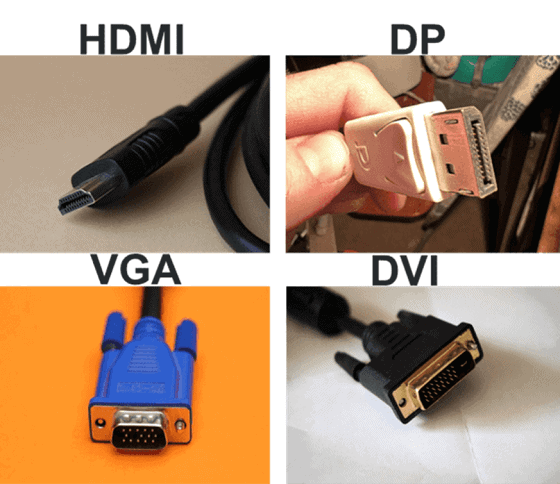
The vast majority of computer monitors support HDMI, DisplayPort (DP), VGA and DVI display cables. So take a moment and use the graphic below to identify which display cord you are using.
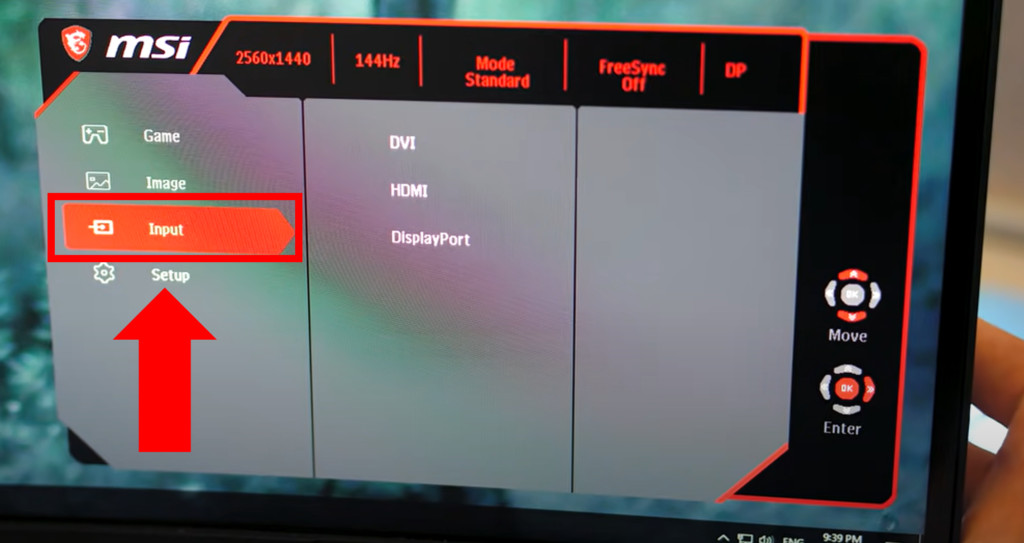
Next, press the Source/ Input button. On most monitors, it will be located in the middle or right-hand side of the screen. Either on backside of the display or towards the bottom.
Notably, not every device has a dedicated Source/ Input button. Some MSI models require you to first use the Menu button, and then navigate to Input.
Examine Display Cables
Once you feel certain that your display has the correct input selected, it’s time to examine your display cable connections.
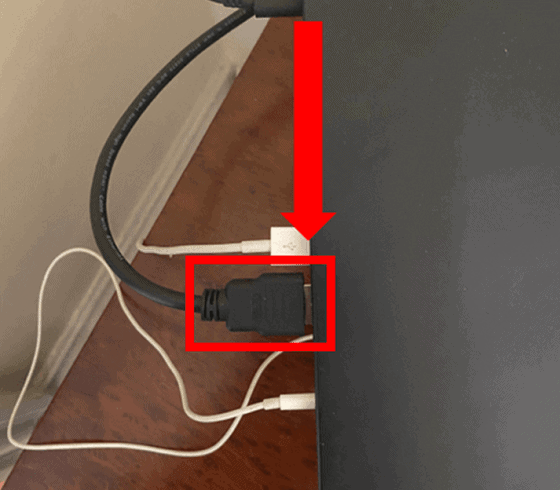
Kick things off by making sure the connection is firm on both ends.
Furthermore, a break in connection might not be obvious upon visual inspection! In fact, that tiny gap in the image below was enough to trigger the error.
Next, give the cable itself a closer review. See if you can identify any obvious signs of visible damage.
Finally, see if swapping out your input cable for a new one fixes the problem.
If you happen to be using an HDMI cable, try swapping it out for a DP, DVI or VGA cable and vice versa. After making the substitution, don’t forget to adjust the input settings!
The benefit of swapping cables is you can easily determine if the cable itself is the culprit.
Boot In Safe Mode And Adjust Resolution
It is entirely possible that your PC’s graphic card is set on a display resolution that is outside the range of what your monitor can handle.
Should this be the case, you may encounter your monitor not turning on at all. To fix this, go ahead and reboot your computer using Safe Mode.
Once in Safe Mode, your PC will automatically use a display resolution that your display is capable of supporting. Neat workaround, huh?
From here, all you have to do is use this opportunity to go into your computer’s resolution settings and select a lower standard display resolution.
If you don’t know what the max resolution is that your monitor can display, you have two options:
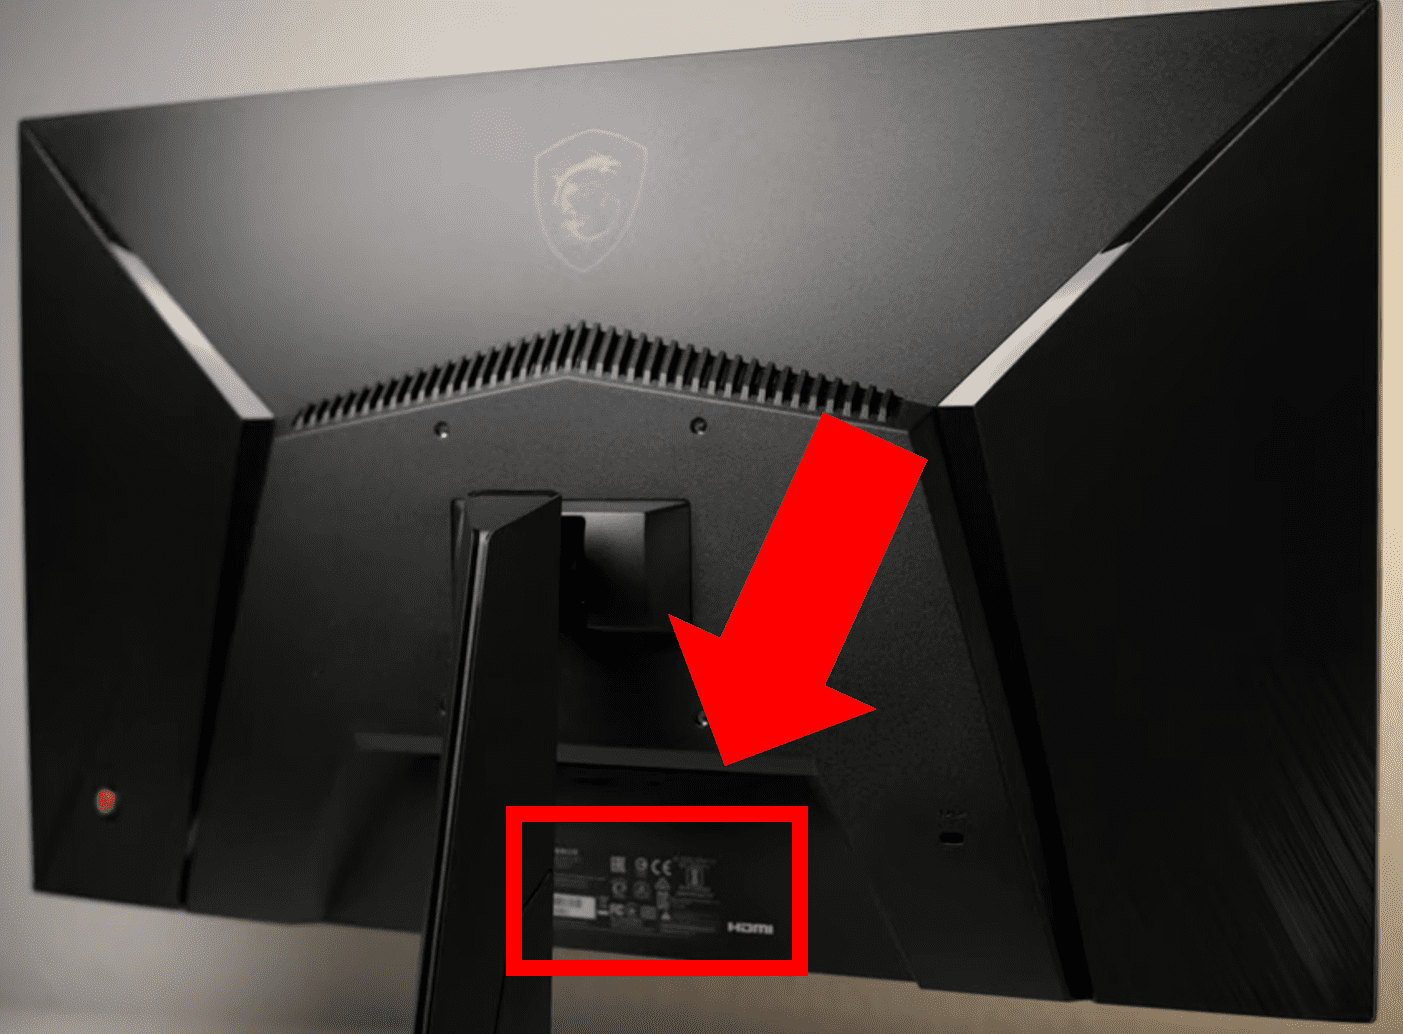
- Locate the model number on the backside of your display and look it up in the MSI monitor user manual lookup.
- Starting on the lowest resolution setting, increase the resolution range incrementally. Allow at least 30 seconds between each range and see whether the error message pops up.
Use Monitor With A Different Device
At this stage, we are at the end of the monitor related troubleshooting steps. To confirm whether or not your monitor is causing the problem, try using your monitor with another device.
In the event your monitor works, then you know your display is working properly and your computer/ hardware is the culprit.
Unfortunately, given the nature of PC driven issues, many of the related troubleshooting steps require you to open up your device.
For folks working on a company provided PC, it is likely best to leave these fixes to your company’s IT team. Even if your computer is personally owned, you may still wish to bring it in to a local computer repair shop.
If you do plan to move forward, make sure you ground yourself to avoid destroying your computer with electrostatic charge.
Ok – disclaimers are now out of the way!
Inspect Display Cable And Graphic Card Connection
The vast majority of desktop computer have an on-board graphics unit with corresponding connections on the back of your computer.
If you have a desktop PC with this configuration, check that your monitor cable is connected straight into the graphic card, as opposed to the motherboard.
You’d be surprised how many users accidentally connect their display cable to the motherboard!
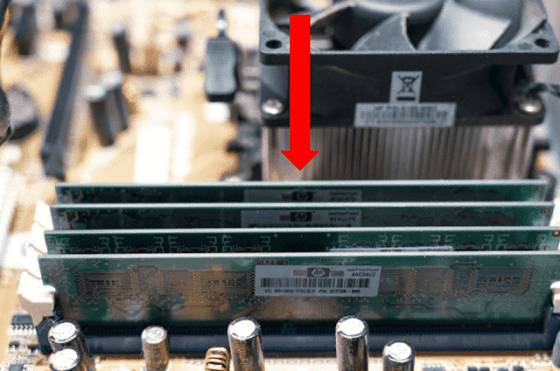
Shuffle RAM Sticks
It is possible your RAM (Random Access Memory) sticks are not making a proper connection.
To fix this, first make sure your computer is powered OFF and the power cord is removed from the outlet.
Next, properly ground yourself, open your PC unit and fully remove each of your RAM sticks.
Lastly, reorder the sicks and reinsert them back into their respective RAM seats.
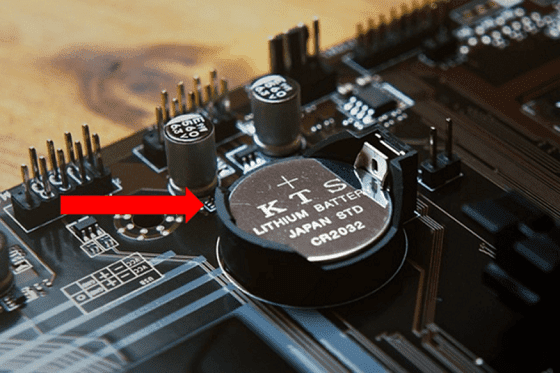
Reset CMOS/BIOS
Resetting your BIOS sets it back to its previous configurations and can often fix a lot of different issues.
Once again make sure your PC is OFF, all cables are disconnected, and you are properly grounded.
Then, just remove the CMOS battery from the motherboard. For good measure, hold down the power button to drain all excess remaining power.
After about 60 seconds, reinsert the CMOS battery back into your computer.
Finally, Reboot your computer and check to see if your display is working.
Conclusion
If you encounter the MSI monitor no signal message, use these 8 steps to repair your display immediately:
- Reboot monitor and PC
- Select correct input
- Examine display cables
- Boot in Safe Mode and adjust resolution
- Use monitor with a different device
- Inspect display cable and graphic card connection
- Shuffle RAM sticks
- Reset CMOS/BIOS
If you’re still having issues, try contacting MSI Customer Service at 1-888-447-6564 or submit a formal Monitor Technical Support request.
You can also use your model number to check the status of your MSI warranty.
Let me know which fix worked for you in the comments section below!

Chelsea Ashbrook is a Senior Manager of Corporate Digital Experience at Genentech. Chelsea received her B.A. from the University of Connecticut and has spent the last 11 years working in the technology field.
