With most of the world now fully working from home, millions of entrepreneurs including myself have picked up a side hustle. If your side gig is anything like mine, you require a quick and reliable label printer to ship products directly out of your home.
I personally think the Rollo Printer is a great option, but I have encountered a few problems with it over the years. One problem I have come across on multiple occasions is my device not printing at all.
If you encounter your Rollo Printer not printing, confirm the device is On, inspect the power and USB cable connections, and confirm the correct active printer has been selected. If the issue persists, inspect the label size, and run automatic label identification. Lastly, roll back the latest Windows update and clean your printer.
Let’s run through each of these troubleshooting steps in greater detail.
Step 1: Make Sure Rollo Printer Is Actually On
Being asked “did you try turning it on” when your printer won’t work can feel insulting. I know. But it’s important to quickly get this step out of the way.
The Rollo has a power switch located on the backside of the device. Many times users will only set this switch to “On” once, and rarely if every need to check it again.
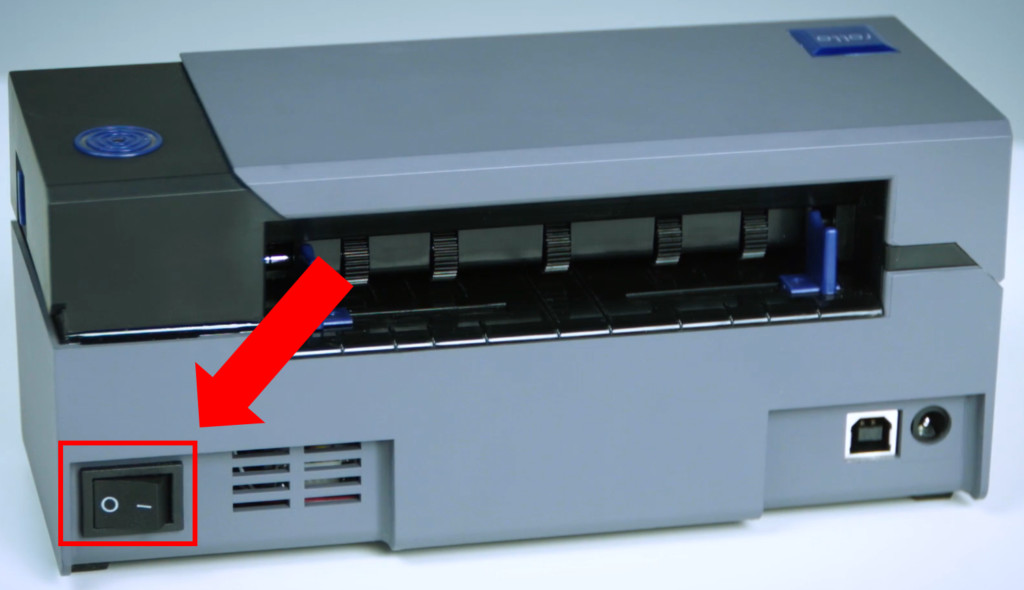
That’s why when it stops printing, this most obvious fix tends to get overlooked.
I recommend setting the power button to Off and back On a few times before leaving it in the On position.
Step 2: Check That Power Cable Is Firmly Connected
Next, make sure that the power cable is firmly connected on both ends.
It is possible that you are encountering this issue because the power cord is not securely inserted into the power socket.
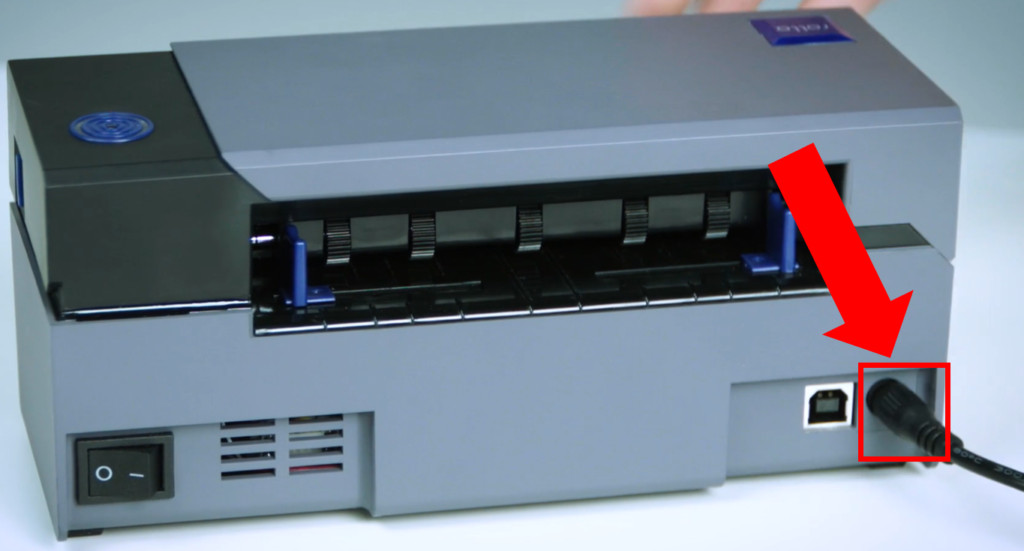
So be sure to check the connection on the back of your printer, between the power cord and the black power box and the power outlet on the wall.
At the same time, examine your power cord for any obvious damage.
Step 3: Ensure USB Cable Connection Is Secure
At this stage, you feel confident that the the power switch is in the correct position and the power cable is secure on all ends. But still, no luck.
It is important to understand that an error can also be caused due to a loose USB cable.
Make sure there is a secure connection made with the USB cable on both ends.
This step of course will not apply to folks with the new WiFi Rollo Printer. You can read on below for WiFi specific troubleshooting support.
Step 4: Select The Correct Active Printer Name
Ok, we’ve gone through some of the basics. Now let’s get into some more specific troubleshooting steps.
For some of you, your printer has been working just fine up until recently. Now you are observing a green light and labels are not advancing when you try to print.
In most cases this is due to the fact that you have changed the USB port to which Rollo was previously connected to your PC.
Ultimately, every time you plug your Rollo into a new USB port, Windows registers it as a new printer. For this reason, when you attempt to print, you are simply adding this request to the print queue of the previously registered version.
There are two very simple options to fix this:
- Simply plug your printer into the original USB port you had been previously using.
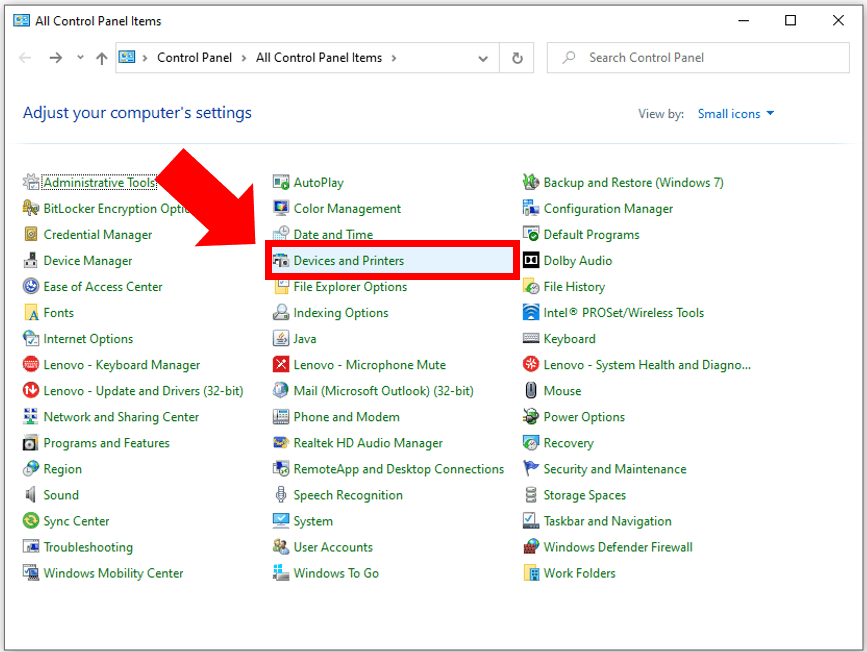
- If you wish to keep your printer in the new USB port, go to your Control Panel and select Devices and Printers. Here you will be able to identify and select the “active” version.
Wondering why your PC is making multiple versions of your Rollo Printer in the first place? As it turns out it’s so that you can have more than one printer running from the same computer, each with customized label options enabled.
Step 5: Ensure You Have The Correct Label Size
The Rollo Printer supports label widths from 4cm (1.57″) to 10.4cm (4.1″).
If you are attempting to send a shorter or longer label to Rollo than it can handle, this could be the issue.
To check your label size in Windows:
- In the Control Panel select Devices and Printers. Then, right click on Rollo, select Printer Preferences and click the Advanced button. Most 4 x 6 labels are 100mm x 150mm.
To check your label size in Mac:
- Simply select 100mm x 150mm or 4″ x 6” size in the print window.
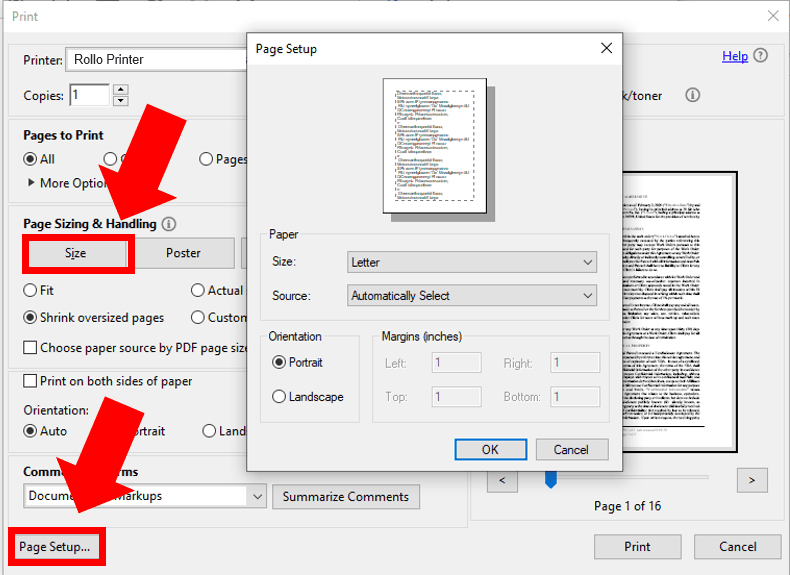
It is also important to check the printer settings of the application you are using. Some applications like Adobe Reader for example may be over-riding your label settings.
Double check Page Setup and Paper Size in the print window to make sure the in-app size settings are correct.
Step 6: Run The Automatic Label Identification
Is your device flashing a red light? Or perhaps your printer is skipping labels or feeding labels through continuously without printing?
If so, your issue could be due to Rollo needing to “re-learn” your label.
First, you will need to ensure you have multiple labels ready to be fed into your printer.
A common mistake is loading the labels upside down. The part of the label that you peel off should face the ceiling when it comes out of your device. Be sure to load your labels properly.
Next, press and hold the circular button on the top of the printer. When you hear a single beep, let go.
The automatic label identification process will now start. The labels will slide in and out and the device will analyze their size and other features.
Check out the video below starting at the 1:00 minute mark to see this process in action.
If, for some reason the identification process does not start, simply turn the printer off and then back on again using the power switch on the back. You can also try disconnecting the USB cable prior to starting the process.
Once the test is complete, re-connect the USB cable to Rollo and try your print.
NOTE: You can press and hold the top circular button until you hear two beeps to print a test page.
Step 7: Roll Back Your Latest Windows Update
Numerous users have been reporting that once their computer updated to Windows 11, their printer no longer works. Furthermore, Rollo support has not been able to solve the issue.
Longer term, the issue will need to be solved with a Rollo Driver update that has not yet been released at the time of this writing (24-Dec-2022).
In fact, Rollo’s latest install update came on 19-Mar-2020. Go to Rollo setup support to see if any new drivers get released moving forward.
In the meantime, unfortunately it seems the only work around here is to roll back to Windows 10.
To roll back to Windows 10, Open Settings, select System and click on the Recovery page. On the Recovery page under the Recovery options section click Go back on the Previous version of Windows setting.
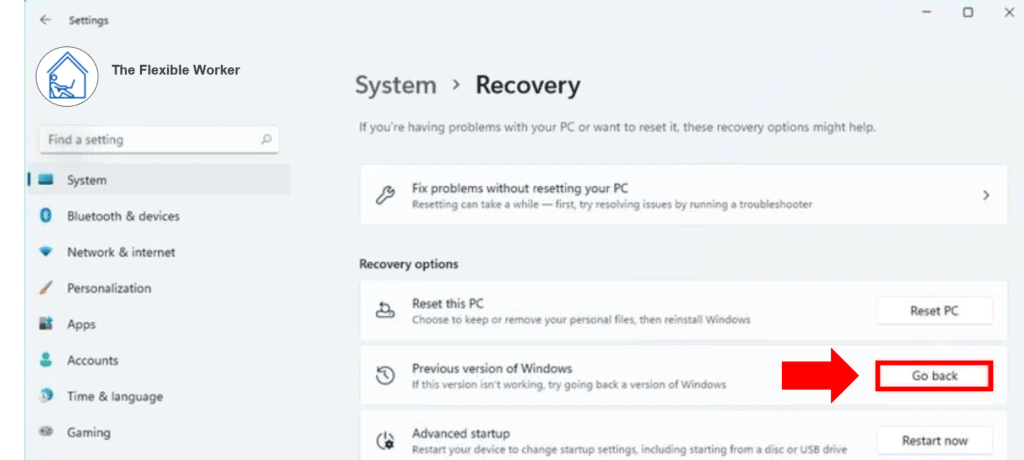
Then just follow the remaining steps as prompted and on the final window select Go back to earlier build.
If your printer is still now working after rolling Windows back, uninstall and then reinstall the driver.
Step 8: Clean Your Rollo Printer
Over time dust will start to build up on the inside of your Rollo Printer.
In same cases the blockage becomes so bad that the ink is not able to make clean contact with the labels.
To fix this, first turn off and unplug your printer. Then, open up your device and apply some isopropyl alcohol to the printer head. Clean it carefully and thoroughly with a QuTip.
After a thorough cleaning, give your printer a test run. It should be fixed!
Wireless Rollo Printer Not Connecting
Rollo also recently released the Rollo Wireless Printer in November 2021. Since then a number of users have been reporting WiFi connection issues.
I did some digging and I compiled the top listed troubleshooting steps I have been able to find to date:
- Restart the PC
- Restart the router
- Disable the firewall
- Uninstall and reinstall the Rollo Printer Driver
- Manually add the Rollo Printer by using the IPv4 address
If these steps do not get your wireless unit connected to the Wifi, there are two temporary workarounds:
- Use the USB cable (not ideal – after all you bought the wireless version for a reason!)
- Use your cellphone to start a hotspot and connect both your PC and your printer to the hotspot instead of your normal WiFi.
Final Thoughts
If your Rollo Printer won’t print, try these 8 troubleshooting steps to get your printer back up and running today:
- Make sure power switch is correctly set to “On“
- Check that power cable is firmly connected
- Ensure USB cable connection is secure
- Select correct active printer name
- Ensure you have the correct label size
- Run automatic label identification
- Roll back latest Windows Update
- Clean the device
Unfortunately, these fixes won’t work for everyone. If this is the case, Rollo has a one year warranty policy from the date of purchase. You can also check out additional Rollo warranty terms and conditions.
If you are still having issues despite attempting each of these troubleshooting steps, you can submit a ticket to Rollo customer support.
Related Reading: Dymo printer printing blank labels

Chelsea Ashbrook is a Senior Manager of Corporate Digital Experience at Genentech. Chelsea received her B.A. from the University of Connecticut and has spent the last 11 years working in the technology field.
