Samsung has a great lineup of monitors, but they have been known to come with a common problems. One such issue reported by many users is encountering their monitor not detecting the HDMI cable.
To fix the Samsung monitor not detecting HDMI problem, turn off and unplug the monitor and computer. After 30 seconds, power on the monitor first, followed by your computer. If the issue persists, ensure the correct input and display resolution settings are selected and all cables are secure and undamaged.
There are 7 common troubleshooting steps you should try.
Some of these fixes involve troubleshooting the display directly, while others involve troubleshooting your PC.
I strongly recommend you follow these steps in order. We will start with the most common fixes and then work our way towards less common, more involved troubleshooting steps.
Troubleshooting The Display
Step 1: Unplug And Reboot The Monitor And PC
Before trying anything else, turn OFF and unplug your monitor and your computer. After 30 seconds plug everything back in and turn ON the monitor FIRST, followed by the computer SECOND.
I know, I know. You didn’t come here to be asked “Did you try turning it off and turning it back on again?”
Humor me. The sequence is IMPORTANT – so again, turn on the monitor FIRST, then computer SECOND.
Countless users have indicated that after trying everything else, this simple solution worked for them.
Still encountering the error? No need to worry just yet – advance to step 2.
Step 2: Adjust The Monitor Input Setting
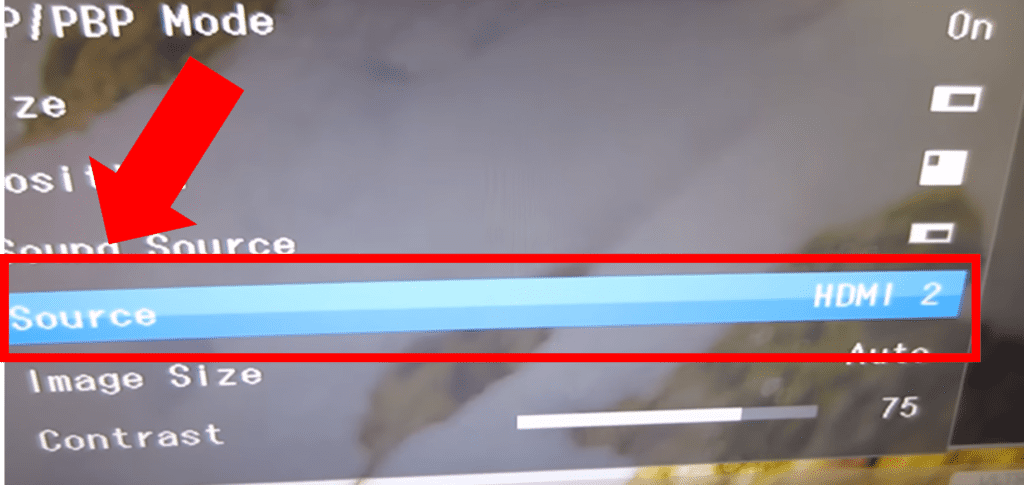
It is also important to make sure your monitor is set to the correct Input.
To do this, you need to first know what kind of input cable you are using.
The Source/ Input button will either be located in the middle or right-hand side of your monitor. It will either be on the backside of the display or towards the bottom.
For some models, you will first need to use the Menu button and then navigate to Input.

Once you press the Input and/or Menu button, options will appear on your monitor. Toggle the input options until you identify “HDMI”.
Many times the issue is due to simply being on HDMI 1 when you should be on HDMI 2 or vice versa. It is therefore important to toggle bettering both inputs.
Step 3: Inspect The Display Cables
Now that we are sure your monitor is set to the correct Input, let’s check your display cable connections.
First and foremost, make sure that the connection is firm on both ends.
A loose cable can cause a whole host of issues, from screen flickering, no signal errors, and more.
An error can be caused even if the connection is slightly broken.
That tiny space you see in the image below between the HDMI and the HDMI port in my laptop?
You guessed it – that was enough to cause the error.

Next, make sure there are no issues or obstructions with the cable itself. Check for any signs of visible damage.
Finally, try using a different input cable than the HDMI cable you are currently using.
Samsung monitors most commonly support 4 different kinds of cables: HDMI, DisplayPort (DP), DVI and VGA. Identify which alternative cable you have using the image below.

When you try a new cable, be sure to follow the process in step 1 again and adjust the display Input accordingly.
If using a different display cable solves the issue, a faulty display cable was likely the culprit.
Step 4: Adjust The Monitor Resolution Settings
Your monitor has a range of possible display resolutions that it can relay back to your PC.
It is possible that your computer’s graphic card is currently set on a display resolution that is higher than what your monitor can handle.
This can sometimes even lead to your monitor not turning on all together. To fix this, reboot your computer using Safe Mode.
In Safe Mode your computer will automatically use a lower display resolution than normal use.
This will allow you the opportunity to go into your computer’s resolution settings and select a lower standard display resolution.
Not sure what resolution your monitor can support? You have two options:
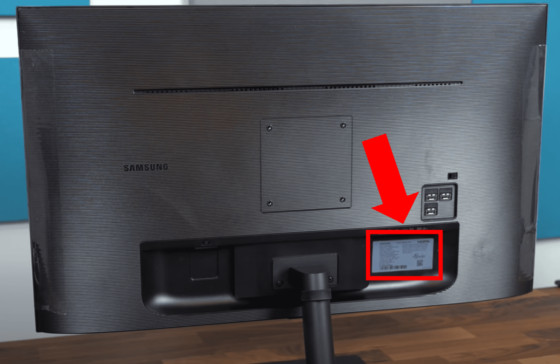
- Find your Samsung model number on the back of your monitor and look it up in the Samsung user manual look up.

- Play around using some trial-and-error. Incrementally increase your resolution. Wait approximately 30 seconds between each update and see whether the error message pops up.
Troubleshooting Your PC
We are now at the end of the most common fixes if your monitor is the source of the problem.
To confirm that your monitor is the issue, try using your monitor with another device.
This can be another laptop, desktop computer, game console, etc. If your monitor display works, then you know your monitor is working properly and your computer/ hardware is the culprit.
First, a few disclaimers. Steps 6 and 7 below require you to open and manipulate your laptop or desktop computer.
If your hardware is company property, it is best to leave these steps to your company’s IT support.
If your computer/ hardware is personally owned, you may still wish to bring it in to a local computer repair shop.
However, if you do plan to proceed make sure you have done proper research. At a minimum you should know how to properly ground yourself to avoid destroying your computer with electrostatic charge.
Step 5: Ensure The Display Cable Is Plugged Into Graphic Card And Not The Motherboard
Nearly all desktop PC’s have an on-board graphics unit with corresponding connections on the back of your computer.
If this applies to you, be sure that your monitor cable is connected directly into the graphic card and NOT the motherboard.
Often times with a desktop PC it can be as simple as that.
Step 6: Remove, Reorder, and Reseat The RAM Sticks
It is also possible your RAM (Random Access Memory) sticks are not making a proper connection.
To fix this, first make sure your computer is powered OFF and the power cord is removed from the outlet.
Next, properly ground yourself, open your PC unit and fully remove each of your RAM sticks.
Lastly, reorder the sicks and reinsert them back into their respective RAM seats.

Step 7: Reset CMOS/BIOS
CMOS stands for Complementary Metal Oxide Semiconductor.
The CMOS battery in your laptop or computer powers the BIOS firmware. BIOS stands for “Basic Input/Output System” and it manages the essential functions of your computer.
Resetting your BIOS sets it back to its previous configurations and can often fix a lot of different issues.
Once again make sure your computer is powered OFF, the power cord is removed, and you are properly grounded.
Next, remove the CMOS battery from the motherboard. Then, hold down the power button to drain all excess remaining power.
After about a minute, reinsert the CMOS battery back into your PC.
Finally, Reboot your computer and check to see if your display is working.

Conclusion
To fix the Samsung monitor not detecting HDMI problem, turn off and unplug the monitor and computer. After 30 seconds, power on the monitor first, followed by your computer. If the issue persists, ensure the correct input and display resolution settings are selected and all cables are secure and undamaged.
Try one of these 7 fixes and be back up and running in no time:
- Unplug and reboot monitor and PC
- Adjust monitor to correct input
- Inspect display cables
- Check monitor resolution settings
- Make sure input cable is plugged into graphic card
- Remove, reorder, and reinsert RAM sticks
- Reset CMOS/BIOS
If you’ve tried all of these fixes, and you’re still having issues with your Samsung monitor you can also contact Samsung Customer Service at 1 (800) 726-7864
You can also use your monitor model number to check the status of your Samsung warranty.

Chelsea Ashbrook is a Senior Manager of Corporate Digital Experience at Genentech. Chelsea received her B.A. from the University of Connecticut and has spent the last 11 years working in the technology field.

