Last week I went to power up my Toshiba laptop and annoyingly it would not boot.
Going even a day without my laptop was not an option. So, I did a deep dive researching the top troubleshooting steps and tried them all.
Here’s what I learned…
If your Toshiba laptop won’t turn on, it is mostly likely due to static build up. To fix it, you’ll need to perform a ‘power drain’. Turn the device off, unplug it and remove the battery. Then hold down the power button for 60 seconds.
Once you plug it back in and press the power button again it should boot up like normal.
While this fix will work for the vast majority of users, there are always exceptions. In total, there are 7 common fixes you try at home before heading to a local repair shop.
I’ve given quite a bit of thought to the troubleshooting order outlined below to ensure you attempt the most common, lowest effort fixes first. For this reason, it’s in your best interest to start with step 1 and sequentially advance your way through step 7 as needed.
Let’s get started!
Step 1: Perform A Power Drain
This step is much easier if your specific model has an external battery. This is because you will not need to go through the extra effort of disassembling the laptop case. Lucky you!
All you need to do is unplug and turn off the device and then unclip the battery. After pressing the power button for 60 seconds to drain any residual power, reinsert the battery and turn the laptop back on.
If you happen to have an internal battery, there are a few extra steps you need to follow. Let’s quickly walk through them together.
Remove Bottom Base
Whenever you are planning to handle electronic internals, you should first ground yourself to avoid accidently frying the motherboard.
Once again, turn off your laptop and unplug it. Then turn it over and remove all of the screws.
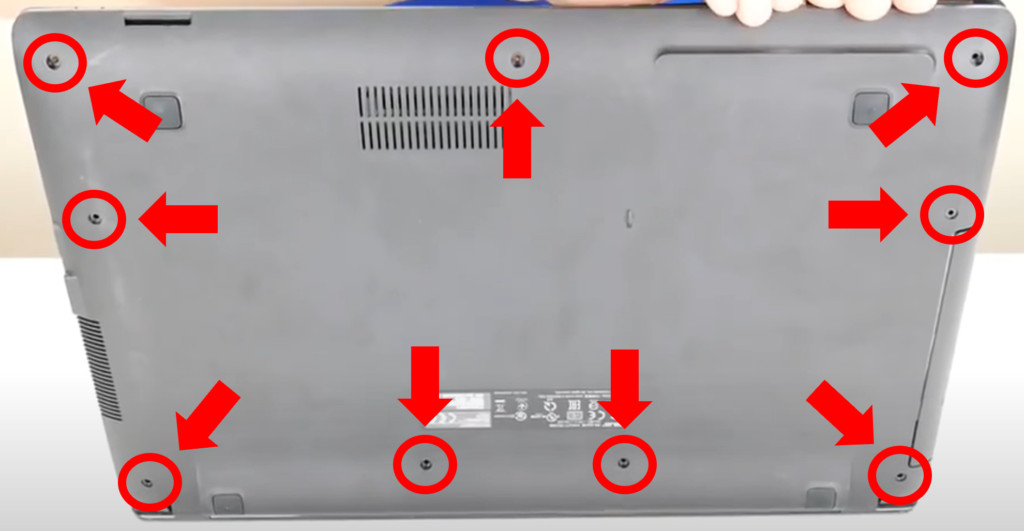
Believe it or not, sometimes finding all the screws can be a bit challenging. Don’t hesitate to use the Toshiba manual lookup for guidance if you are struggling.
With all the screws taken out, slowly remove the bottom base. If it’s being stubborn, try using a credit card or any plastic (AVOID metal) tool with a flat edge to run along the sides until it opens up.
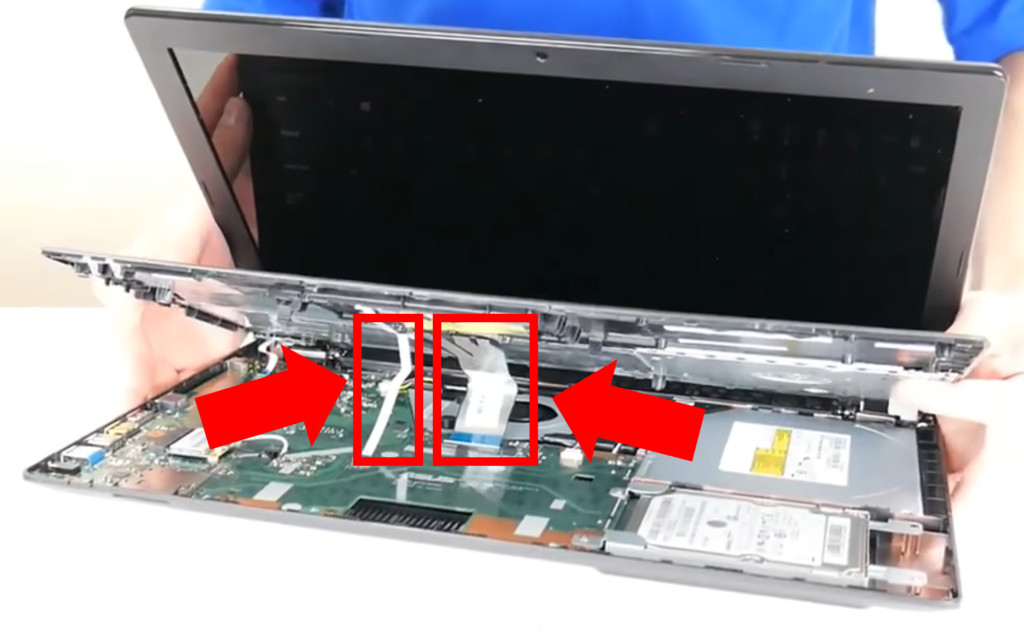
At this stage, you’ll notice that either the bottom case will come off smoothly, or the palmrest will begin to separate. If the palmrest separates, do not simply pull it off!
There are a number of connecting ribbon cables that you will need to unclip first.
Remove Battery
With the case now removed, you should have clear access to the battery. In most cases, you’ll be able to fully remove it by just lifting it up.
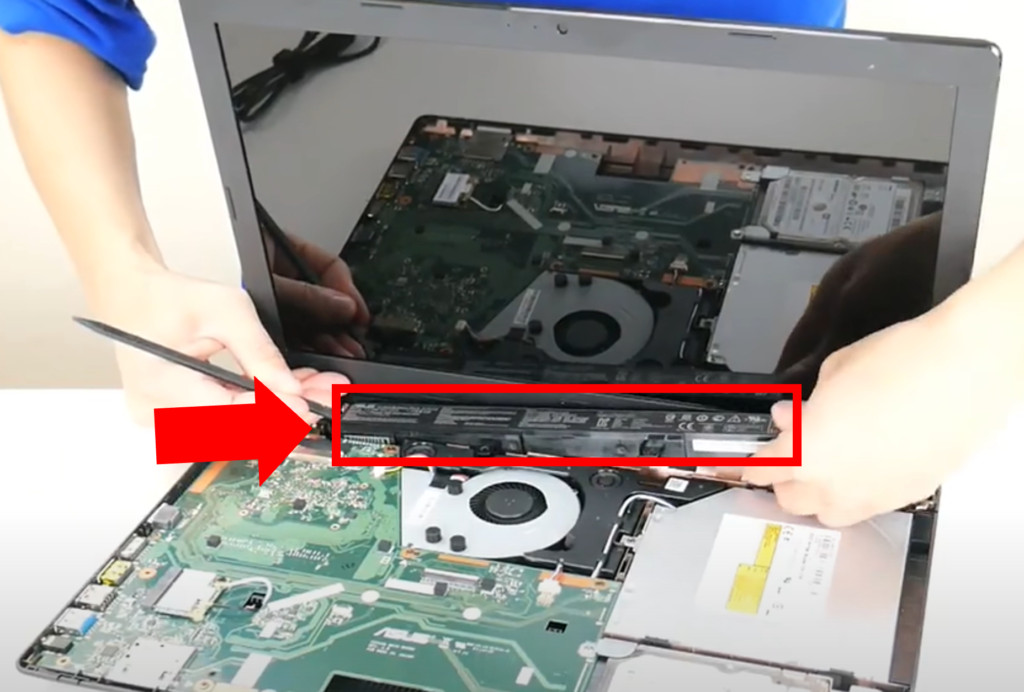
In the event you notice the battery is secured by a screw or clip, unscrew and/or detach it first prior to removal.
Long-press Power Button
Now that the battery is out you can turn the laptop over and open up the screen.
With the laptop still turned off and unplugged, press and hold the power button for 60 seconds.
If the palmrest came off during the process, first reattach your power button by connecting the ribbon cable from the keyboard case to the motherboard.
While you are long-pressing the power button, it will appear nothing is happening. That’s ok! Rest assured, any excess power is being flushed out of the laptop.
Reassemble And Reboot
Finally, piece your laptop back together by performing the steps above in reverse order. Plug in and boot up! Your laptop should be functioning properly now.
If you notice this issue keeps popping up, a faulty power adaptor, battery, or surge protector could be causing static build up to reoccur. In that case, the only thing to do is replace them.
Step 2: Test The Charger
For users who don’t find success following a power drain, the culprit is almost always a bad battery or charger. Let’s troubleshoot them both to see if we can determine which one is causing the problem.
This time after performing a power drain, attempt to turn the laptop on with JUST the battery (i.e. do not plug the power cable back in).
Amazingly, your laptop can automatically prevent itself from powering up so that a faulty charger doesn’t permanently ruin the motherboard.
If it does turn on, that tells us that both the laptop and battery are working just fine!
Unfortunately, this also means that the charger is likely no good and needs to be replaced.
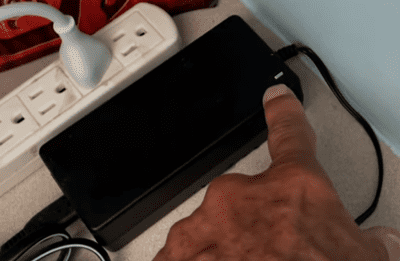
Try swapping out the charger for a spare or go ahead and purchase a new one.
Step 3: Test The Battery
Still no luck?
Perform another power drain and this time DO NOT reinsert the battery. Instead, only plug the charger back in.
If the laptop turns on now, we’ve discovered that a bad battery was causing the problem all along.
You’ll need to purchase a new one to get your laptop fired back up.
Step 4: Inspect RAM Sticks
Ok, moving right along.
Damaged Random Access Memory (RAM) sticks can prevent proper motherboard communication which can also result in your laptop not turning on.
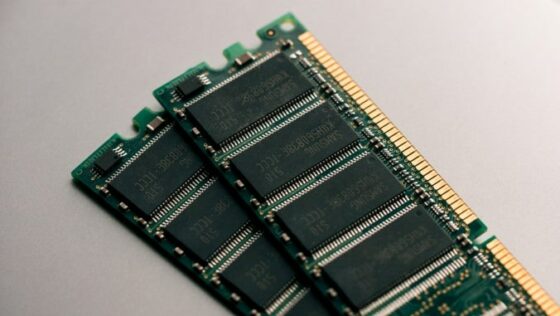
Common reasons for RAM failure:
- Unsecure/ loose connection
- Thermal damage
- Extreme voltage levels
- Improper user handling leading to structural damage
Reinsert RAM Sticks
To quickly test if a loose connection is the cause, turn off and unplug your device. For some models, you will also want to pop out our external battery so that you can gain access to the RAM area.
Remove any screws that hold the RAM compartment in place and then fully remove the RAM stick(s).
Finally, reinsert the stick(s) firmly into their respective seats to ensure a proper connection.
If your model has more than one RAM stick, be sure to also reorder them. You can also try rebooting your laptop after reinserting one stick at a time to determine which one is damaged.
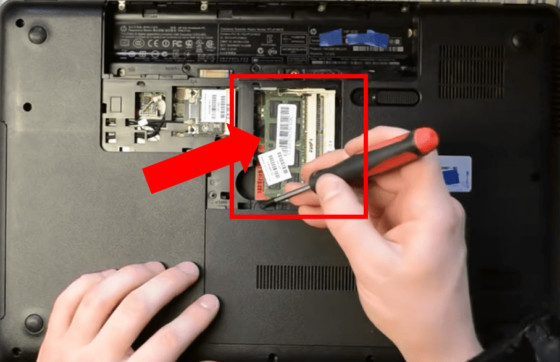
Now reassemble your laptop and attempt to start it up.
Run A Windows Memory Diagnostic Test
Even if the problem is resolved, I recommend you check the health of your newly reseated RAM sticks by running a Windows Memory Diagnostic Tool.
To run the test, type Windows Memory Diagnostic Tool into your search bar and click on it. Next, select Restart now and check for problems.
Once your laptop has restarted, a diagnostic report will appear.
If no issues are uncovered then you are all set and no further action is needed.
If however, there are faults discovered you may need to purchase a new RAM stick.
Step 5: Reinsert CMOS Battery
A system board failure is another possible culprit.
More specifically, the issue may be located in the Embedded Controller, which may be timing out waiting for the BIOS to return from system board initialization (also know as “end of POST”).
While this error may sound complex, you can easily fix it by removing CMOS battery from the motherboard.
With the laptop off and unplugged, disassemble the case and remove the CMOS battery from the motherboard. Then, hold down the power button for 60 seconds.
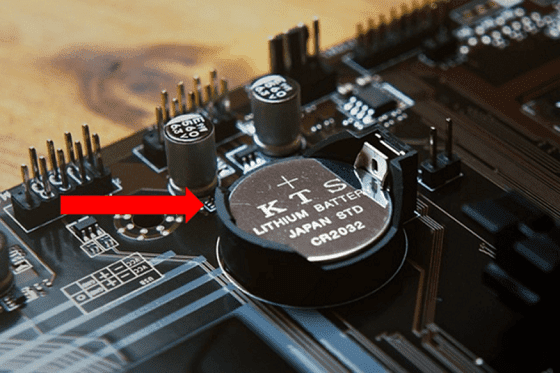
Now wait about 15 to 20 minutes before reinserting the battery.
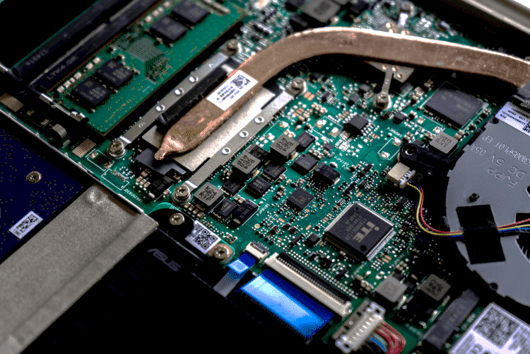
Step 6: Clean Or Replace Fan
While less common, there’s a chance your CPU or GPU is overheating.
My laptop was constantly making a humming sound because the fan was running a maximum speed almost all hours of the day. This was an obvious sign that the internal motherboard was getting to hot!
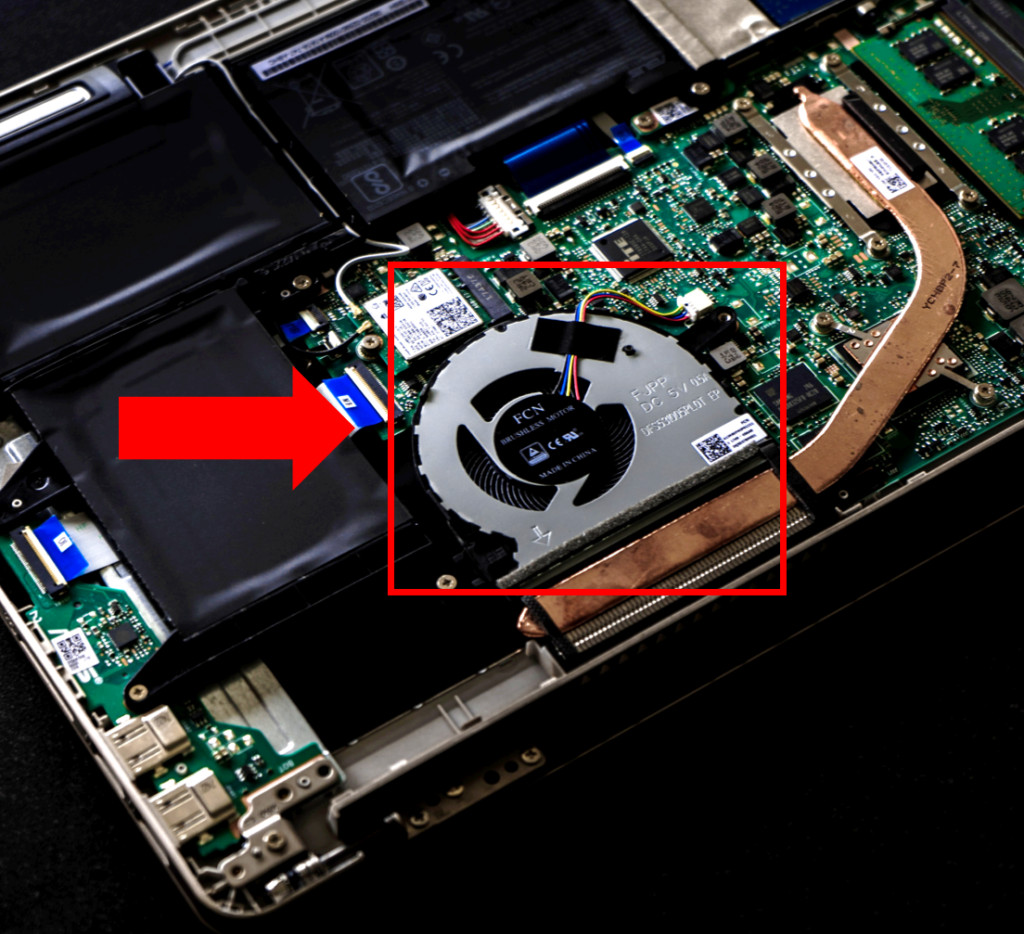
Perhaps unsurprisingly, the fastest way to resolve an overheating issue is to fix your laptop’s internal cooling.
Over time, quite a bit of debris and dust can build up on your laptop fan. When this happens, it slows down and fails to properly cool your device.
Follow the previously detailed steps to remove the laptop case. Then, with a cotton swab and some isopropyl alcohol, carefully clean the cooling fan. While you are in there, clean the exhaust port on the case that allows air to flow in and out of the laptop.
Allow 30 minutes to pass so that the isoporpyl alcohol can fully dry before booting back up.
If the issue persists, you may need to replace the cooling fan or purchase an external cooling unit for your laptop.
Step 7: Perform BIOS Recovery
As a final resort, if absolutely nothing else is working, you can consider performing a BIOS recovery.
During startup, the very first thing your computer does is boot the BIOS. The BIOS firmware then configures your hardware at which point your hard drive takes over.
Unfortunately, sometimes your BIOS firmware can become corrupt due to failing PC flash memory, a virus, or a BIOS update interruption. In some cases the BIOS chip can fail entirely as a result of overheating, extreme voltage levels, or even random cosmic ray interactions.
Regardless of the reason, a BIOS level failure means that this “handover” to your hard drive cannot take place. Hence the reason you are staring at a black screen!
Fortunately there is a built-in function for BIOS recovery for most Toshiba models.
The three BIOS recovery keys are:
- “F2”
- “F9”
- “Fn” (Function) + “B”
HOLD DOWN each of these keys BEFORE and DURING your attempts to turn ON your Toshiba laptop. If this does not work, you should also attempt repeatedly tapping these keys prior to and during laptop start up.
Between each key attempt be sure to turn off your laptop PRIOR to trying a new key.
Conclusion
If your Toshiba laptop won’t turn on, try the following troubleshooting steps:
- Perform a power drain
- Test the charger
- Test the battery
- Inspect RAM sticks
- Reinsert CMOS battery
- Clean or replace fan
- Perform BIOS recovery
If you’ve tried all of these steps without any luck, you can also contact Toshiba customer support at 1 (800) 457-7777 or check on your warranty policy.

Chelsea Ashbrook is a Senior Manager of Corporate Digital Experience at Genentech. Chelsea received her B.A. from the University of Connecticut and has spent the last 11 years working in the technology field.
