Dymo makes extremely popular label printers, but occasionally they can have some frustrating issues. One of the more common problems users report is their device printing blank labels.
Your Dymo printing blank labels is commonly due to incorrect label alignment. To fix this, use Dymo branded labels only and confirm that the labels have been loaded correctly. A dirty printer sensor may also be the issue. Feed a Dymo cleaning card through the printer multiple times until clean.
Additional causes include incompatible Dymo DLS software, incorrect printing settings or power strip overload. Uninstalling and then reinstalling the DLS software, updating your printing settings and unplugging additional devices from the power strip usually solves the problem.
Read on for further step-by-step instructions to get your printer back up and running properly.
It is important to note that each of the Dymo models are all nearly identical in terms up setup and function. For this reason, these troubleshooting steps generally apply across all models.
Step 1: Properly Align Printer Labels
Ultimately, there is an infrared LED photocell inside the Dymo printer that detects the ‘top-of-form’ sense hole that is located between labels. The sense hole re-syncs the logical counter to a known value that corresponds to the number of motor steps between the sensor and the cutter bar.
Mostly, these are a lot of fancy words to say that Dymo’s printer sensors are highly sensitive and rely heavily on properly formatted labels to operate properly!
The very first thing you should do is check if you are using genuine Dymo brand labels.
No, this is not just some marketing move by Dymo to get you to buy their product. Off-brand labels are notorious for feeding unevenly into the printer and throwing off the sensor.
For that reason, the Dymo warranty does not cover any malfunction or damage caused by the use of third-party labels.
Once you have confirmed you are using the correct labels, make sure the spool is tightly fitted around the label roll.
First, open the top of the Dymo, as if you were going to change the roll. You will notice the label roll sits on a spool that has a flat, black plastic disc on both ends to hold the roll in place.
Go ahead and push those two discs as tight to the roll as they will go. If these discs are even slightly loose, it can result in blank labels being printed.
As a final step, be sure to slide the label guide against the label to keep it in position.
Step 2: Clean The Printer Sensor
Over time dust, debris and adhesive will start to build up on the inside of your Dymo printer. In some cases the blockage becomes so bad that the sensor is not able to properly detect the labels.
Dymo recommends that labelwriter printers are cleaned at least once a month for reliable operation. Notably, there are two main ways to go about cleaning your device.
Method 1: Dymo Cleaning Card
Each Dymo printer comes with a single Dymo cleaning card at purchase. If you cannot locate the card or if you have already used it, you can purchase more at labelvalue.com.
- First, open the top of the device and remove the label roll from the printer.
- Then, remove the cleaning card for the package. Important Note: Once the package is open the cleaning card should be used immediately.
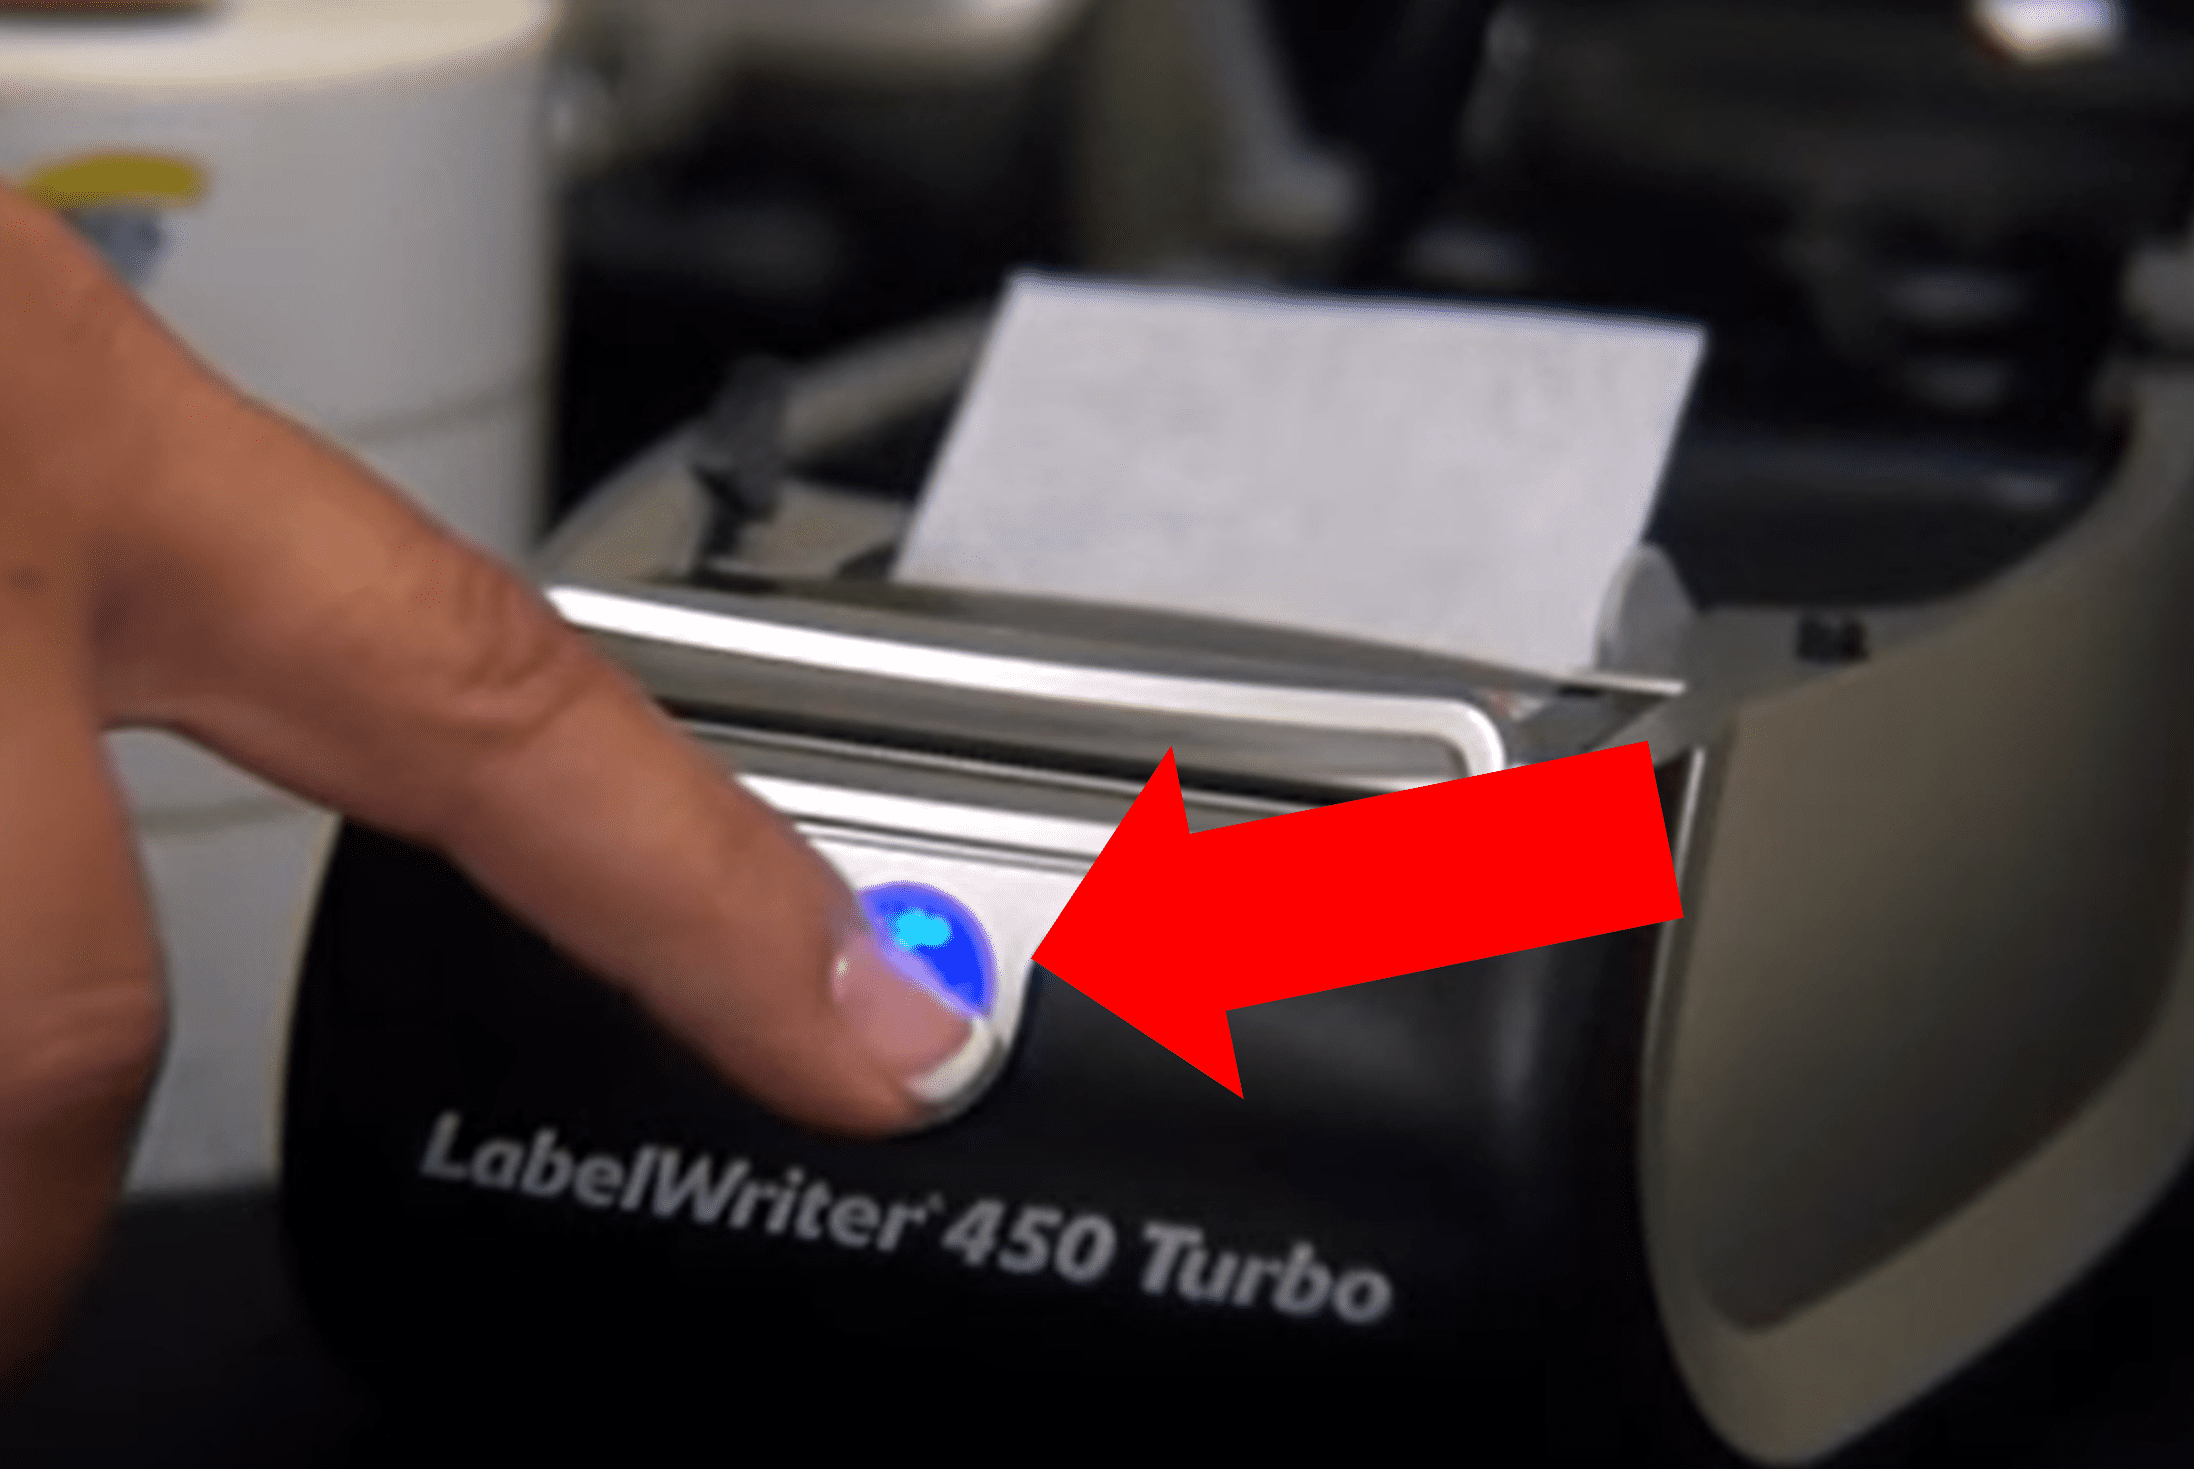
- Next, feed the cleaning card into the printer just as you would labels. The printer should automatically sense the card and feed it completely through the printer. If it does not, press the feed button on the front of the device to feed the card through.
- Finally, repeat this process a few times to ensure thorough cleaning.
That’s it! Once you are done you can dispose of the cleaning card and attempt to print again.
Method 2: Manual Cleaning
If the cleaning card is not effective, try manually cleaning the device.
- First, lift the printer cover and remove the spool with the labels, followed by removing the face of the printer.
- Next, lift the drive roller cover and check inside for any label adhesive that may be stuck there.
- Now, pull the label release lever and check inside the print head for any obstructions.
- You should also check underneath the sensor for any debris by using a small, bendable non-metal item. Important Note: Never insert a metal object into the printer!
- Finally, use a cotton swab and an adhesive remover to wipe away any remaining adhesive.
Once cleaning is complete, reinsert the printer label spool and attempt to print. Be sure to continue following step 1 to ensure the labels are properly aligned!
Step 3: Uninstall And Reinstall Dymo Labelwriter Software (DLS)
By this step, you are confident that you have the correct, properly aligned labels and your Dymo printer is completely clean.
If the problem persists, the most likely cause is a Dymo Labelwriter Software (DLS) compatibility issue. Furthermore, such compatibility issues regularly arise following routine Windows updates.
To confirm that this is the case, you can either uninstall the DLS and reinstall the prior version or you can roll back the Windows update from your PC.
Method 1: Uninstall And Reinstall DLS
- First, unplug the Dymo printer USB cord.
- Then, type ‘Add or remove programs‘ into the Windows search bar and select it from the menu.
- Next, search for Dymo from the list, click it and select Uninstall.
- Once you have uninstalled the Dymo software, go to the official Dymo Driver & Software Downloads page and locate your Dymo model. Be sure to select the prior DLS version (not the most current version that is experiencing the issue).
- Now, open the downloaded software installer on your computer and through the installation steps as they appear.
- Once the Dymo software installation has completed, restart your PC and plug the Dymo printer USB back into your computer. Try to print!
Method 2: Rollback Windows Update
To roll back a Windows update, open Settings, select System and click on the Recovery page.
On the Recovery page under the Recovery options section click Go back on the Previous version of Windows setting.
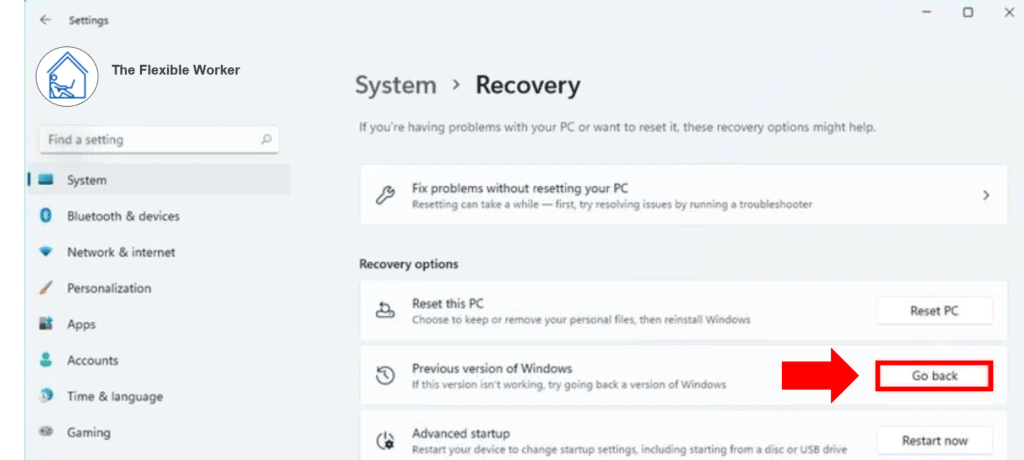
Then just follow the remaining steps as prompted and on the final window select Go back to earlier build.
Step 4: Update Your Printing Settings
If you have made it this far without a fix, there is most likely an incorrect printing setting in the Dymo Label Software (DLS) or within your third party application.
First, open DLS and create a new label. Confirm that you are selecting the correct label from the list. You should now see a completely blank label on screen. From the Designer/Insert tab, place some text on the label, and attempt to print a single label.
If the LabelWriter prints one label, then the format of the label template you were previously trying to print with is causing the issue. Design a new label template to resolve the problem.
On the other hand, if you are printing from a third party application and the LabelWriter is advancing more than one label at a time or printing incorrectly, you may have incorrect paper settings specified in your application.
To confirm this is the issue, try printing a label from DLS. If the LabelWriter prints correctly from DLS but not from your third party application, you may need to contact the application vendor to help resolve the issue.
Step 5: Unplug Additional Devices From Power Strip
As it turns out, electromagnetic interference may also be the culprit. While this problem may seem complex and unusual, the fix is straightforward and predictable.
Are any other devices using the same power strip as your Dymo printer? Perhaps a PC, light, fan or heater? Maybe all 4?
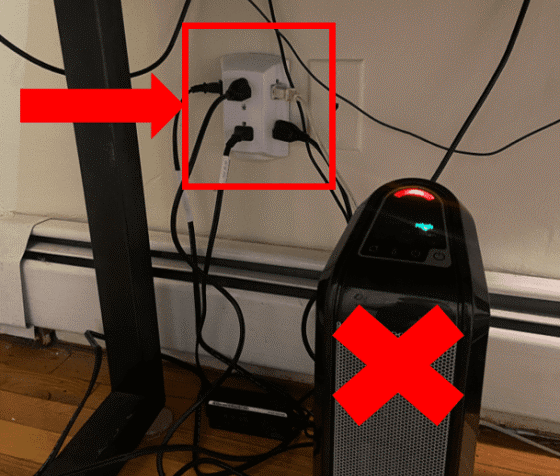
Unplug your Dymo printer and move it to an empty electrical outlet.
Interestingly enough, Dymo printer owners have reported that simply plugging the printer into an empty power outlet fixed the issue.
Conclusion
If you come back to your home office to find your Dymo printing blank labels, don’t worry. This is a common issue with five proven fixes:
- Properly align the printer labels
- Clean the printer sensor
- Uninstall and reinstall Dymo Labelwriter Software (DLS)
- Update your printing settings
- Unplug additional devices from the power strip
After attempting each of these troubleshooting steps, if you continue to encounter the issue, you can submit a ticket to Dymo customer support. You can also try calling customer service at 1 (877) 289-3966.
If all else fails, you may need to swap your printer out for a new one. Notably, Dymo printers come with a 2 year limited warranty.

Chelsea Ashbrook is a Senior Manager of Corporate Digital Experience at Genentech. Chelsea received her B.A. from the University of Connecticut and has spent the last 11 years working in the technology field.
