Netgear’s Orbi Mesh WiFi System has fantastic reviews, however as is the case with all WiFi devices, users report a number of common issues. One such issue users routinely encounter is their Orbi satellite not connecting to the router. Here’s how to fix it.
Your Orbi satellite not connecting is usually due to the satellite and router being too far apart. To fix it, try syncing the devices in the same room. If the issue persists, reset the satellite, and connect the devices via Ethernet cable. As a final measure, power cycle the router.
The Obri light colors signify the current status of each of the devices. If the satellites are failing to connect, a purple light will appear.
Let’s review each of the steps you need to take to get connected as soon as possible.
We’ll start with the easier more obvious fixes, and work our way to some move involved troubleshooting steps.
Step 1: Sync Devices In Close Proximity
The very first thing you should try is syncing the Orbi satellite and router in the same room.
Starting with each of the devices about 6 feet apart from each other, follow these steps:
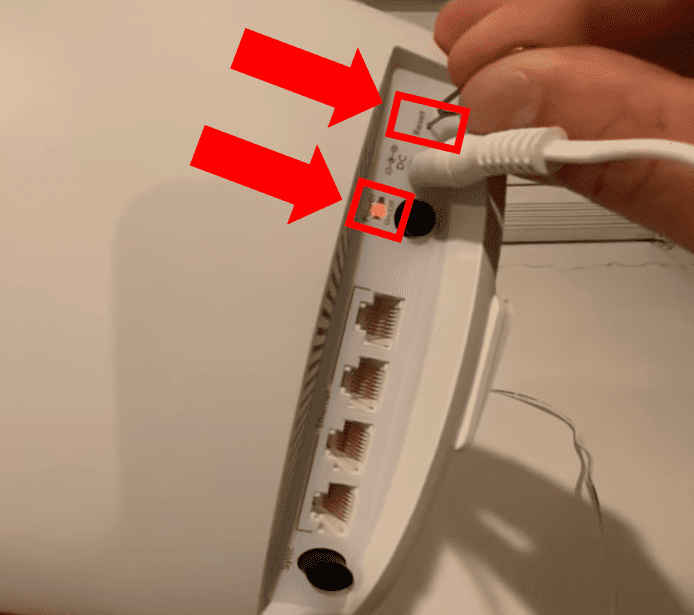
- First, unplug the satellite and plug it back in. The power light on the back of the device should turn on. If it doesn’t, press the power button to turn it on.
- Then, press the Sync button on the router, followed by pressing the Sync button on the satellite. It is important to not allow more than 2 minutes to pass between pressing the Sync buttons.
- Now, wait for the devices to sync. The satellite’s ring LED should start blinking white while it attempts to sync with the router.
- Finally, when the connection is made, a blue light will appear on the satellite.
Users have reported that if this syncing process failed after the first few attempts, trying these four steps in a different location or position within the house usually proved successful.
Once a connection is made, go ahead and move the satellite to the location where you want to install it and follow these syncing steps a final time.
Step 2: Reset Satellite And Resync
If the devices are in the same room but you still are unable to connect them despite trying different locations, attempt to reset the satellite.
To reset the satellite, while the device is powered on, press and hold the Reset button with a paperclip until the Power LED on the back starts blinking.
Once the satellite is reset, try following the Orbi syncing process again.
Step 3: Sync Devices Via Ethernet Cable
Should your syncing problems persist, try plugging the satellite directly into the router via an ethernet cable.
Allow the devices a few minutes to sync while directly connected and then unplug the ethernet cable and move the satellite to whichever location you desire. Once again, follow the syncing steps above to complete the process.
Notably, when you connect the devices via ethernet cable you do not need to press sync or do anything. Simply wait until the satellite shows a blue light and unplug and relocate the device after the blue light disappears.
Step 4: Power Cycle The Router
Lastly, if you still find your Orbi satellite not connecting, try power cycling the router.
To power cycle the router, while the device is on, unplug the power cord and wait one minute. Then plug the router back in and try again.
How To Set Up Orbi Mesh WiFi System
If you are dealing with connection issues, it is important to be certain you are setting up the network correctly. First and foremost, Netgear is not an Internet service provider (ISP). To access the Internet with Orbi you must have a separate modem and an Internet plan with a cable service provider!
Additionally, the satellites are used to extend WiFi network coverage and signal strength for the router. While the satellite is an optional device that is not required to establish an internet connection, it is highly recommended you use them especially in larger homes.
The standard mesh system comes with two satellites, you can always order additional devices as needed.
Step 1: Preparation
To set up your Orbi Mesh WiFi System you will need:
- A connected and working modem
- A smartphone with the Orbi app downloaded
- An Orbi router
- Orbi satellites
Start by downloading the Orbi app onto your smartphone. Then, disconnect your existing router from your modem and unplug the router to power down your current WiFi signal.
Next, turn your smartphone WiFi ON but make sure that it is not connected to any other existing WiFi networks. This is important. The entire setup will not work properly if your smartphone is connect to a different network, so use your data plan instead.
Step 2: Set-up
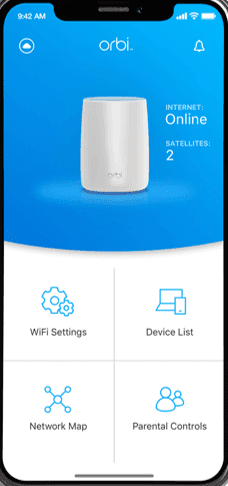
You are now ready to open the Orbi app. Go ahead and accept the terms and conditions and allow the application access to your location.
Then tap Get Started and either log into your existing Netgear account or create it if you do not have one yet.
Once your account is created, the App will ask “Do you wanted to install a new Netgear Product?” Select Yes to proceed. Now allow Orbi access to your camera and scan the QR code on your router.
You will now be prompted to reboot your modem. To do so, simply unplug the modem for 10 seconds and plug it back in. Once complete, press Next on the app.
It is now time to connect the Orbi router to your modem via the provided ethernet cable.
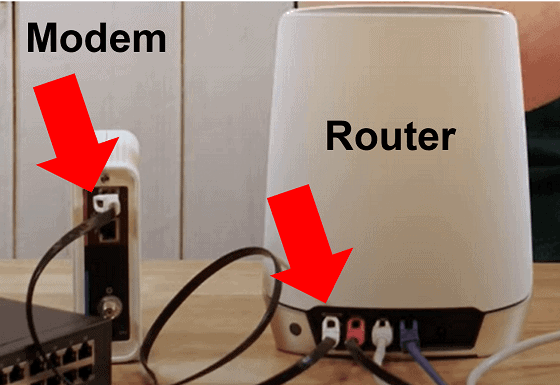
Be sure to insert the cable into the port that says Internet on the router, and the port that says LAN on the modem. Plug the router in and press Next on the app to continue.
Step 3: Satellite Placement
A diagram will now display on the app explaining where to best place your Orbi satellites within the house.
As a general rule of thumb, you should place the satellites in rooms further away from the router and in areas where there is heavier WiFi device usage.
Don’t worry about getting the placement perfect right away. Depending on your WiFi signal strength, you can always experiment with changing positions in the future.
Once you are happy with the initial placement, plug each of your satellites in and press Next on the app.
Step 4: Finalization
You’re almost there!
The app will now take a few minutes to power up the satellites. Then the router will detect and connect to your network. This may also take a few minutes so sit tight! Finally, Orbi will detect the satellites. Once it does, tap Continue.
You will now be prompted to personalize your network settings. Here you can change your new WiFi network name and password, or you can choose to keep the ones provided.
On the next screen, you will also be asked to set up an admin username and password for the account. It is always a good idea to use a different username and password than you selected for the network for security reasons.
Once you have finished setting up your account security questions, Orbi will check for any new available firmware. If there is an update available, be sure to download it.
That’s it! Your setup is now complete!
Conclusion
There are few things as frustrating as when your Orbi satellite fails to sync with the router. Fortunately there are four proven fixes you can try to get your internet up and running quickly:
- Sync the devices 6 feet apart
- Factory reset the satellite
- Sync the devices via Ethernet cable
- Power cycle the router
If you didn’t find exactly what you were looking for in this article, you can check out the official Netgear Orbi WiFi System User Manual.
You can also try calling Netgear customer service at 1 (888) 638-4327.
If this post helped you connect your devices, or if you solved your issue some other way, be sure to leave me a comment below so that I can include it!

Chelsea Ashbrook is a Senior Manager of Corporate Digital Experience at Genentech. Chelsea received her B.A. from the University of Connecticut and has spent the last 11 years working in the technology field.
